Hey developers; in this article, we are going to see how to upload files to s3 bucket. AWS cloud has a lot of services that they offer. AWS storage services are called S3 Bucket. You can store a very large amount of data, of various formats, on it. Check out AWS S3 documentation here.
AWS is known for being a little pricy. However, there are multiple AWS storage types, we can select the cheapest AWS storage which serves our needs. You can see the S3 prices here.
Prerequisites!
- Should already have AWS account made (Create Account)
Table of Content
- Create S3 Bucket
- Configuring S3 bucket
- Upload File to AWS S3
What is S3 AWS?
What is S3 AWS you ask? S3 (Simple Storage Service) is essentially cloud-based storage by Amazon Web Services. It offers a large data storage capacity with industry-leading scalability, data availability, security, and performance. There are various AWS storage types with different S3 prices.
AWS Storage: Create S3 Bucket
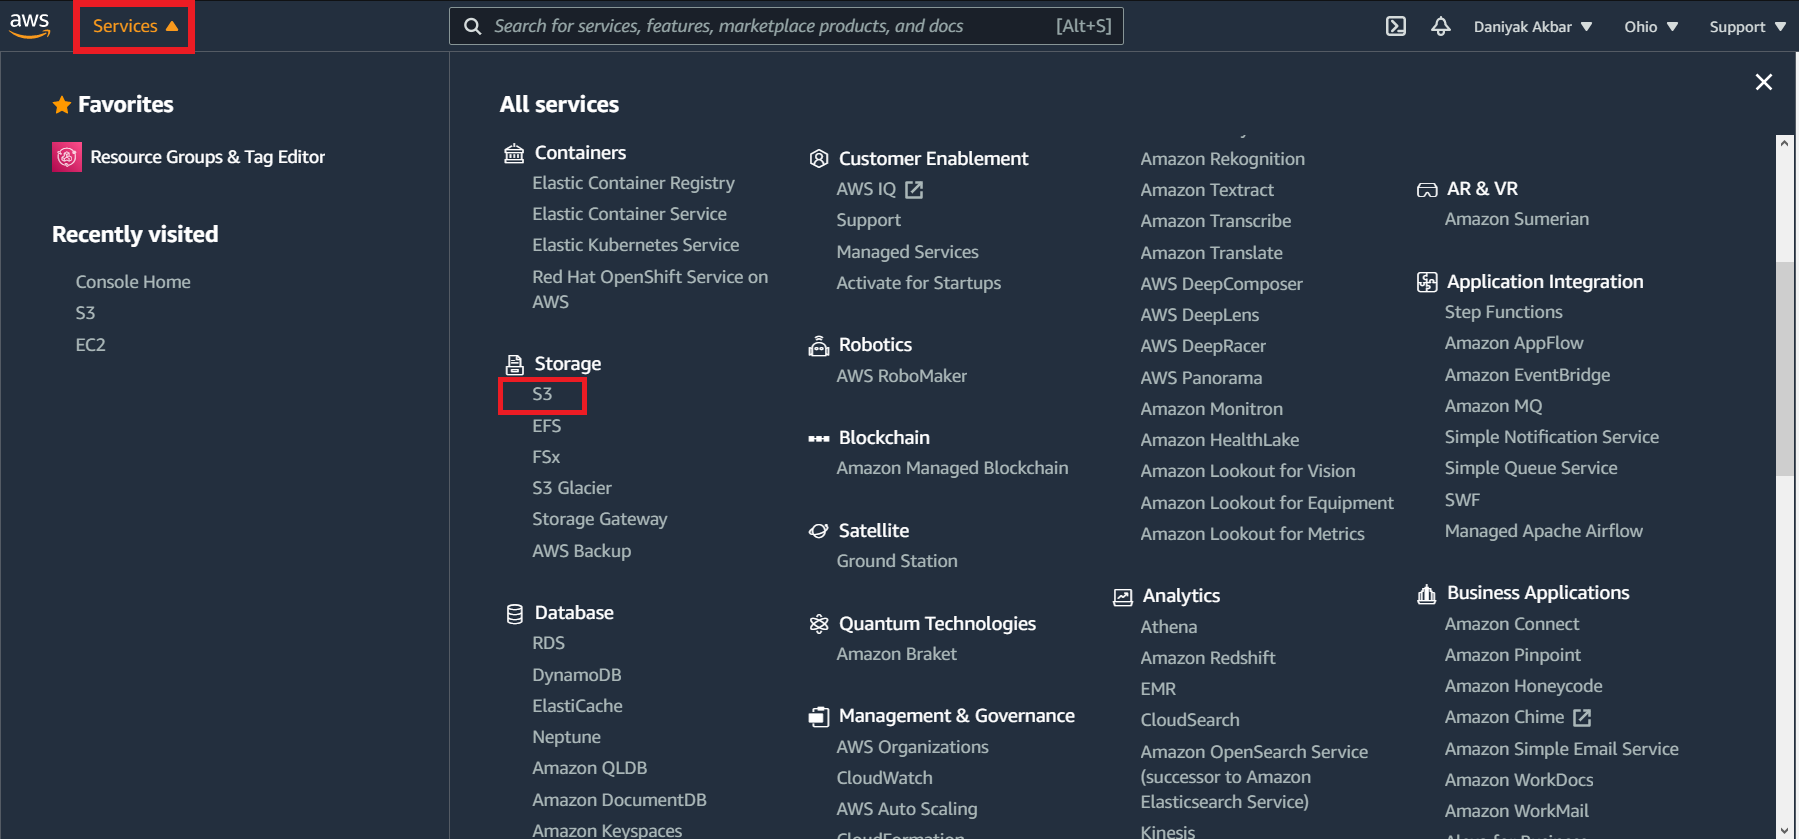
To begin with, we need to create S3 Bucket. We will be creating an S3 bucket folder. Then perform a backup to AWS S3. First, choose AWS storage services in the management console. Take reference from the image below:
This will open up the S3 bucket dashboard where your S3 bucket folder would be listed. Here you will create S3 bucket.
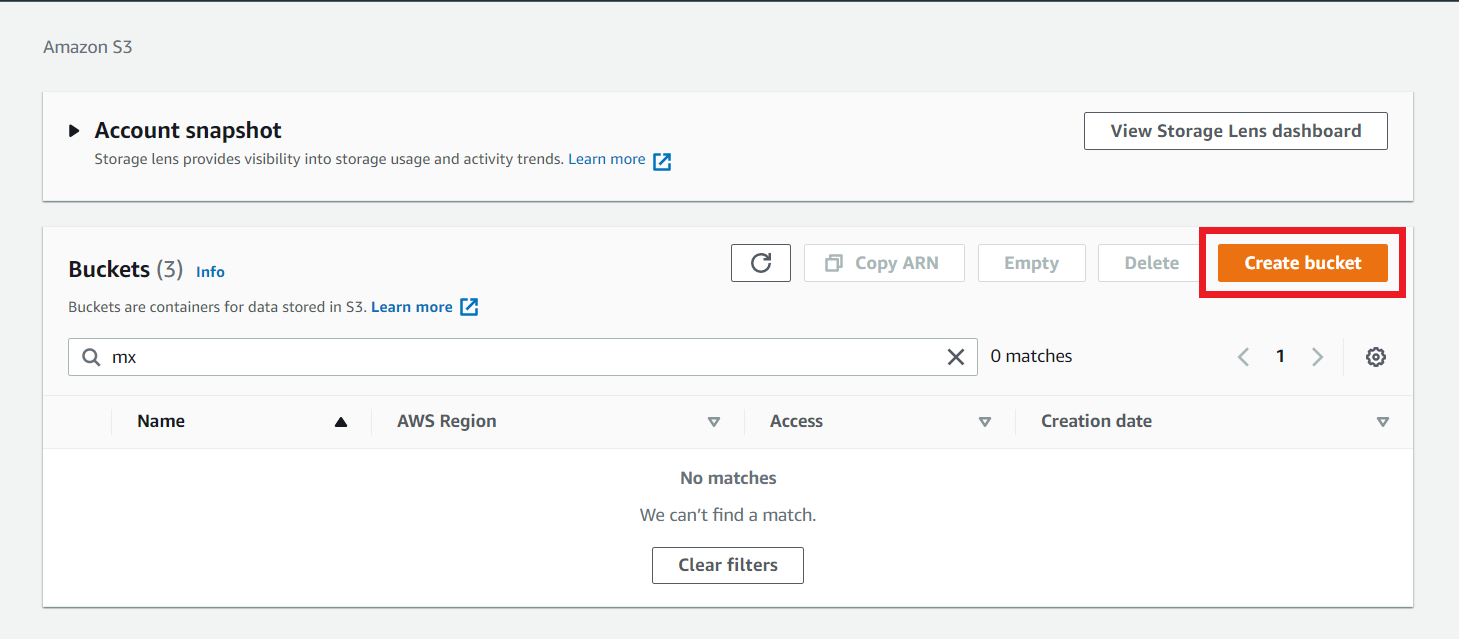
Now then, when you come to the dashboard of the AWS S3 bucket, you will see the “Create bucket” button on the top right. See the image below for reference. Click on it to begin the configuration of a new AWS storage server.
AWS Storage: Configuring S3 Bucket
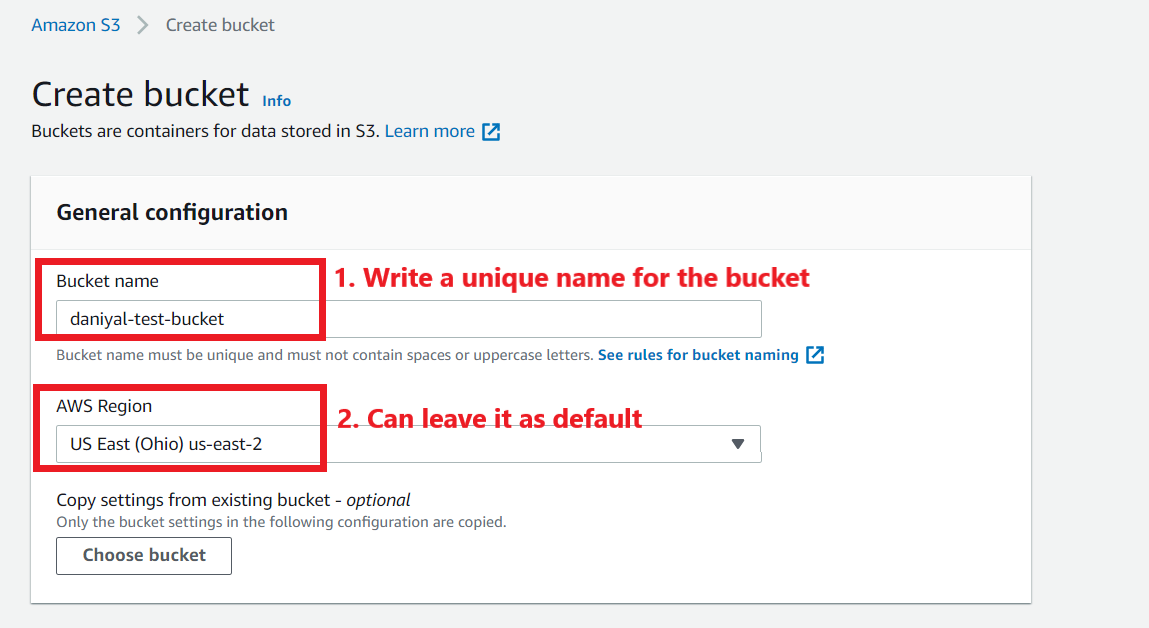
Earlier we saw how to create S3 bucket, now we will be configuring it. As shown in the below image write the name of your bucket and set its region. You can leave the region as default if you want, but note that you can not rename S3 bucket later on.
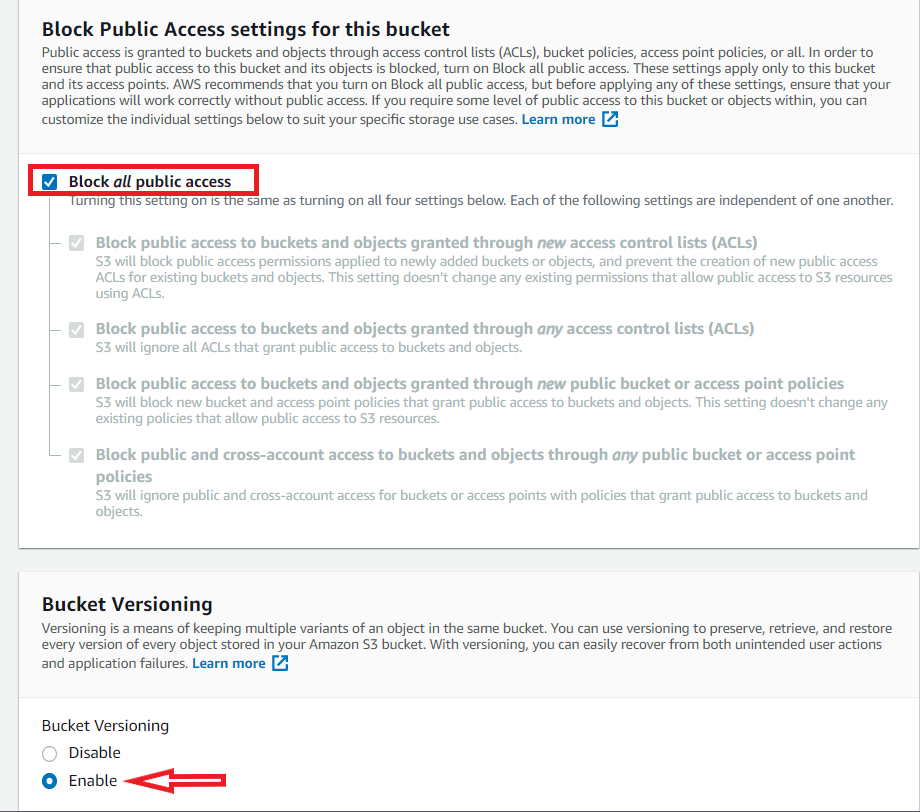
Next, you will configure S3 bucket permission. For that, enable the checkbox that says “Block public access”. This will block all S3 bucket policy for public access to your AWS storage. Also, you should enable “Bucket Versioning” option. This is helpful when you want to keep a separate copy of the old and new versions of the same file. This is one way of keeping AWS S3 backup. (Note: this will consume additional space in your AWS S3 bucket).
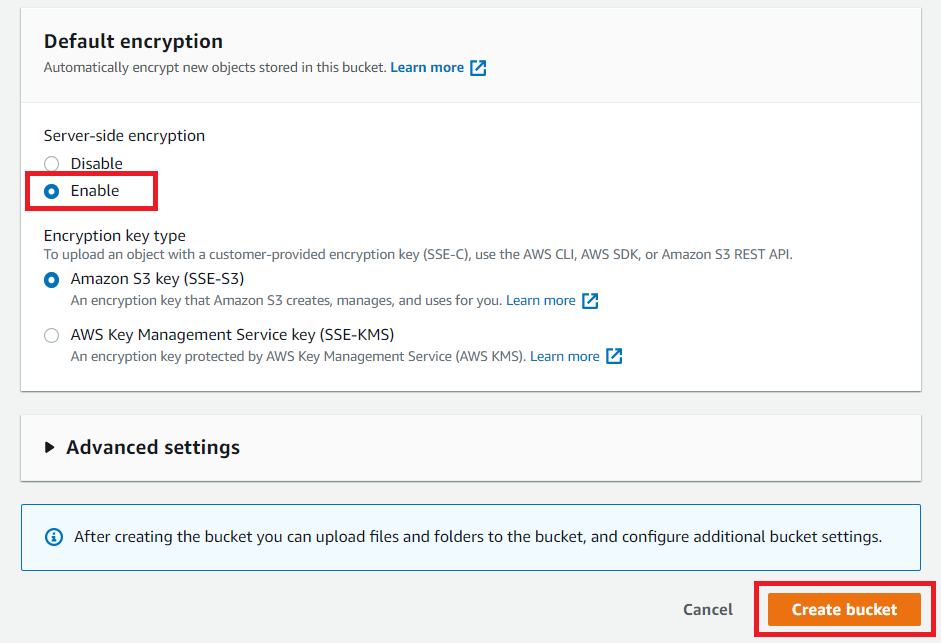
Lastly, you will enable another important AWS storage options; “Default encryption”. This will encrypt all the data that you store on the AWS S3 bucket for security purposes. It will encrypt and decrypt automatically for you when you want to access the data. Afterward, click on “Create bucket” and you’re done.
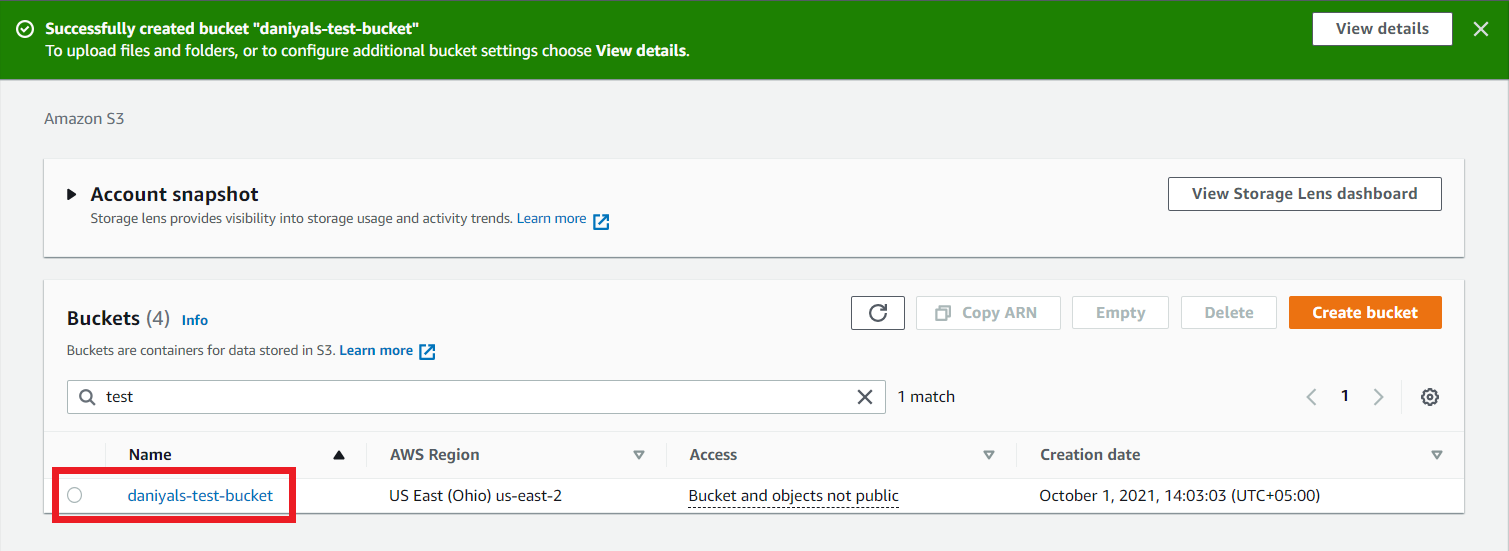
The image below shows that your AWS S3 bucket was successfully created.
AWS Storage: Upload File to AWS S3
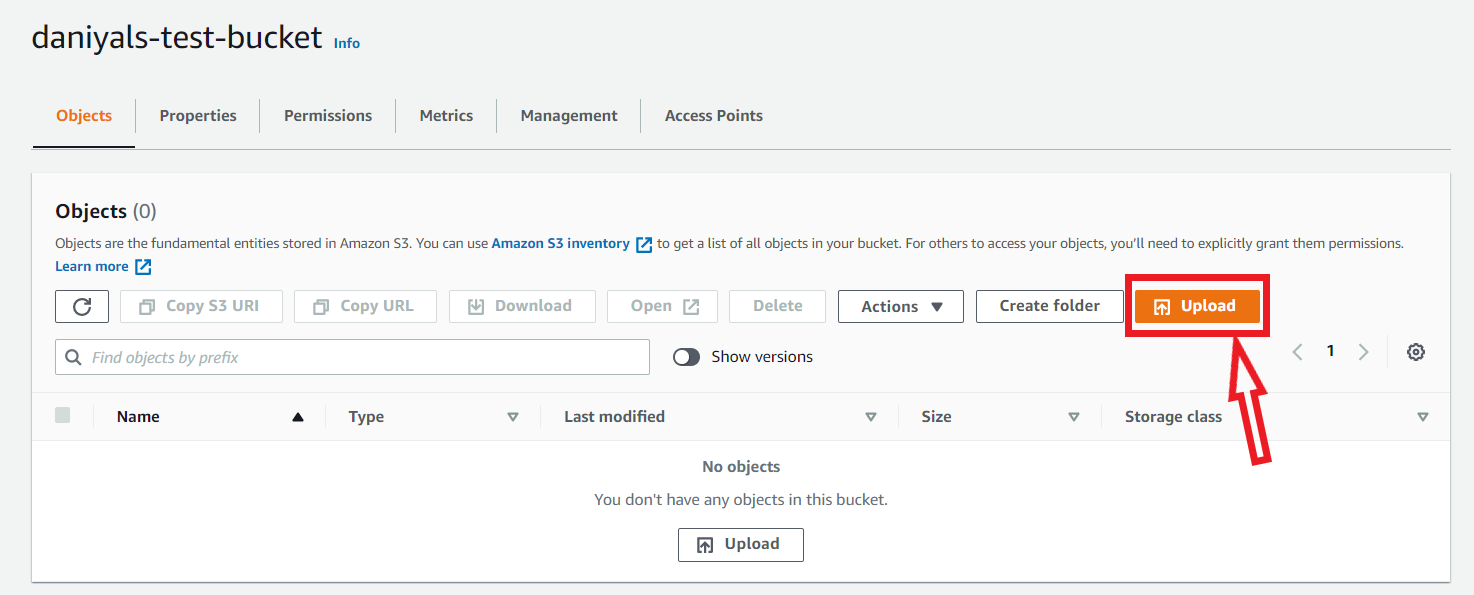
Finally, now we will see how to upload files to S3 bucket. Which is the easiest step of this entire process. Click on the bucket link as highlighted in the above picture. Afterward, click on the “Upload” button as shown in the image below.
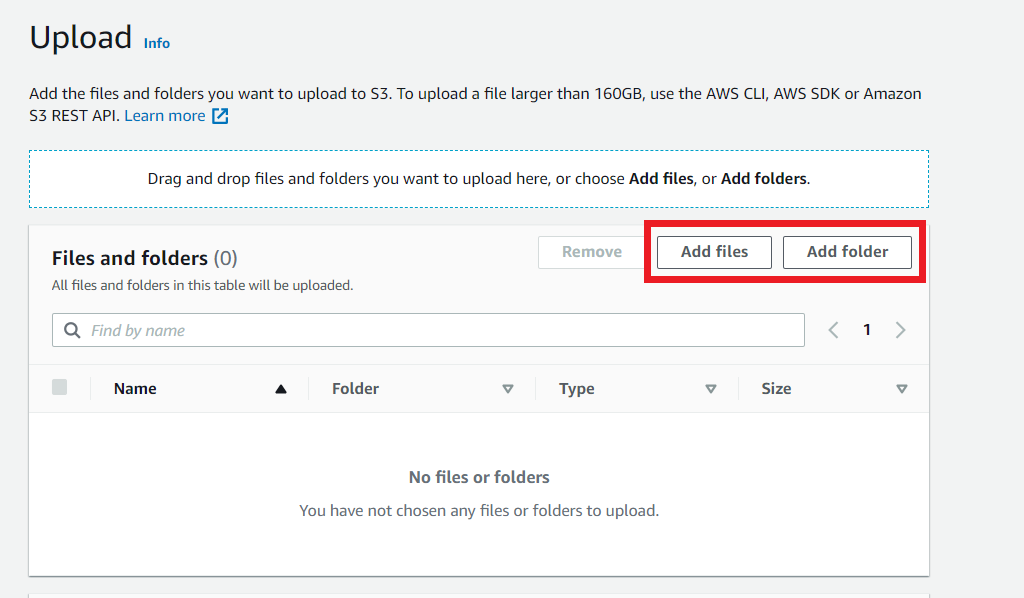
To upload file to AWS S3, click on either “Add files” or “Add folder” and then browse to the data that you want to upload to your Amazon S3 bucket. Just like in Google Drive or One Drive, you can either upload a single file or an entire folder with multiple files in it.
And that’s a wrap!
We hope this tutorial helped you learn how to upload files to S3 bucket. You may also want to learn how to host a website on AWS S3 bucket, or how to create virtual machines on AWS. Feel free to your reviews in the comment section below.
Have a great one!
Recent Comments
Categories
- Angular
- AWS
- Backend Development
- Big Data
- Cloud
- Database
- Deployment
- DevOps
- Docker
- Frontend Development
- GitHub
- Google Cloud Platform
- Installations
- Java
- JavaScript
- Linux
- MySQL
- Networking
- NodeJS
- Python
- Python Flask
- Report
- Security
- Server
- SpringBoot
- Subdomain
- TypeScript
- Uncategorized
- VSCode
- Webhosting
- WordPress
Search
Recent Post
Understanding Linux Scheduling Algorithm: A Comprehensive Guide
- 13 June, 2023
- 3 min read
How to add routing in Angular
- 9 May, 2023
- 4 min read
What is Data at Rest in Cloud
- 13 March, 2023
- 2 min read
