In this article, we will learn how to build a virtual machine on AWS with EC2 instance. On AWS cloud, the service to create a Virtual Machine is called EC2 Instance. If you are exploring Amazon Web Service and its services, then creating a virtual machine is the right start. But before we begin, there are a few prerequisites.
Prerequisites
- You should have already made an AWS account (Create one)
- Should have basic knowledge about Virtual Machines
- Should know basics about Linux OS
NOTE: Creating EC2 Instance in AWS is not free and will cost you. Check out AWS EC2 instance prices
Table of Content
- Select EC2 Instance in AWS Management Console
- Choose a Virtual Machine Image on AWS
- Choosing From AWS EC2 Instances Types
- Configuring Network Settings in EC2 Instance
- Adding EC2 Storage Space to Your Virtual Machines
- Configure Incoming Traffic Rules for your Virtual Machines
- Using SSH Keys for Virtual Machine on AWS
1) Select EC2 Instance in AWS Management Console
First, log in to your AWS Management Console. Then Select the “Services” tab option at the top bar and choose “EC2 Instance” from the mega drop-down menu. See what I mean in the image below:
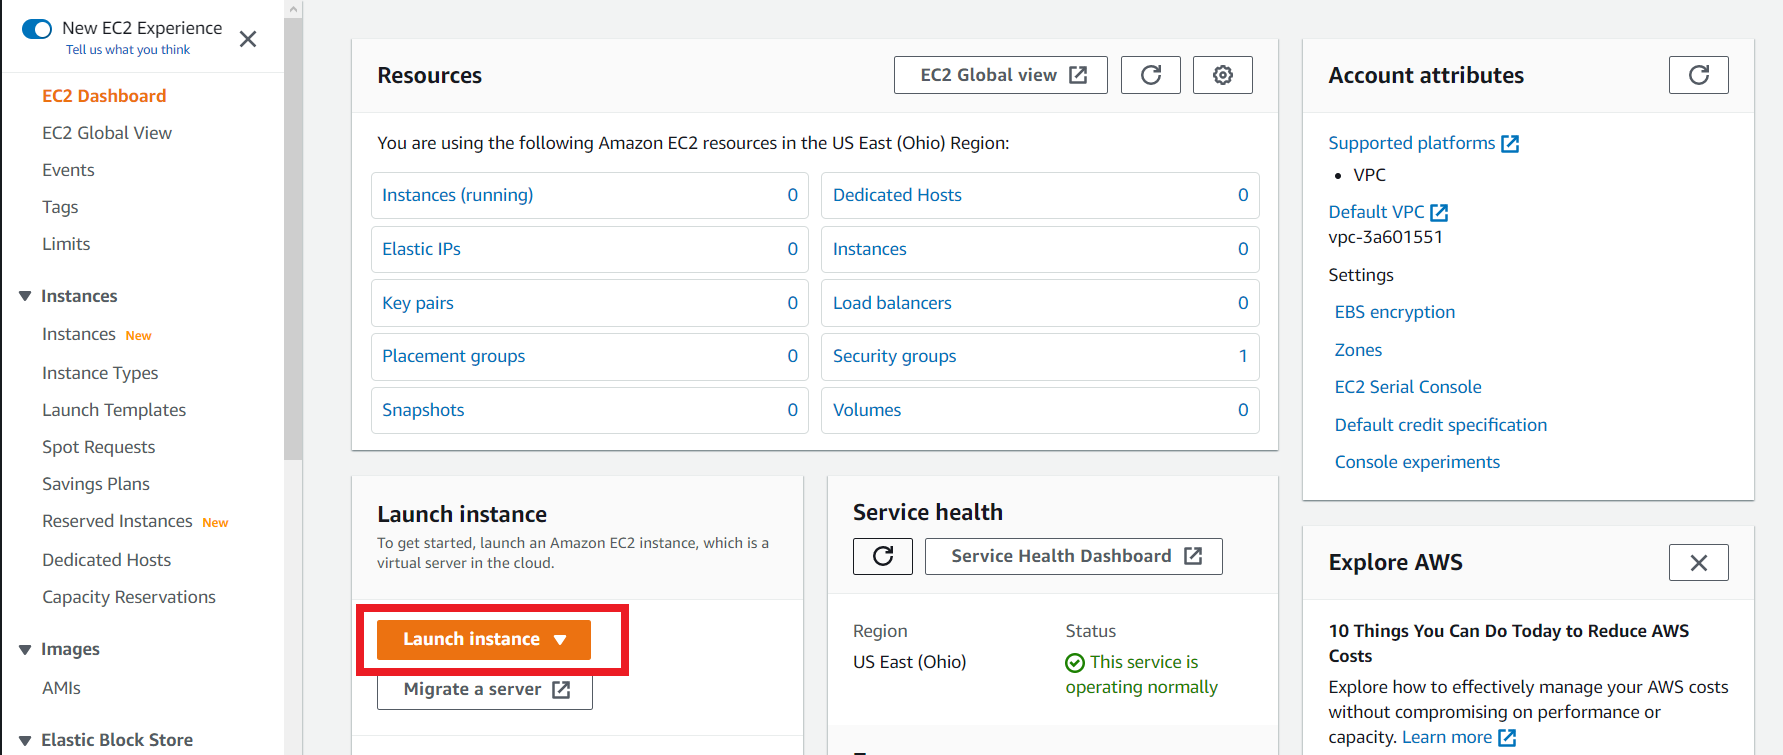
Afterward, you’ll be taken to the EC2 Instance Dashboard page where you will be given many options. There you will find a prominent orange button saying “Launch Instance”. Click it and you will be taken to the configurations page to create EC2 instance on AWS. Take reference from the image below.
2) EC2 Instance: Choose a Virtual Machine Image on AWS
Here, you will find all the images for the virtual machine on AWS. We will select an image from the list of AWS EC2 instances types. We would choose the operating system and its version of the image which would run on the VM. I have chosen a Linux OS created by Amazon itself. Choose whichever OS VM image you want and click on the Select button as shown in the image below:
3) VM Image: Choosing From AWS EC2 Instances Types
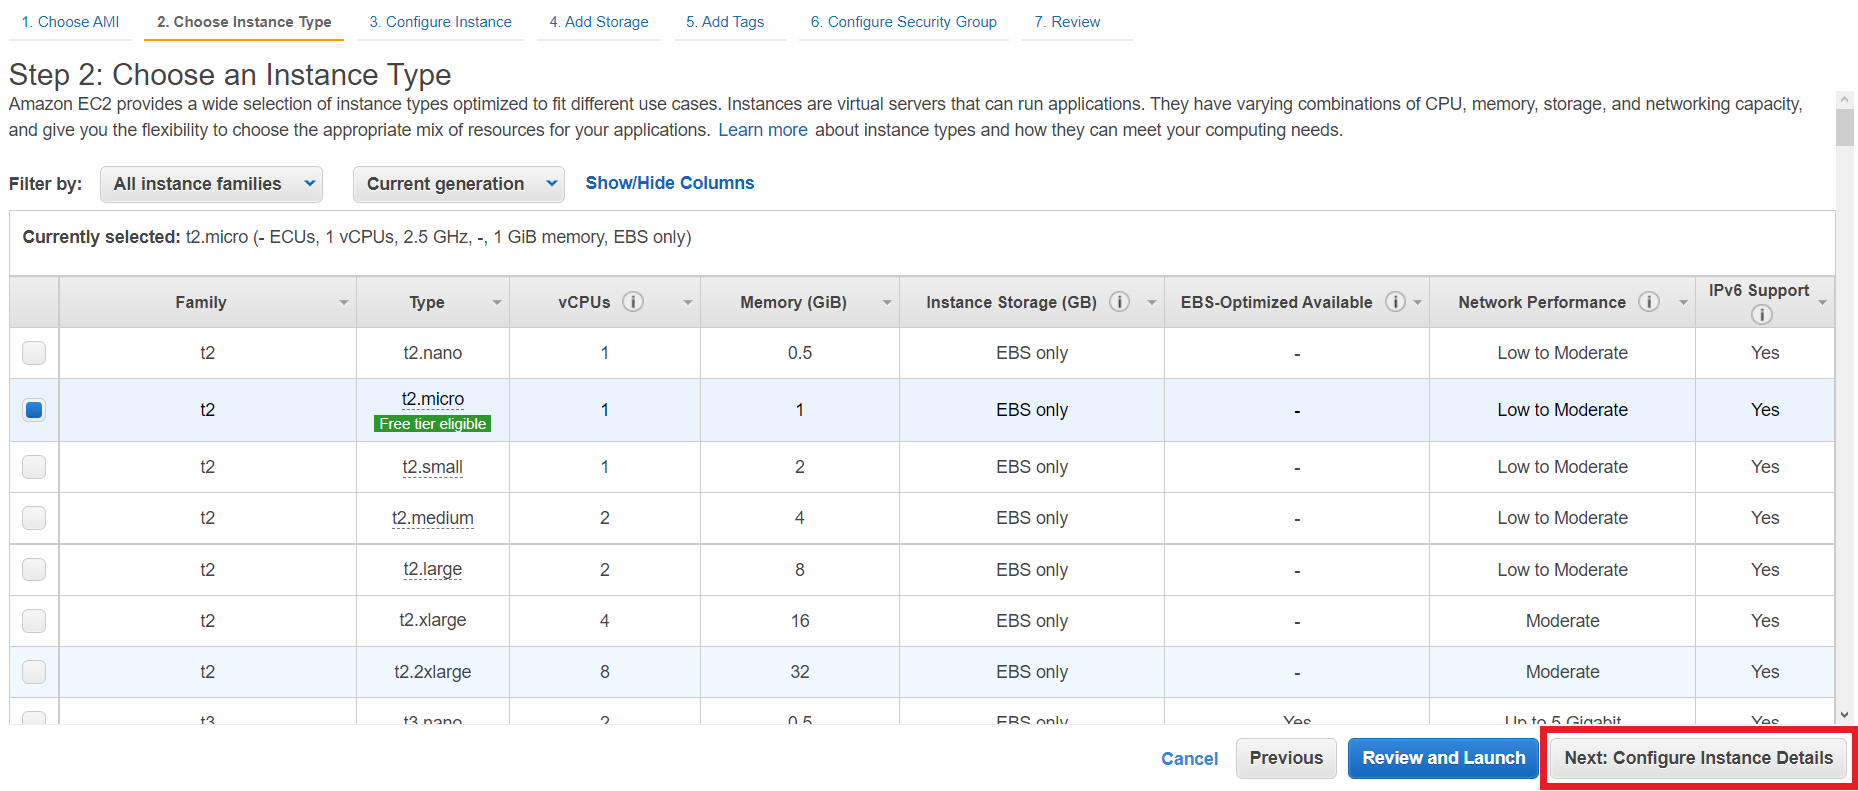
Next, you will find all types of virtual machine on AWS. We will select one from the list of AWS EC2 instances types. Each EC2 instance type comes with different specifications of Memory and CPUs. You choose these specs according to the task you will be executing on your EC2 instance. Learn more here.
I’ve taken the most basic one which was for Free Tier users. Each of these instances would have different costs as well. Check out AWS EC2 instance prices. Take reference from the image below and hit the Next button.
4) Configuring Network Settings in EC2 Instance
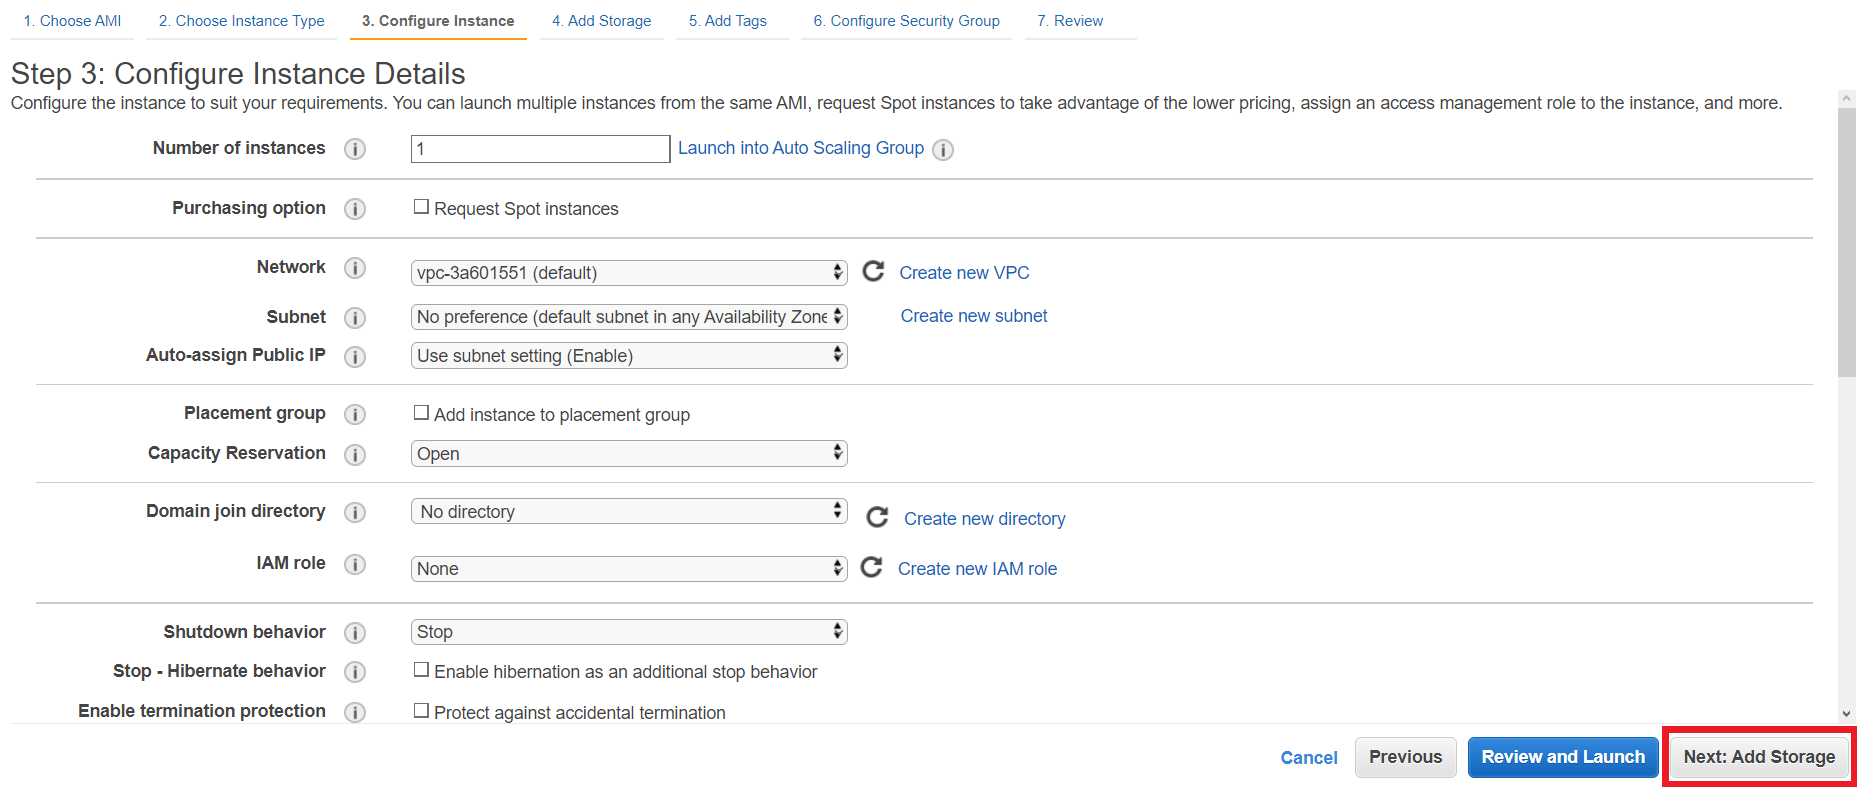
Afterward, you’ll be taken to network configurations for your AWS EC2 machine. If you do not know how to configure them, you may leave the default settings and click the Next button.
5) AWS Storage: Adding EC2 Storage Space to Your Virtual Machine on AWS
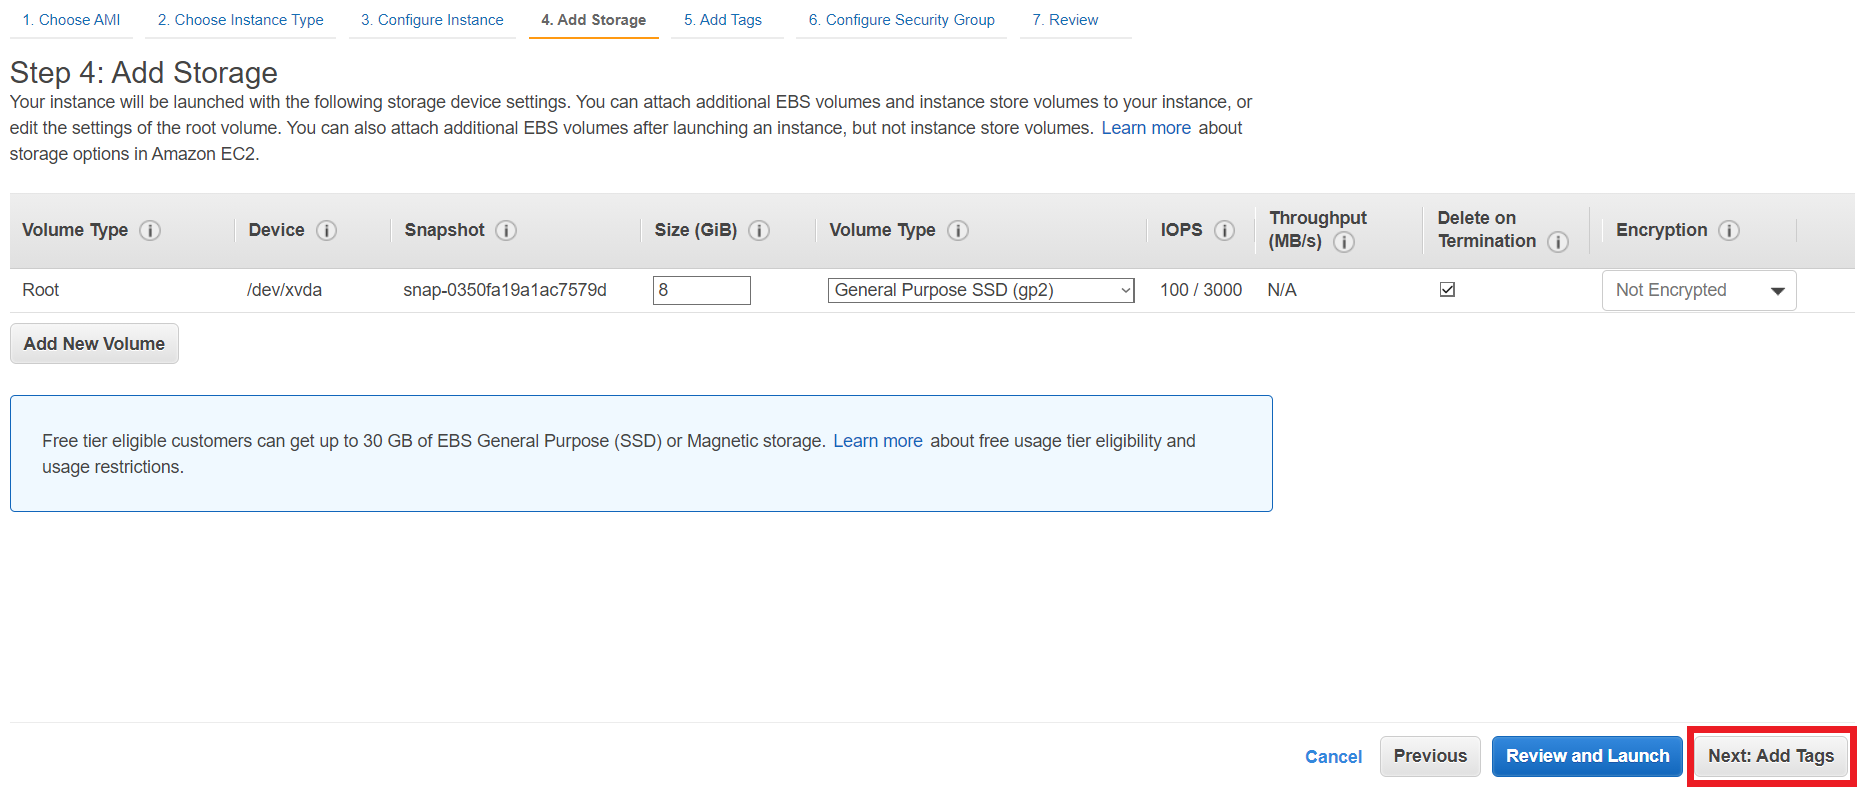
Over here, you would be asked to select an EC2 storage space options that you would like in your virtual machine on AWS. You can also leave the default settings if you want. Click the Next button when done.
6) EC2 Instance: Configure Incoming Traffic Rules for your Virtual Machines
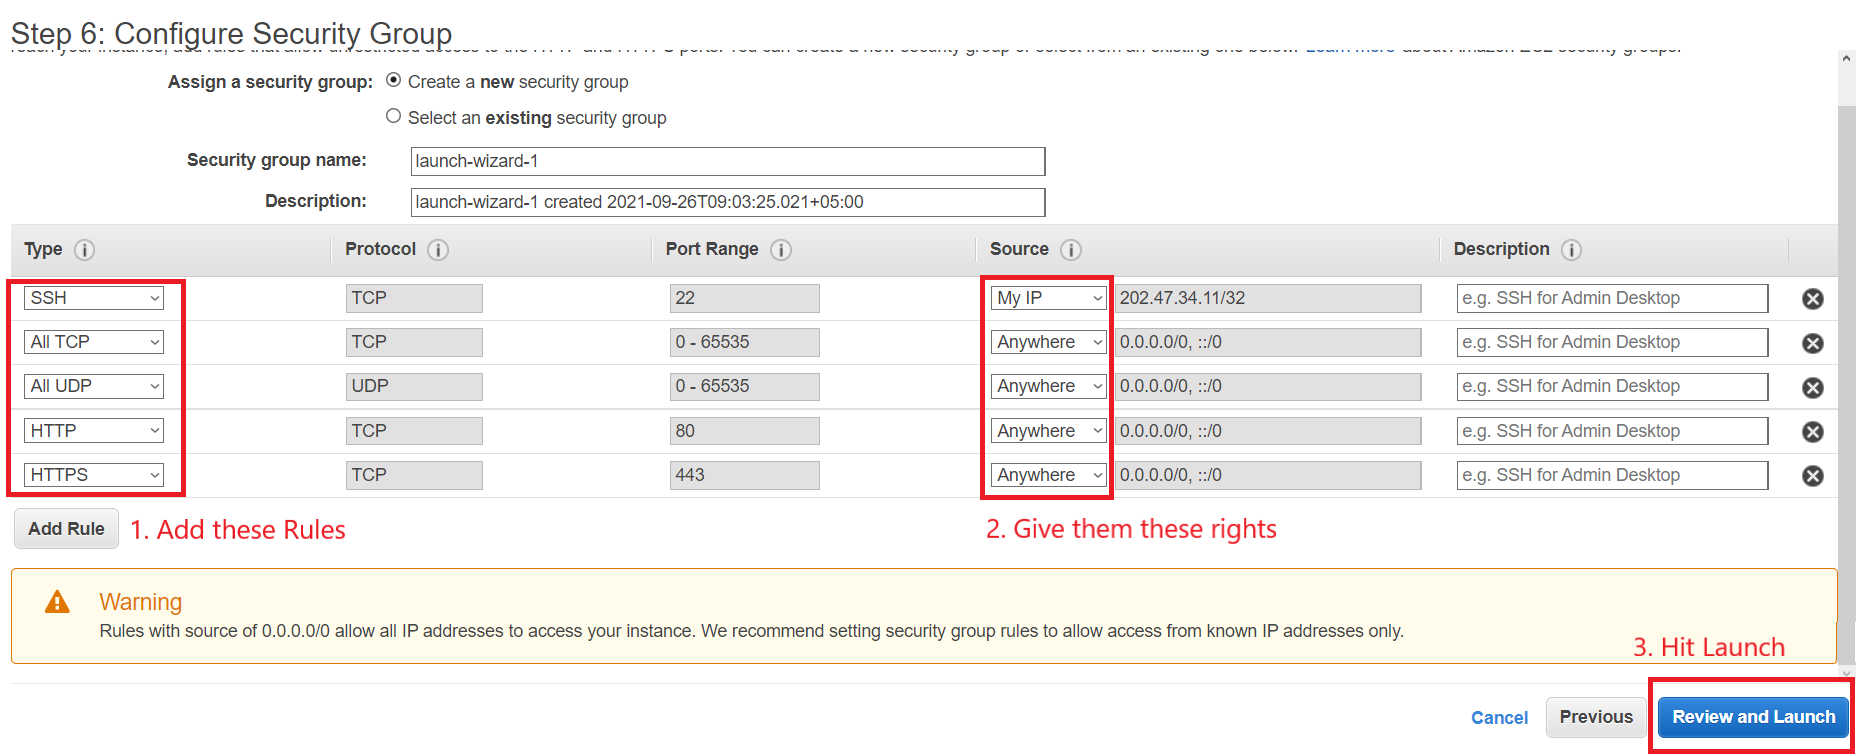
You need to set accessibility rules to allow traffic in and out of your virtual machine on AWS. Use the following set of rules shown in the image below and hit the Launch button.
7) SSH Key Generation: Using SSH Keys for Virtual Machine on AWS
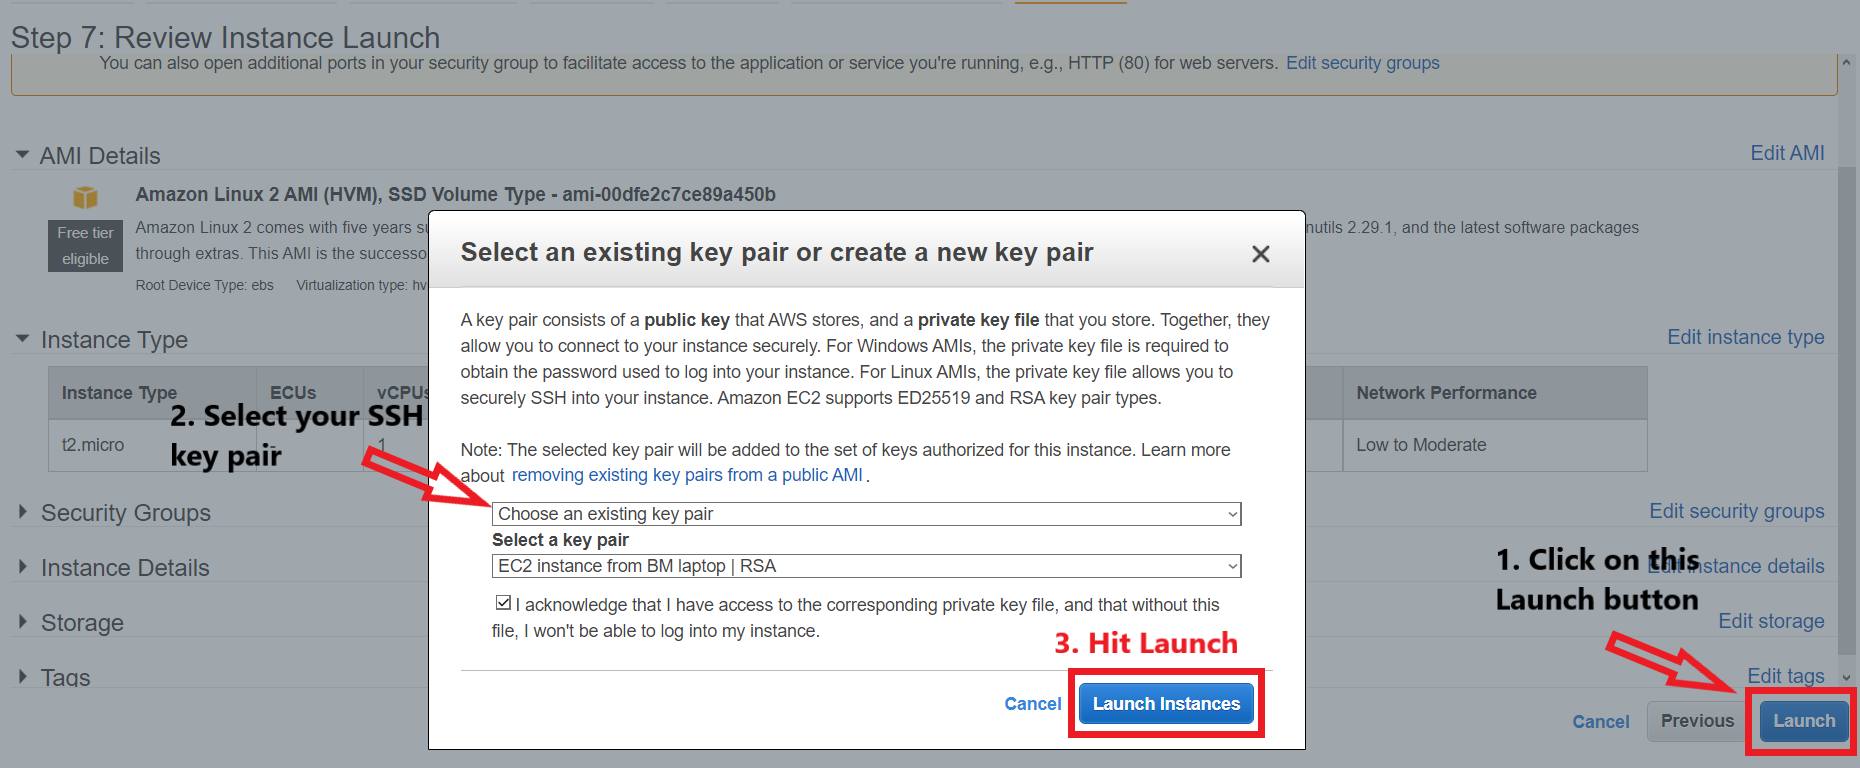
Another important configuration for your EC2 instance on AWS is to enable a secure transaction protocol for your VM. We can do this by using ssh keys and assigning them to our EC2 instance. With SSH key generation, we could also access our virtual machine on AWS from your local host machines.
Click here to see how to create SSH Keys on AWS. If you already have an SSH key, then select them in the dropdown and hit the Launch button. Check the below image for reference.
And you’re done!
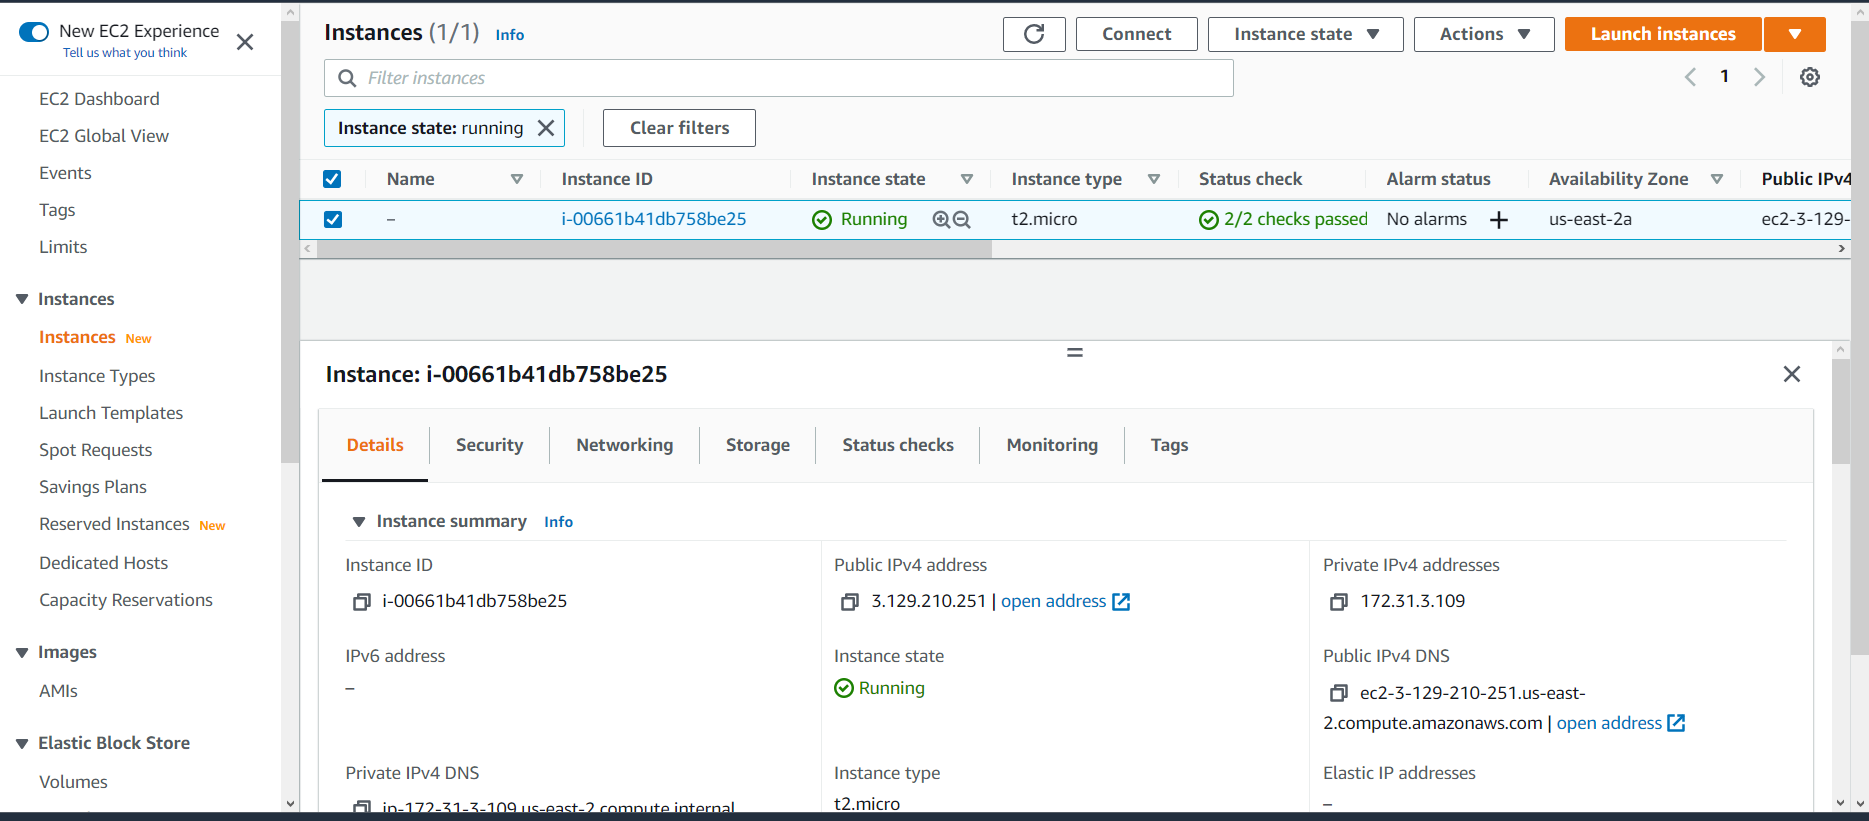
Thereby, you can see here that your Virtual Machine has been created and launched. The status would take a few minutes to get green though. After it does turn green, your EC2 instance in AWS would be ready to function.
FAQ
EC2 instance is a Virtual Machine on AWS Cloud. It is used to run applications on it or execute small to complex tasks. Its physical hardware is located in AWS Data Centers. Hence it is very secure, robust, and has almost zero failure rate.
Essentially, Yes. An EC2 instance is a Virtual Machine on AWS. These terms are used interchangeably.
I’ve created a YouTube tutorial to show exactly this. Click here to check it out.
That’s a wrap!
I hope this tutorial helped you learn how to build a virtual machine on AWS with EC2 instance. You may also want to learn how to create MySQL in database on AWS or how to deploy Google Cloud Function. Feel free to leave a review in the comment section below.
Have a great one!
Recent Comments
Categories
- Angular
- AWS
- Backend Development
- Big Data
- Cloud
- Database
- Deployment
- DevOps
- Docker
- Frontend Development
- GitHub
- Google Cloud Platform
- Installations
- Java
- JavaScript
- Linux
- MySQL
- Networking
- NodeJS
- Operating System
- Python
- Python Flask
- Report
- Security
- Server
- SpringBoot
- Subdomain
- TypeScript
- Uncategorized
- VSCode
- Webhosting
- WordPress
Search
Recent Post
Understanding Mutex, Semaphores, and the Producer-Consumer Problem
- 13 October, 2024
- 10 min read
Process scheduling algorithm – FIFO SJF RR
- 14 September, 2024
- 8 min read
How to Implement Multithreading in C Language
- 8 September, 2024
- 9 min read

