Hey developers. If you plan to deploy your Virtual Machines on AWS cloud using the EC2 instance, you definitely need to know how to access VM using SSH keys on AWS cloud. In this tutorial, we will see how to create SSH keys and how to link them to our Virtual Machines on the AWS cloud. So, let’s get started.
Prerequisites
- Should already have AWS account made (Create account)
- Should know how SSH keys work (Check out here)
- Should have PuTTY tool installed (Download PuTTY)
Table of Content
- Choose EC2 Service in AWS Management Console
- Configuration for creating SSH Key on AWS Cloud
- Connect to VM using SSH Keys on AWS
STEP 1: Choose EC2 Service in AWS Management Console
First, log in to your AWS Management Console. Then Select the “Services” tab option at the top bar and choose “EC2 Instance” from the mega drop-down menu. See what I mean in the image below:
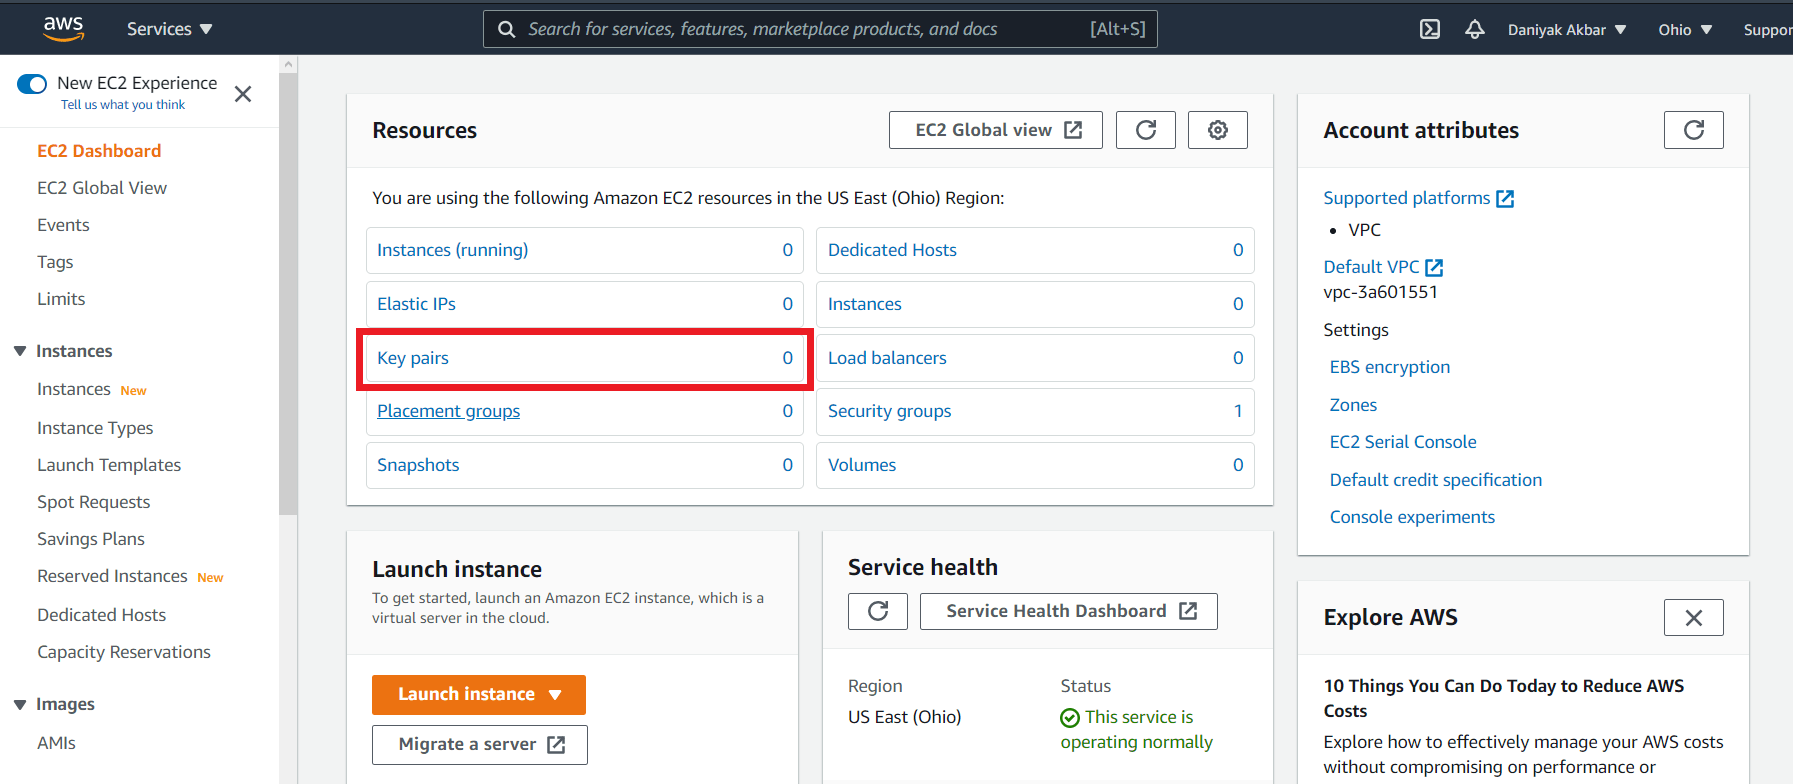
Afterward, you’ll be taken to the EC2 Instance Dashboard page where you will be given many options. Here you need to find and click on the “Key Pairs” link. Take reference from the image below.
STEP 2: Configuration for creating SSH Key on AWS Cloud
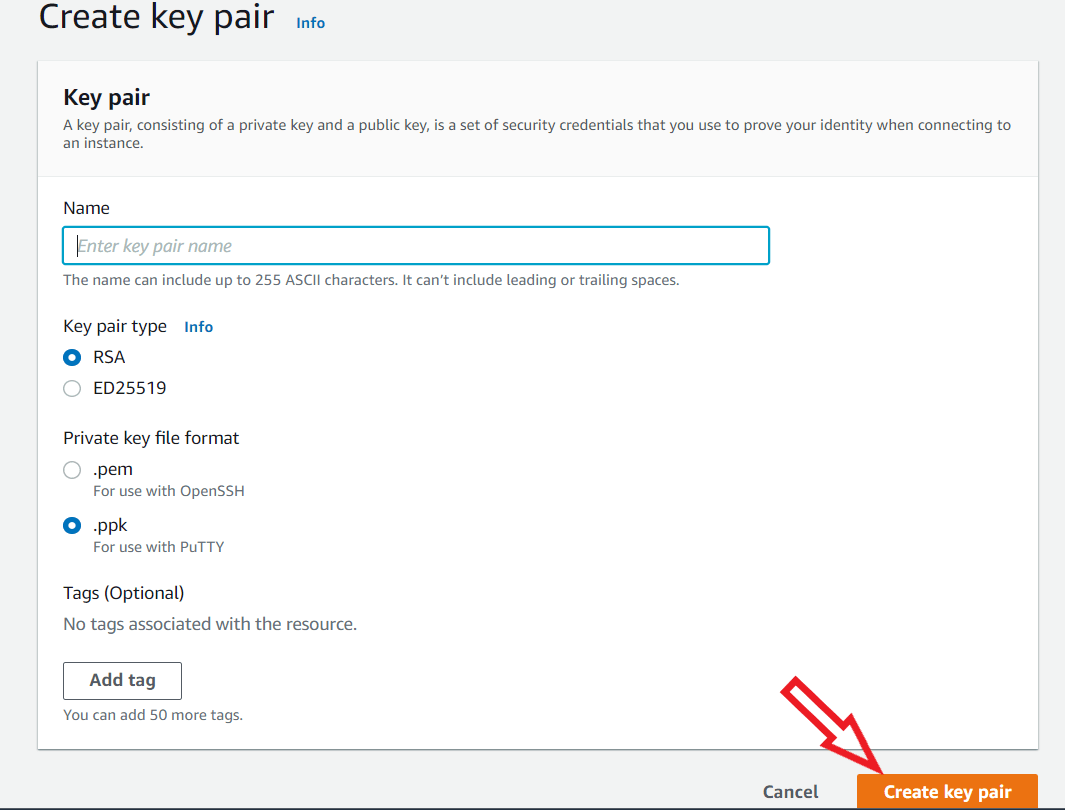
After you have clicked on the above link, it will take you to the main page for creating your SSH key pairs. On the top right corner of the page, there will be an orange-colored button saying, “Create Key Pair”. Click on that and you will do the configuration for creating SSH key pairs that you will use to access virtual machines on AWS Cloud. So, take reference from the image below and then click on create button.
This will successfully create your SSH Key pairs and also download a key on your local machine as well. This key that it downloaded is especially important, so keep it safe. It will allow you to access VM using SSH on AWS.
STEP 3: Connect to VM using SSH Keys on AWS
Lastly, we need to connect to virtual machines on AWS using SSH Key pair. For that, we need the PuTTY tool. Connecting via the PuTTY tool is done in 2 parts.
PART A
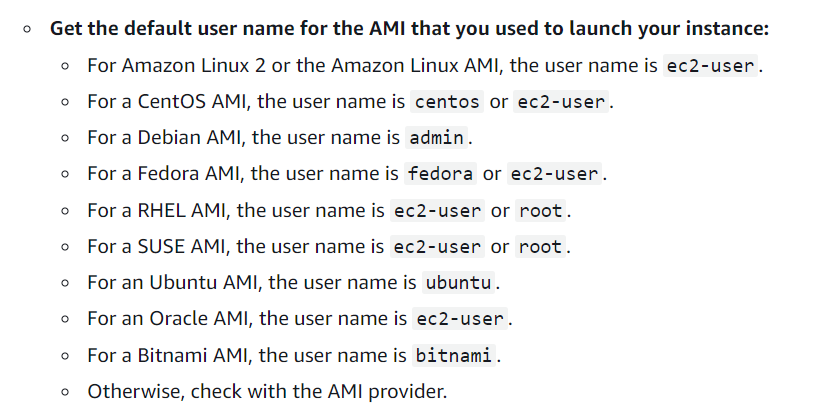
In the first place, you will have to enter the “Host Name” to connect to the specific VM instance on AWS. For that, you should know the username of the Virtual Machine you launched on an EC2 instance. If you do not know, then here is a list of usernames for VM images on AWS.
Here is the AWS documentation where you find the usernames and other details.
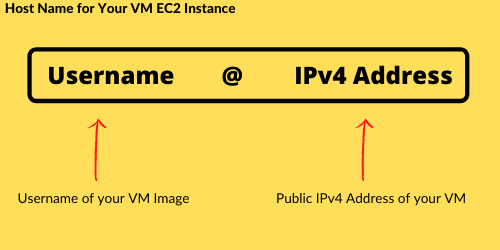
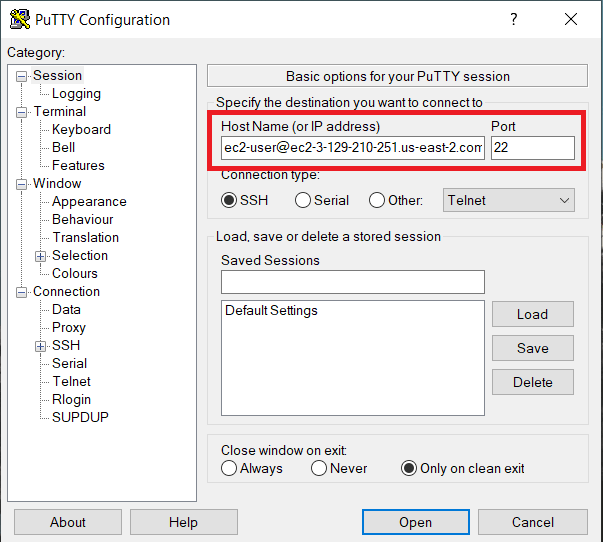
Afterward, open the PuTTY tool, and on the first page that shows up, you must enter the Host Name in the given format.
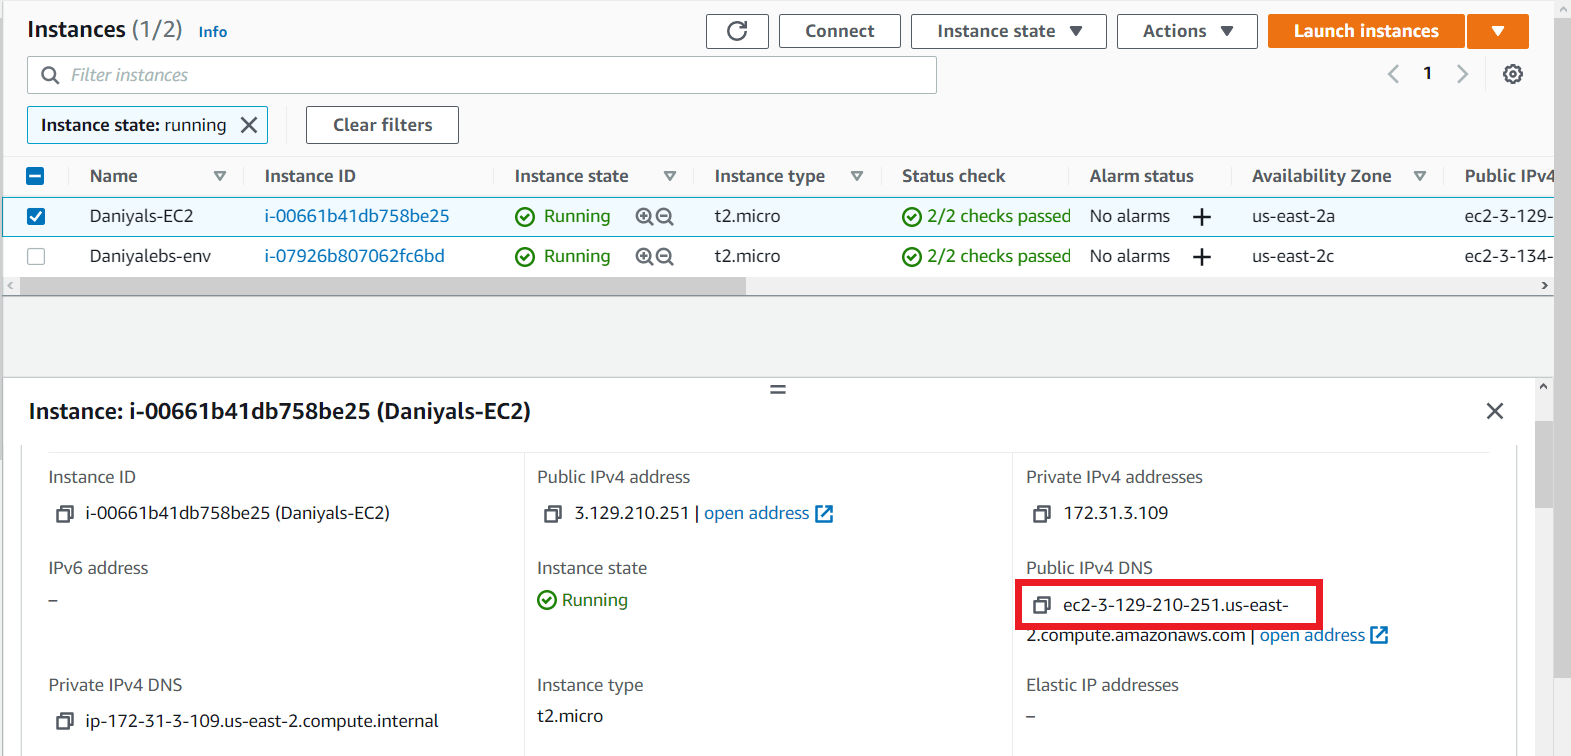
I have launched the ‘Amazon Linux AMI’ image virtual machine on an EC2 instance. Hence, according to the image above, its username is “ec2-user”. The next component you need to add after the username is the symbol @. Lastly, you need to enter the public IPv4 address of the EC2 virtual machine that you have launched on AWS. Here is an image to guide where to find the IP address.
Now combining all 3 components together, the final Host Name will be like this:
Take reference from the image below:
PART B
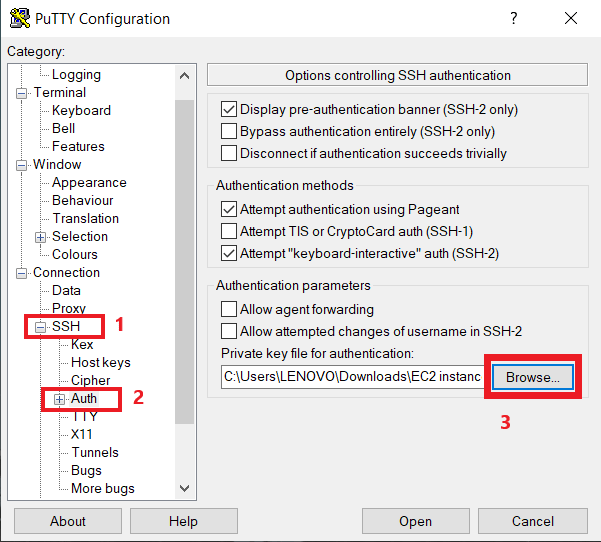
Now that the keys have been downloaded, we need to add them to the PuTTY tool. On the left panel, select “SSH” and then select “Auth”. Then click on the browse button and select the .ppk SSH key file that was downloaded earlier. Take reference from the image below:
And that’s all!
After that just click “Open” and it will open up a terminal console linking to your Virtual Machine on AWS.
Hope you developers found this guide helpful. I hope now you know exactly how to access VM using SSH keys on AWS. For more guides on AWS services, like this article and leave a comment below.
Have a great one!
Recent Comments
Categories
- Angular
- AWS
- Backend Development
- Big Data
- Cloud
- Database
- Deployment
- DevOps
- Docker
- Frontend Development
- GitHub
- Google Cloud Platform
- Installations
- Java
- JavaScript
- Linux
- MySQL
- Networking
- NodeJS
- Operating System
- Python
- Python Flask
- Report
- Security
- Server
- SpringBoot
- Subdomain
- TypeScript
- Uncategorized
- VSCode
- Webhosting
- WordPress
Search
Recent Post
Understanding Mutex, Semaphores, and the Producer-Consumer Problem
- 13 October, 2024
- 10 min read
Process scheduling algorithm – FIFO SJF RR
- 14 September, 2024
- 8 min read
How to Implement Multithreading in C Language
- 8 September, 2024
- 9 min read

