Angular is one of the popular JavaScript frameworks out there. Since JavaScript is its backbone, we can use NodeJS and hence all its packages and libraries in Angular as well. We can install them by using npm (Node Package Manager), which is an extremely useful tool, as you will soon see. So, npm comes along with NodeJS, so we need to install node first.
Table of Content
- Installing NodeJS and NPM
- Installing Angular on Windows Using NPM
- Starting Angular Project
- Uninstalling ng CLI in Windows
STEP 1: Installing NodeJS and npm
The link for downloading NodeJS is here: Download Node
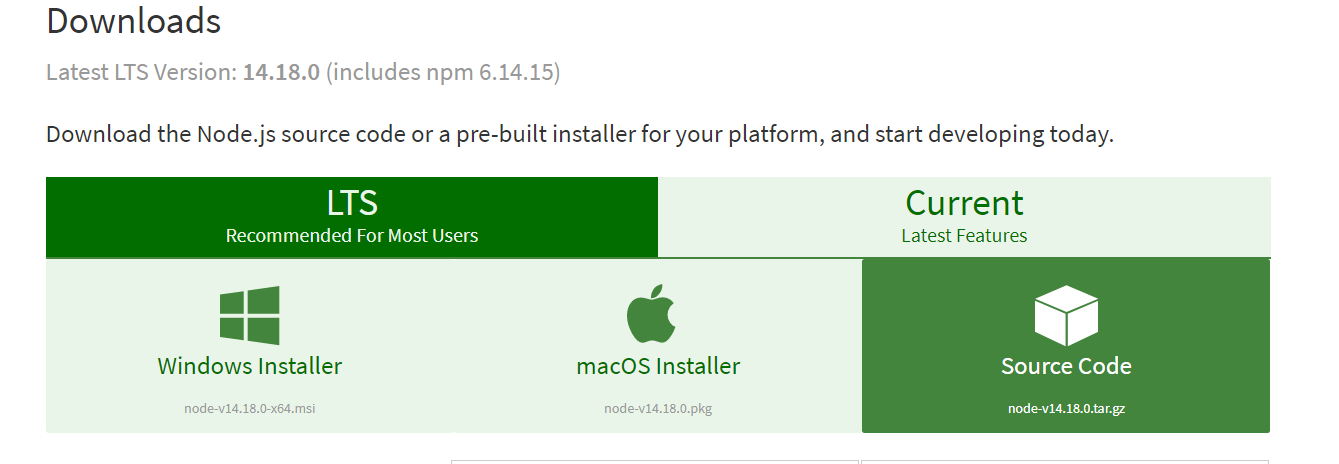
Then you would be shown this screen where you can click and download NodeJs according to the operating system you’re running. The setup is very simple, it’s mostly hitting the next button.
So once you’re done with installing NodeJS, npm would have already been installed with it. You can test if node and npm are installed by typing this command on CMD in windows or any terminal in macOS or Linux.
P.S. For full details, check out my article on how to install Node JS on windows.
					node –v
npm --version
These commands will show you the version of the software you’ve just installed. If doesn’t tell you the version, then your installation was not successful, and you need to reinstall NodeJS.
STEP 2: Installing Angular in Windows Using npm
So, from here it’s easy-peasy. Just type in this command in cmd for windows or terminal for macOS or Linux:
npm I -g @angular/cli
You can read about its documentation here: npm Documentation
If your installation was successful, then Angular is installed on your system. To check if it is indeed installed, run this command.
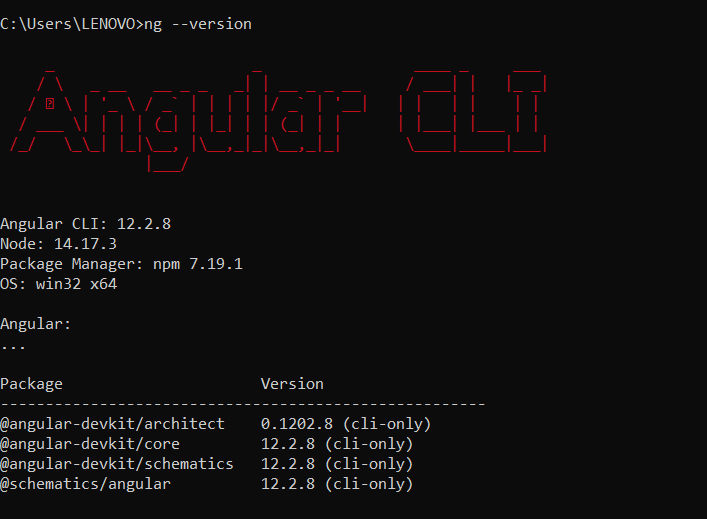
ng -–version
Then you’ll be shown this screen inside your cmd or terminal. And it confirms that Angular is installed.
And it’s done!
Now you can go ahead open your IDE or text editor like VSCode and start making a new project on Angular. Check out the angular documentation here for it.
STEP 3: Starting an Angular Project
The command to create a new Angular project is this:
ng new MyProject
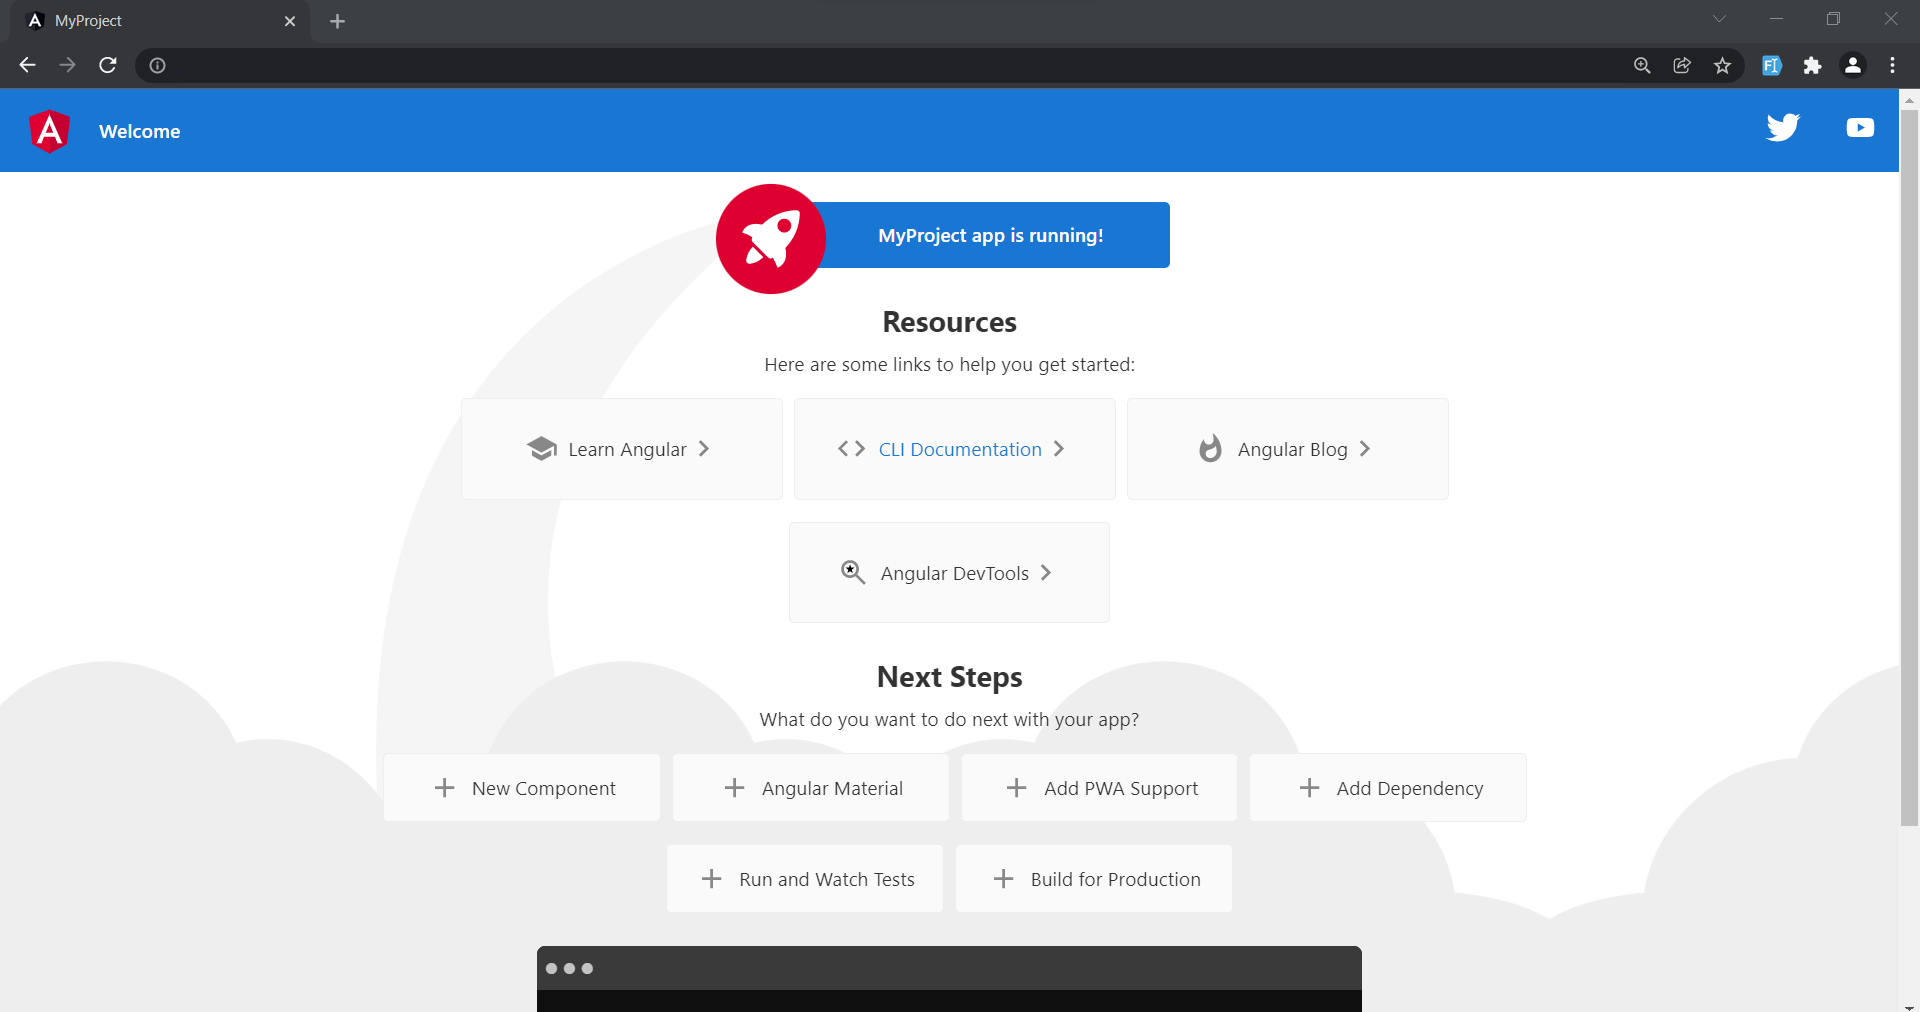
Now the above command is going to ask you a few questions… check YES for the routing option. Also, choose CSS as the style sheet in Angular when it asks. After that, run the below commands to run the project:
					cd MyProject
ng serve --open
STEP 4: How to Uninstall Angular CLI From Windows
Similar to the way we installed the ng CLI, we are also going to use the command line to uninstall it. Simply execute these 2 lines in the CMD command prompt and ng CLI will be uninstalled from your computer.
					npm uninstall -g @angular/cli
npm cache verify
I hope you found this article helpful. If you find anything that you would have like to see in this article or better yet have your own best ideas, then please send a message our way, It will be highly appreciated.
Have a great one!
Recent Comments
Categories
- Angular
- AWS
- Backend Development
- Big Data
- Cloud
- Database
- Deployment
- DevOps
- Docker
- Frontend Development
- GitHub
- Google Cloud Platform
- Installations
- Java
- JavaScript
- Linux
- MySQL
- Networking
- NodeJS
- Python
- Python Flask
- Report
- Security
- Server
- SpringBoot
- Subdomain
- TypeScript
- Uncategorized
- VSCode
- Webhosting
- WordPress
Search
Recent Post
Understanding Linux Scheduling Algorithm: A Comprehensive Guide
- 13 June, 2023
- 3 min read
How to add routing in Angular
- 9 May, 2023
- 4 min read
What is Data at Rest in Cloud
- 13 March, 2023
- 2 min read
