Hey developers! In this article, we are going to see how to install node js on windows. Later on, we are also going to see how to install node js in Ubuntu Linux operating system. And I have also shared a YouTube Video at the end for those of you who want a visual tutorial. So, let’s get started.
Table of Content
- Download Node JS on Windows
- Install Node JS and NPM on Windows
- Install Node JS Ubuntu
- YouTube Tutorial to Install Node JS
STEP 1: Download Node JS on Windows
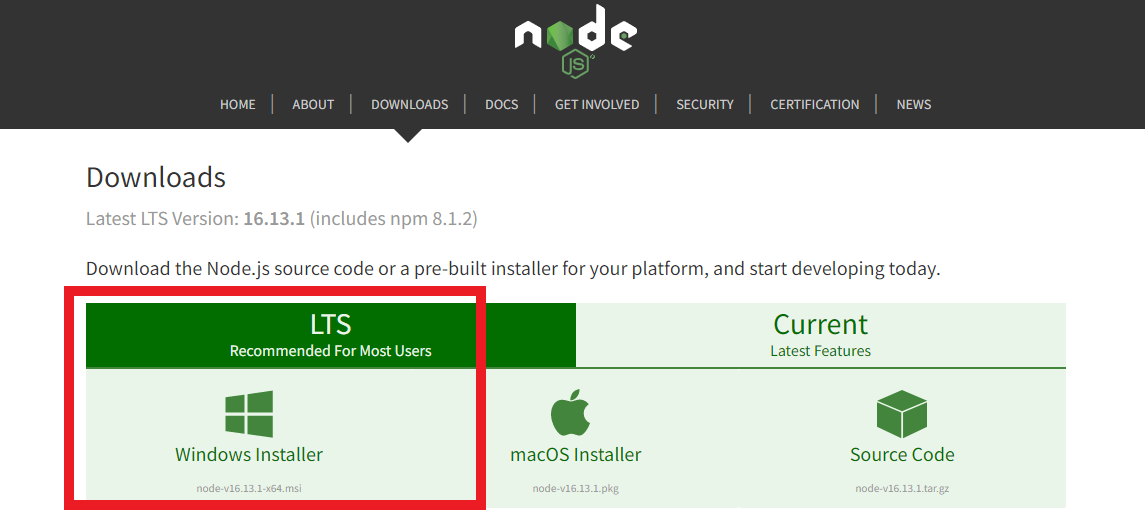
To begin with, we need to firstly download Node JS software on our system. For that, click here to go to their official website where you will download it. Look at the image below, click on the highlighted windows icon to download node js software for Windows operating system.
STEP 2: Install Node JS and NPM on Windows
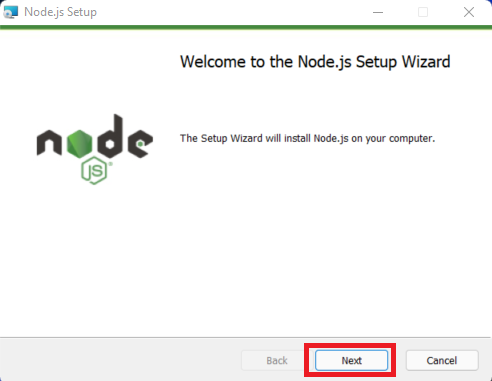
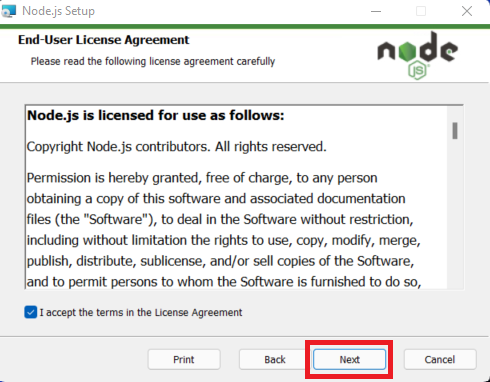
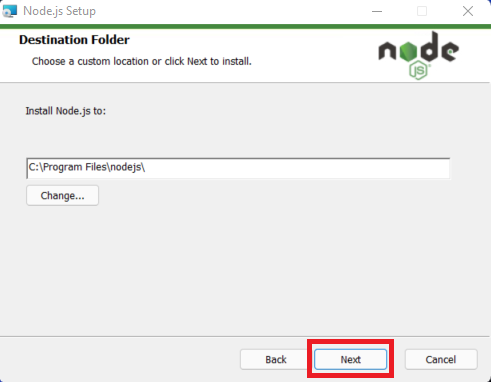
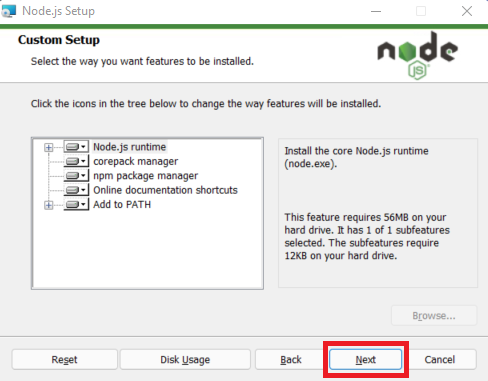
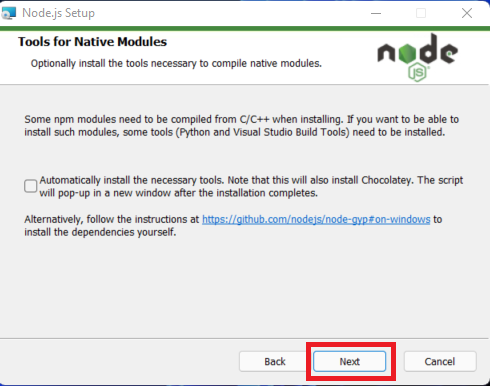
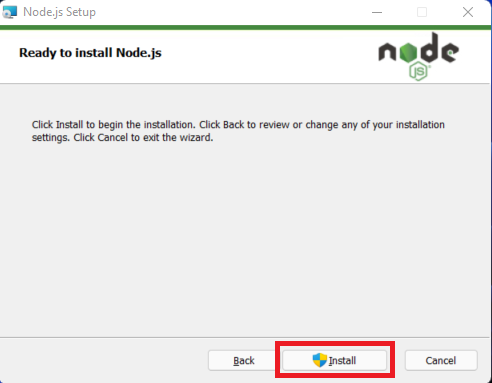
Earlier, we downloaded the installer file of Node JS for Windows, so now we will be how to install it. It is as simple as double-clicking on the installer file to start the installation process. Just follow along with the images shown below to keep track of each step. But first, what is NPM?
What is NPM?
NPM stands for Node Package Manager. It is exactly what it stands for, it’s the package manager for JavaScript programming language. And there is also a remote registry called the NPM registry, where all the public and private JavaScript packages are kept. This is how we can install all the dependencies relative to the project we are making. Provided that that project is in JavaScript.
NodeJS has been successfully installed and to see if it is indeed installed or not open up a command prompt on windows. Now execute the command “node —version” and check for the output. See the image below for further clarification.
If it displays the version in this case 16.13.1, then it can be assured that Node JS is now installed on your windows.
STEP 3: Install Node JS Ubuntu
In comparison to windows, to install Node JS in Ubuntu is way easier and straightforward. You only need to up terminal and execute one single command which will install node JS and NPM for you. So, open up that terminal and execute this command:
sudo apt install nodejs npm -y
Now we need to check if node JS is actually installed on Ubuntu or not. Therefore, in the same terminal execute the following command to check the version of node JS.
node --version
And there we go. Node JS has been successfully installed on Ubuntu. in case you want a visual tutorial for how to install nodejs on windows, here it is.
YouTube Tutorial: Installing NodeJS on Windows
Recent Comments
Categories
- Angular
- AWS
- Backend Development
- Big Data
- Cloud
- Database
- Deployment
- DevOps
- Docker
- Frontend Development
- GitHub
- Google Cloud Platform
- Installations
- Java
- JavaScript
- Linux
- MySQL
- Networking
- NodeJS
- Operating System
- Python
- Python Flask
- Report
- Security
- Server
- SpringBoot
- Subdomain
- TypeScript
- Uncategorized
- VSCode
- Webhosting
- WordPress
Search
Recent Post
Understanding Mutex, Semaphores, and the Producer-Consumer Problem
- 13 October, 2024
- 10 min read
Process scheduling algorithm – FIFO SJF RR
- 14 September, 2024
- 8 min read
How to Implement Multithreading in C Language
- 8 September, 2024
- 9 min read
