In this article, I will show step by step how to create and publish Angular Library to NPM registry. There are a few prerequisites:
Prerequisites!
- Must have Angular installed (Install Angular)
Table of Content
- Creating a public repository on the NPM registry
- Creating a library in angular
- Adding scope and building the NPM library
- Publishing the library to NPM registry
So, without further ado let’s jump right in.
STEP 1: Creating a Public Repository on NPM Registry
First, you need to create your free and PM account. Click here to sign up.
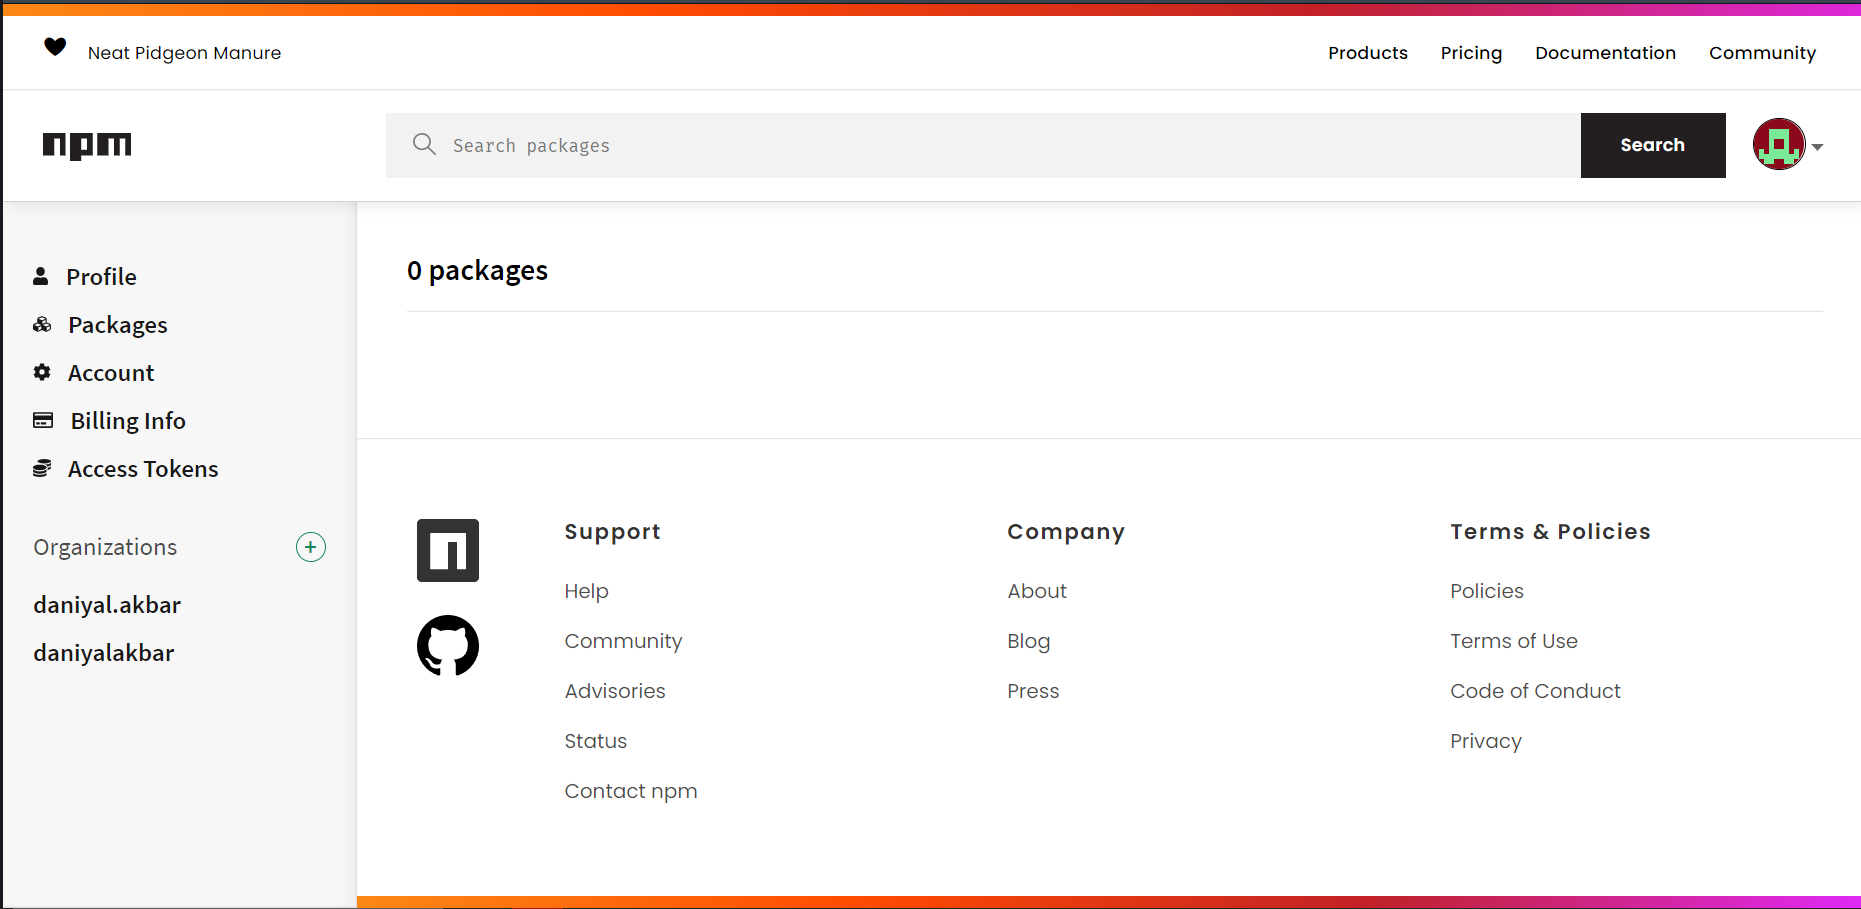
Once you sign up and go to ‘Packages’, you’ll see that there are no packages uploaded yet. Just like the picture shown below:
So, now we jump on to the next step, which is to create a library.
STEP 2: Creating a Library in Angular
So then, for today’s example, I’m going to create a new project called “MyProject”. To do that, you need to execute the following command into a terminal/cmd. You could also check out my other article on how to get started with an Angular project.
ng new MyProject
Once you created your project you will now execute the following command to create a new library. in this example, I have made an angular library called “HelloWorldLib”.
ng g lib HelloWorldLib
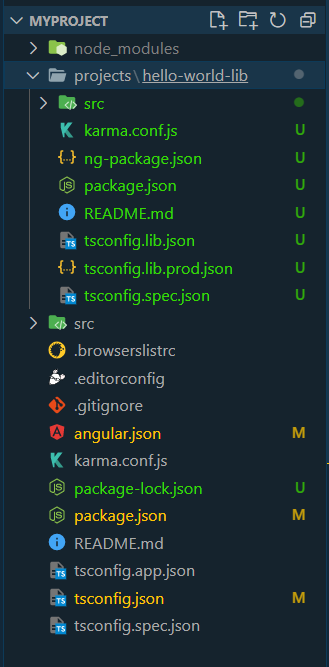
This will create a new folder called “Project” which will contain all the files for your library. The below picture is there for your reference.
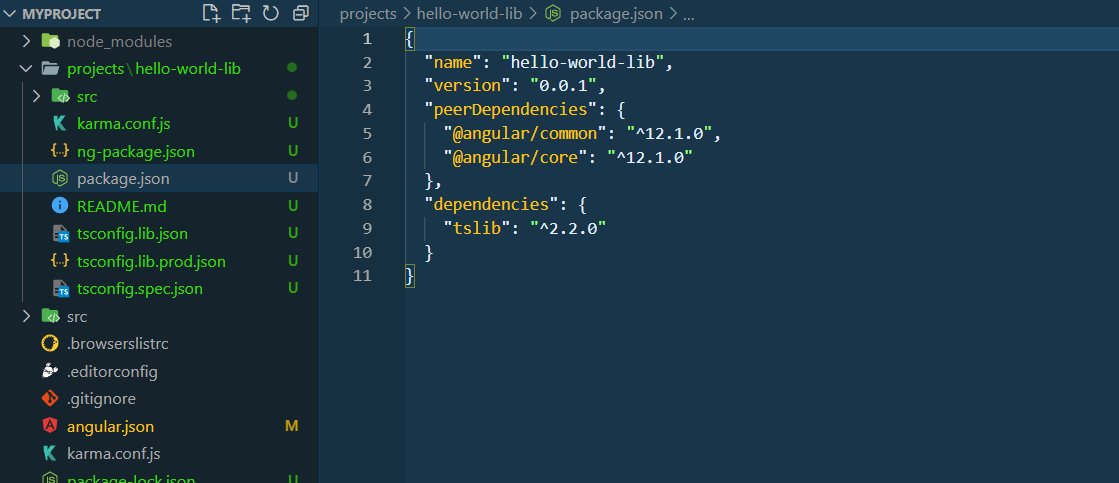
If you open up the package.json off the library, you will see a few important items here. You can change the version and add more dependency to your library before publishing it to the public registry. Here is a picture for reference.
STEP 3: Adding Scope and Building the NPM Library
This brings us to our next step which is very crucial. You need to add scope to your library before publishing it. A scope defines the path for the library to get published on the NPM registry. Basically, you need to tell the library to get published into your account. There are 2 ways to do this. A longer but proper way and a faster, easier yet not so proper way.
1. Proper (but longer way)
For this, you need to step into the Project > hello-world-lib directory through your terminal. Then execute the following command:
npm init --scope=@<your account username>
The after @ part should be the same username when you created the NPM account in the first step. For my project, I entered the following command: npm init –scope=@daniyal1217
This command will then launch a few questions in the terminal asking more information about the library we just created. Just hit enter to all unless you like to address them. And that’s all. It’s actually not a long method, to be honest.
2. Faster (but not the proper way)
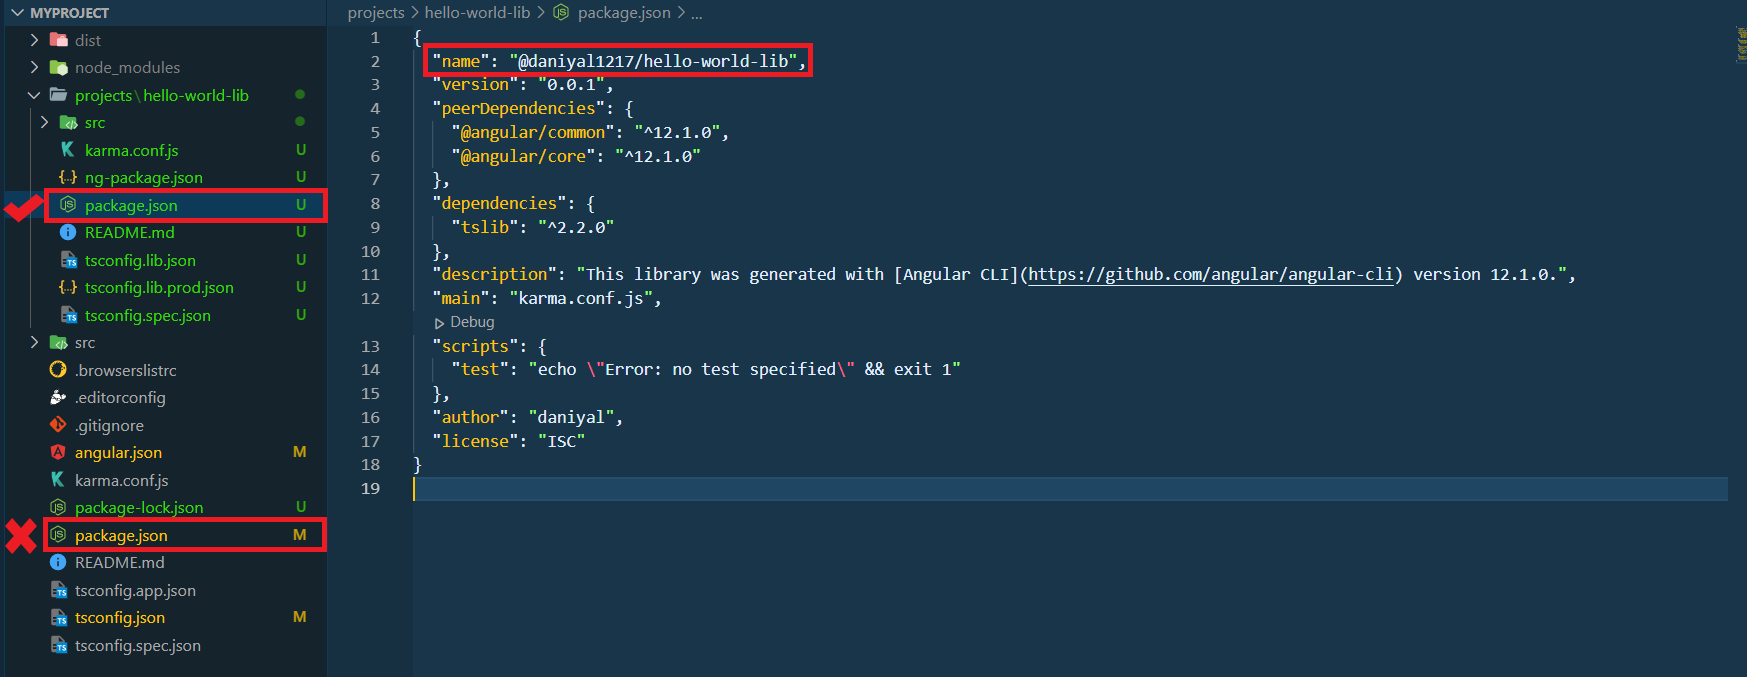
For this, you need to open the package.json file, which is INSIDE THE PROJECT FOLDER. Note that there is also a package.json file in the root directory of your project. Do not edit that. Open the project folder, then the hello-world-lib folder. Inside this, you will find a package.json file that you need to edit.
Open this file and in the “name” value, simply add your username that you used to create the NPM account in STEP 1. This username should be added after a @ symbol. Follow the image below:
Next, you need to build the library. This will prepare the NPM file that we will be publishing to the public registry account which we created earlier. The command to build Angular Library is this:
ng build HelloWorldLib
Note that, whenever you make any changes to your library file, you need to go to your library package.json and change the version. After that, you need to run the above command again to build the npm file. This npm file reflects the latest work that you’ve done. And this will be the file that gets published to the NPM registry.
STEP 4: Publish Library to NPM Registry
Now the step is to publish your custom library to the public NPM registry. For that, you first need to log in to your NPM account through the terminal. Execute the following command:
npm login
This will ask you for your username, password, and email address. Just enter those and you’re done. Now finally, you would enter the command to publish your custom library. For this, you need to be on the root directory of the project in the terminal. Execute the following command:
npm publish --access public
Now if you log in to your NPM account and go to ‘Packages’, you would see that your library has been successfully uploaded to the npm registry.
To install this library into any project, simply open this package and you will see the installation command on the right-side. Like so:
And you’re all done!
Hope that this article helped you to build a clear understanding of how to create and publish Angular library to NPM. If you liked this article, please like, share, and leave a review at the bottom.
Have a great one!
Recent Comments
Categories
- Angular
- AWS
- Backend Development
- Big Data
- Cloud
- Database
- Deployment
- DevOps
- Docker
- Frontend Development
- GitHub
- Google Cloud Platform
- Installations
- Java
- JavaScript
- Linux
- MySQL
- Networking
- NodeJS
- Operating System
- Python
- Python Flask
- Report
- Security
- Server
- SpringBoot
- Subdomain
- TypeScript
- Uncategorized
- VSCode
- Webhosting
- WordPress
Search
Recent Post
Understanding Mutex, Semaphores, and the Producer-Consumer Problem
- 13 October, 2024
- 10 min read
Process scheduling algorithm – FIFO SJF RR
- 14 September, 2024
- 8 min read
How to Implement Multithreading in C Language
- 8 September, 2024
- 9 min read
