In this article we are going to see how simple and fast it is to add swagger UI in SpringBoot project.
What is Swagger?
As per Google: “Swagger is an Interface Description Language for describing RESTful APIs expressed using JSON. Swagger is used together with a set of open-source software tools to design, build, document, and use RESTful web services. Swagger includes automated documentation, code generation (into many programming languages), and test-case generation.”
Prerequisites
- Must have a basic SpringBoot project up and running. (Click here to see how)
Table of Content
- Adding Swagger Dependencies
- Enabling Swagger in your SpringBoot Project
STEP 1: Adding Swagger Dependencies
In the first place, to integrate swagger to your SpringBoot project, you need to add the following dependencies in the POM.xml file of your project.
					<dependency>
    <groupId>io.springfox</groupId>
    <artifactId>springfox-swagger2</artifactId>
    <version>2.6.1</version>
    <scope>compile</scope>
</dependency>

<dependency>
    <groupId>io.springfox</groupId>
    <artifactId>springfox-swagger-ui</artifactId>
    <version>2.6.1</version>
    <scope>compile</scope>
</dependency>
STEP 2: Enable Swagger in your SpringBoot Project
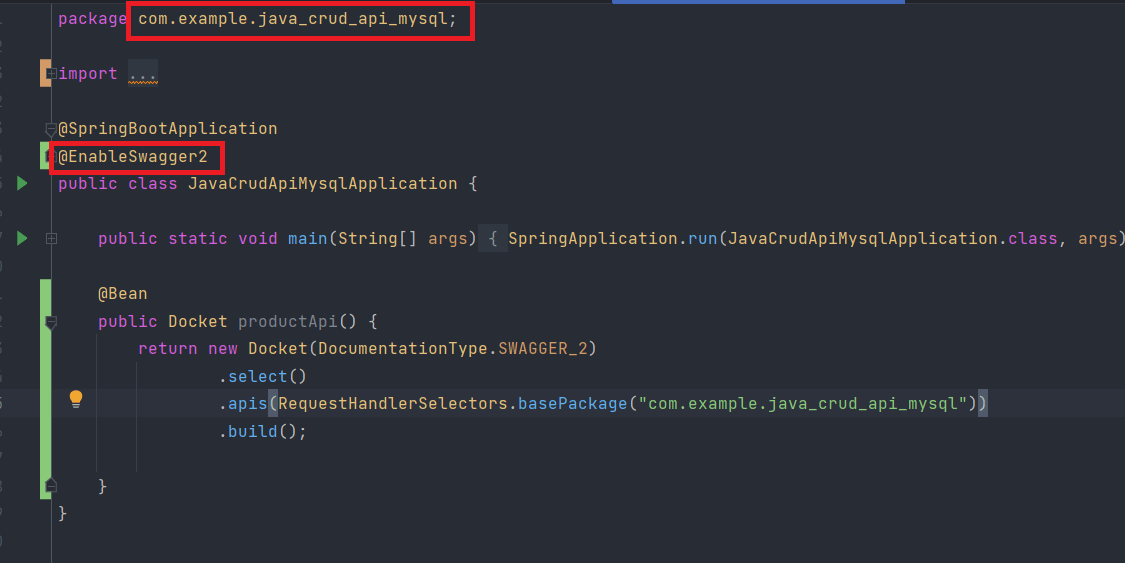
After adding all the dependencies, we now need to add an annotation to add swagger UI in the SpringBoot project. Simply open up your entry point java class and add this annotation at the top: “@EnableSwagger2”.
Next, you need to add a Bean instance inside the same class where you added the above annotation. Therefore, copy the following code in your main java application entry class.
					@Bean
public Docket productApi() {
    return new Docket(DocumentationType.SWAGGER_2)
            .select()
            .apis(RequestHandlerSelectors.basePackage("com.example.java_crud_api_mysql"))
            .build();
}
Take reference from the image shown below.
In the code that you will add, it asks for a ‘base package’. This is going to be the package name that is mentioned at the very top of the same java class. It’s also highlighted with a red box in the above image as well. This bean instance basically tells the swagger to find all the available API endpoints in all your controller classes of your project. And then it will be displayed to the user on the browser at a specific URL. This project is running on port 8080, so the URL is going to be http://localhost:8080/swagger-ui.html
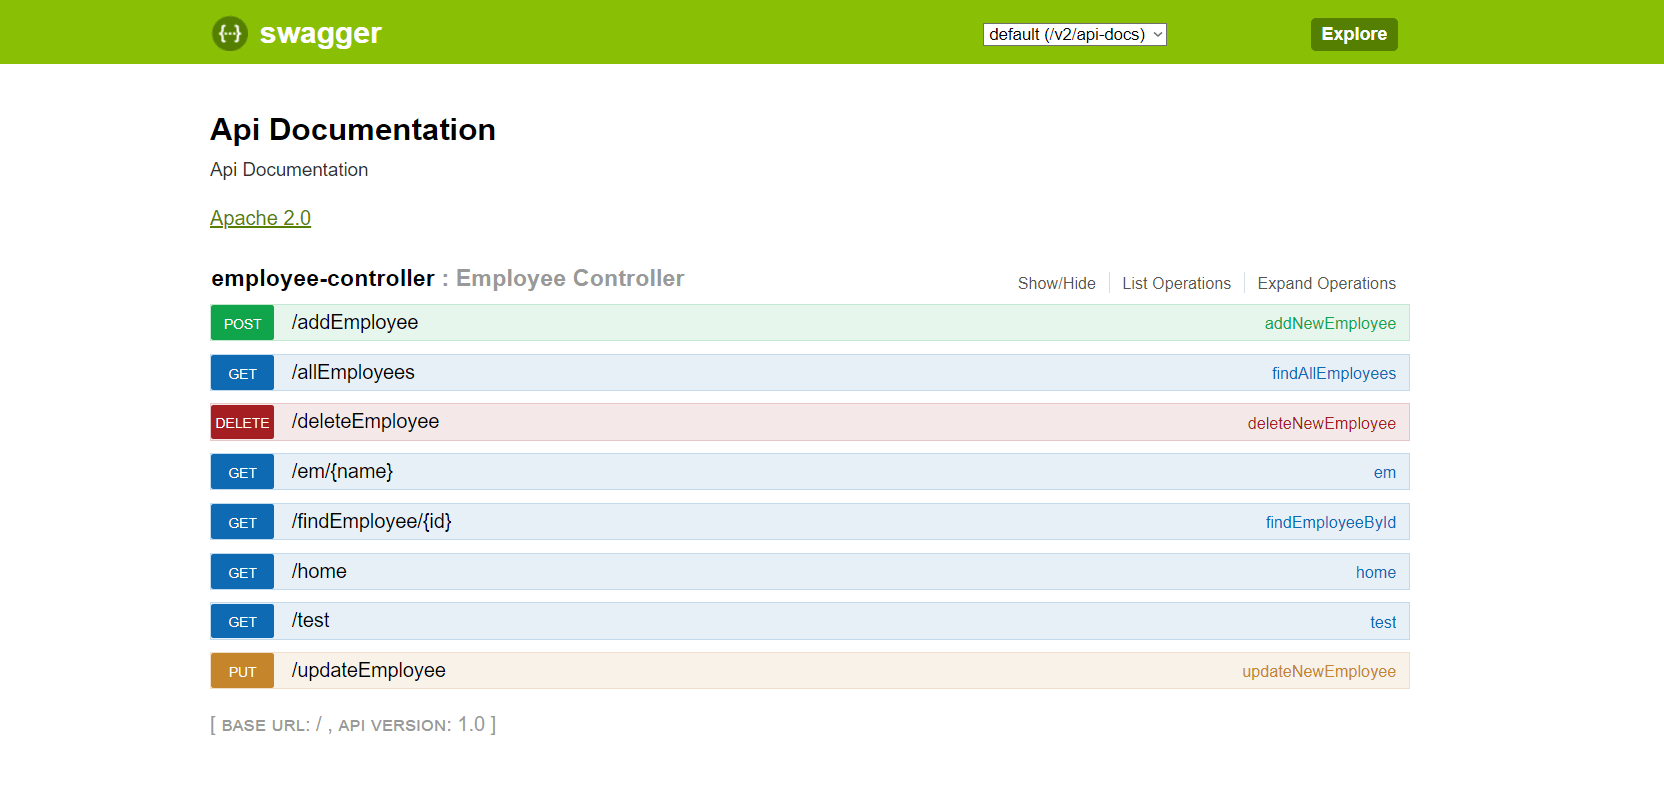
Finally, run the project and go the above-mentioned URL and you will be displayed with the Swagger UI like so:
And we are done!
Hope this helps you to understand how exactly to add Swagger UI in the SpringBoot project. If you have any questions, please leave a comment down below and share this article with others too.
Have a great one!
Recent Comments
Categories
- Angular
- AWS
- Backend Development
- Big Data
- Cloud
- Database
- Deployment
- DevOps
- Docker
- Frontend Development
- GitHub
- Google Cloud Platform
- Installations
- Java
- JavaScript
- Linux
- MySQL
- Networking
- NodeJS
- Operating System
- Python
- Python Flask
- Report
- Security
- Server
- SpringBoot
- Subdomain
- TypeScript
- Uncategorized
- VSCode
- Webhosting
- WordPress
Search
Recent Post
Understanding Mutex, Semaphores, and the Producer-Consumer Problem
- 13 October, 2024
- 10 min read
Process scheduling algorithm – FIFO SJF RR
- 14 September, 2024
- 8 min read
How to Implement Multithreading in C Language
- 8 September, 2024
- 9 min read


