Google Cloud Function (GCF) is one of the most consumed features on the Google Cloud Platform. It basically is a serverless execution environment where you can simply deploy your code and it will run ONLY whenever you trigger an event.
Let me make it clearer. GCF is a cloud service on a cloud platform from Google. And on it, you can deploy your code, which has support for many languages (i.e. Python, Java, Node, PHP, etc). You deploy your code, and it generates a trigger link. That trigger link is what you will use to execute your code whenever an event happens. Which you can then call from your application like any other HTTP request call.
The reason why Google Cloud Functions are so widely used is that its serverless, which means it does not need a virtual machine to run your tasks. It is an event-driven technology, and Google only charges you only when you use it. So, if you’ve made a GCF but haven’t used it for a year, it won’t charge you. This is exactly what Lambda function from AWS is.
I’ll show how to set up a Google Cloud Function step by step and then test it out too. Let’s log on to your google account first and open up Google Console. This is the link for it:
https://console.cloud.google.com
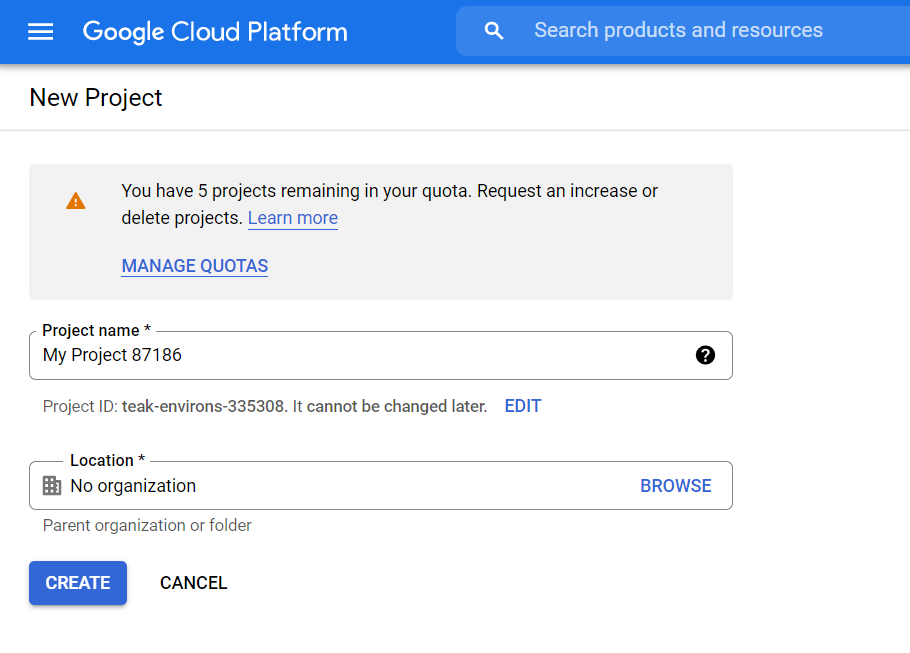
Google gives every newcomer a $300 gift card let’s say. It means you can use up to 300 dollars’ worth of Google Cloud Platform services for a certain period.
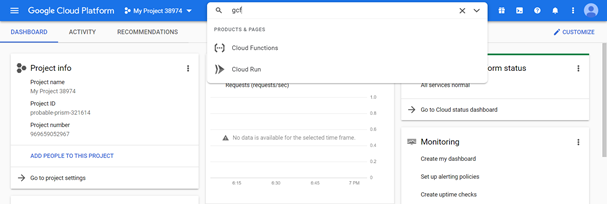
Once you’re done creating a project, you’ll see a lot of new stuff on your dashboard. You now have to search for Google Cloud Function service so type that or simply “gcf” would also do. Like this:
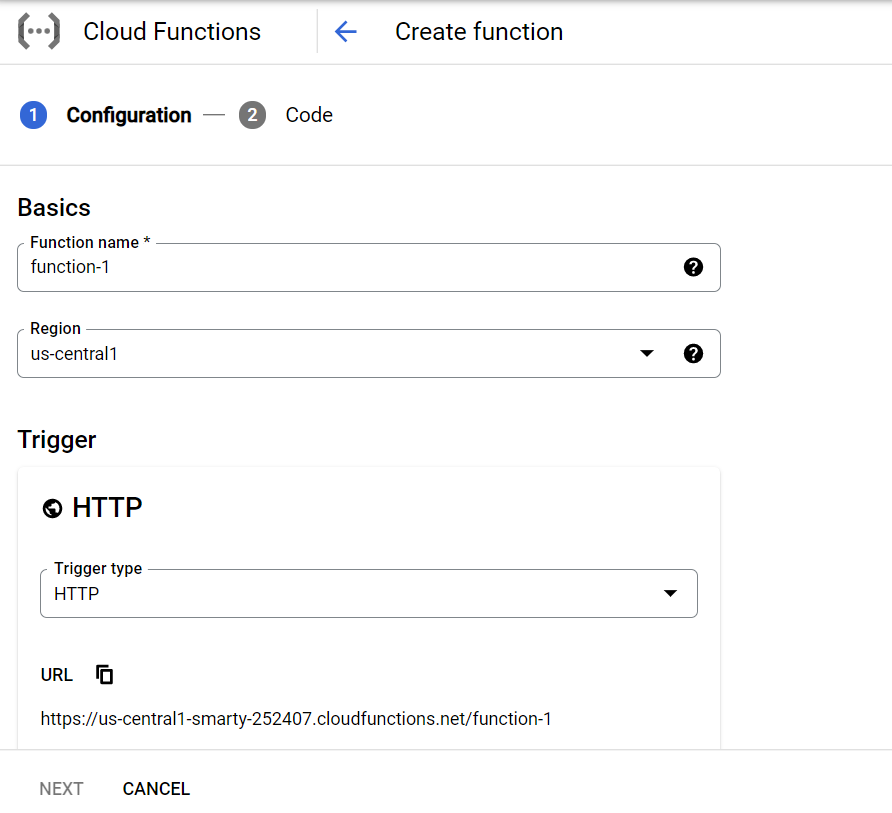
Click on “Cloud Function”, which will take you to the service page where you can create your serverless functions. Once you have reached the Cloud Function page, click on “Create Function”. That would take you to the setup for your cloud function, like so:
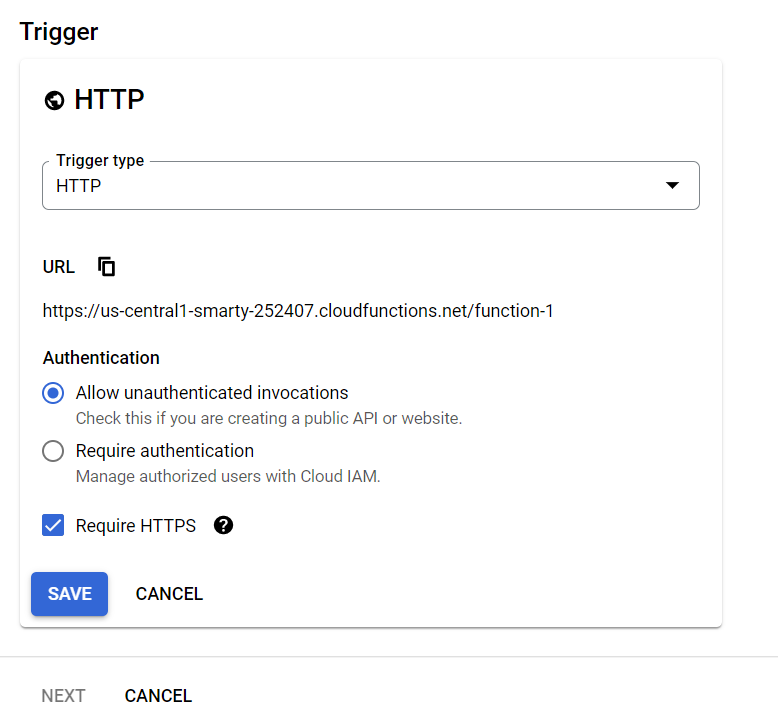
Here you can name your function and choose a region (you can leave it as ‘us-central1’ as default too). Next is the trigger type, it used for the type of trigger that you’d want to make, either HTTP or a secure version of HTTPS. Note that, using HTTP is a little less secure, but using HTTPS would have made some extra adjustments programmatically speaking in your application where you’d be consuming this function. For the sake of testing, I’m going to leave it at HTTP.
Next, you can choose Require authentication and then give IAM roles and rights to individual users for this service. For now, I’m simply going to choose to Allow unauthenticated for testing purposes. Click on save and hit next.
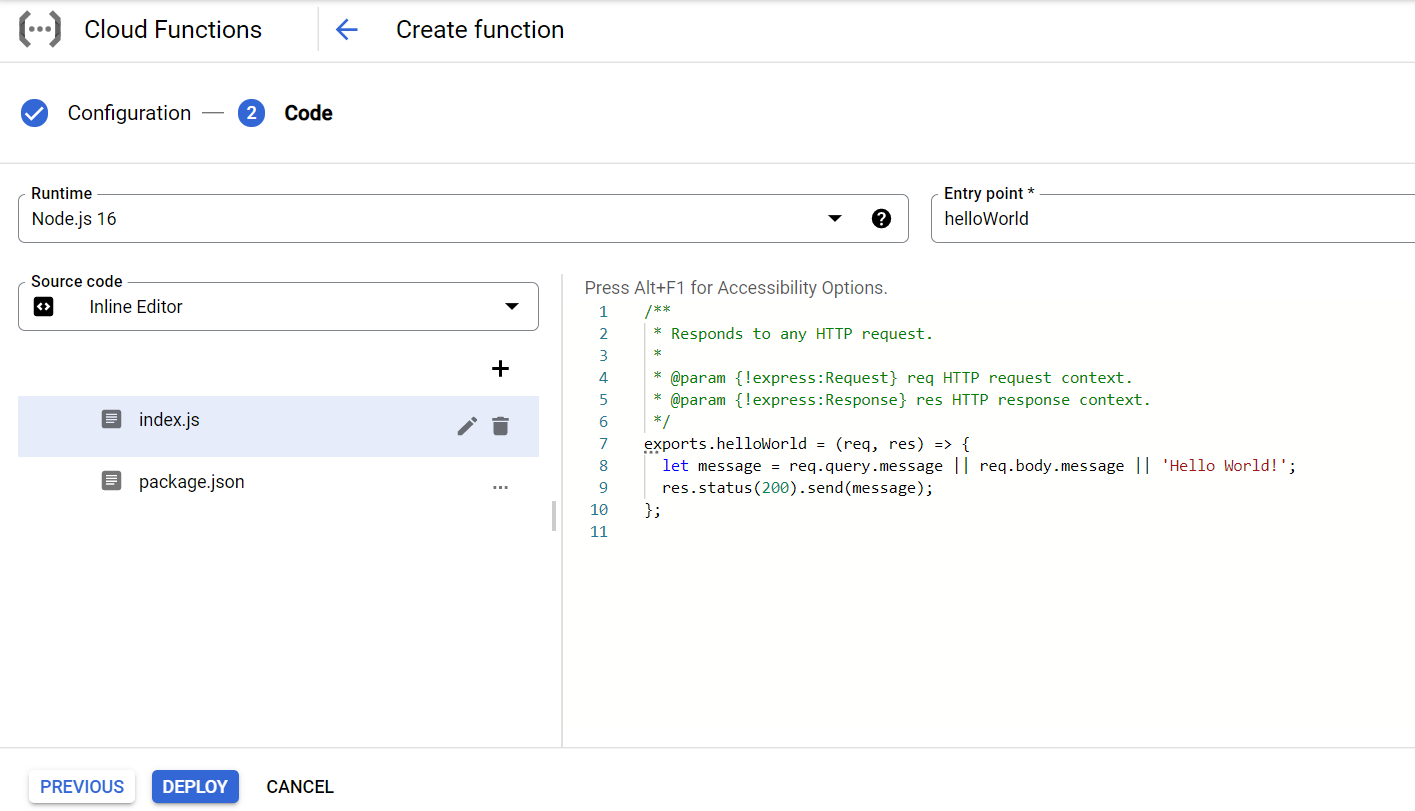
So, this is the final place where you can select the programming language and add your code on the console to the right. In each language, it will give you a default boilerplate template to get started off just as you see in the picture above for NodeJS. Let’s simply go with that and hit deploy.
What’s happening here is that this ‘helloWorld’ function is listening for a message body in JSON format. And in it, it will search for a key name ‘message’. If it finds the matched key, then it will simply print its value. Otherwise, it will return the value ‘Hello World’ by default.
Now let’s deploy this function and test it out. Note that it will take a few minutes for it to get deployed. Once it gets deployed, it will look like this.
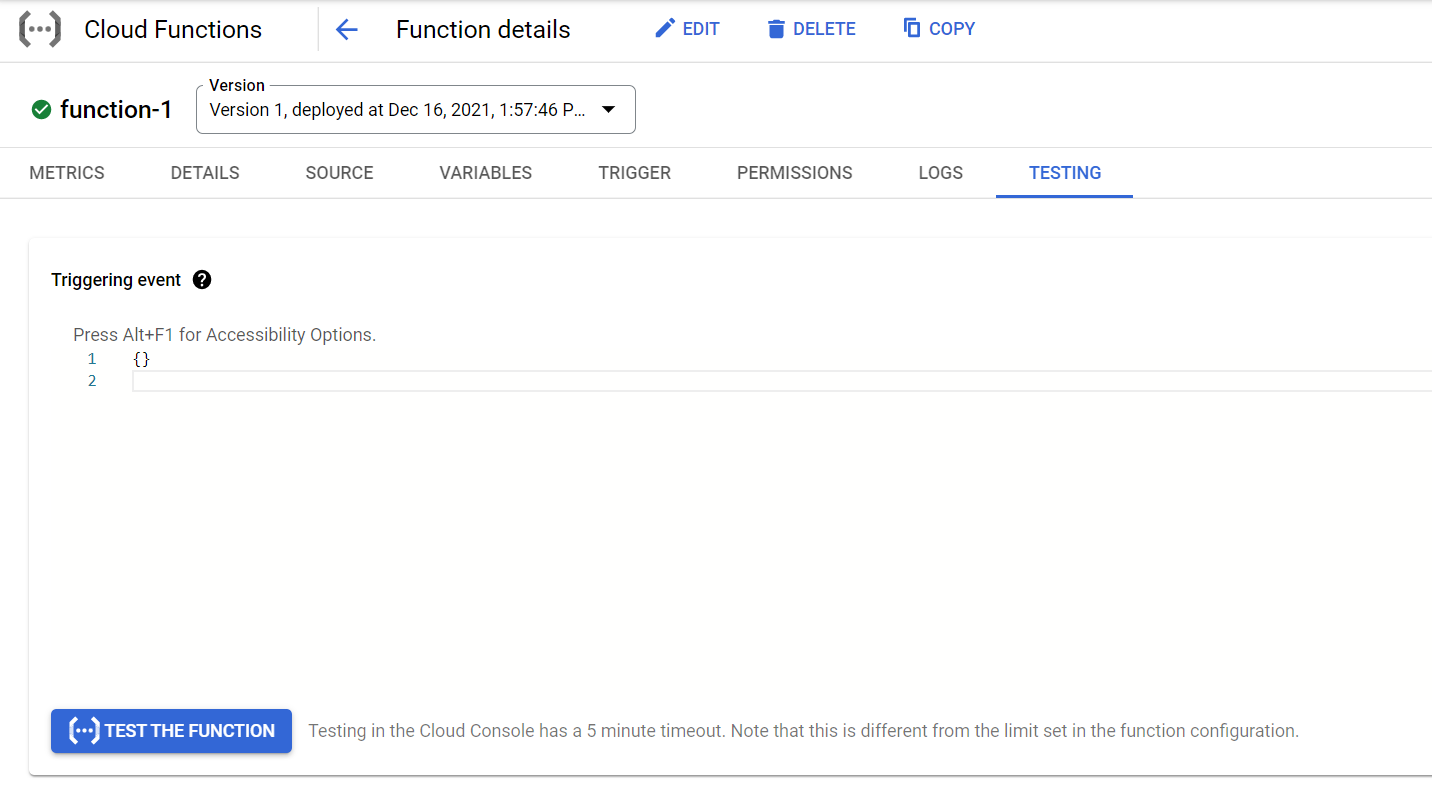
Now to test it, we can either use postman or just test it on this platform too. Click on the function and then click on the Testing tab on the top bar.
Testing Google Cloud Function
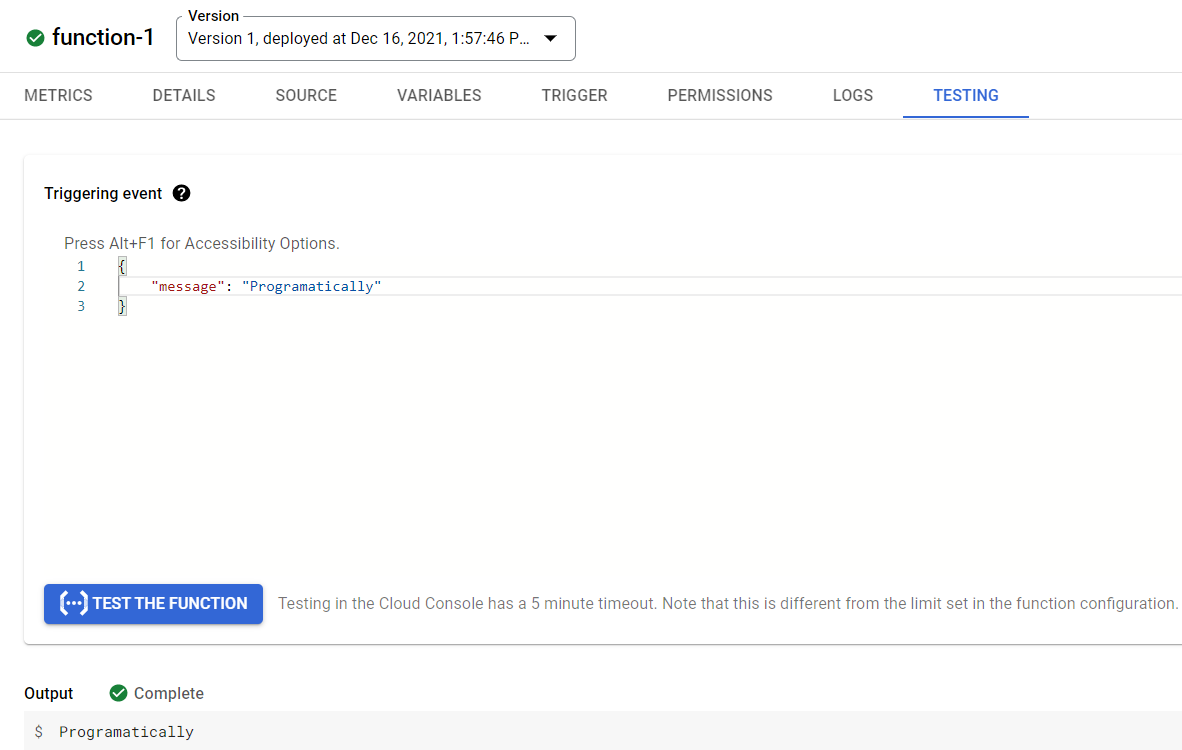
Now as you can see, if I throw in an empty JSON object and hit the “TEST THE FUNCTION” button, it gives me the response ‘Hello World!’ by default. But, when you do insert the key ‘message’, it will return its value like below:
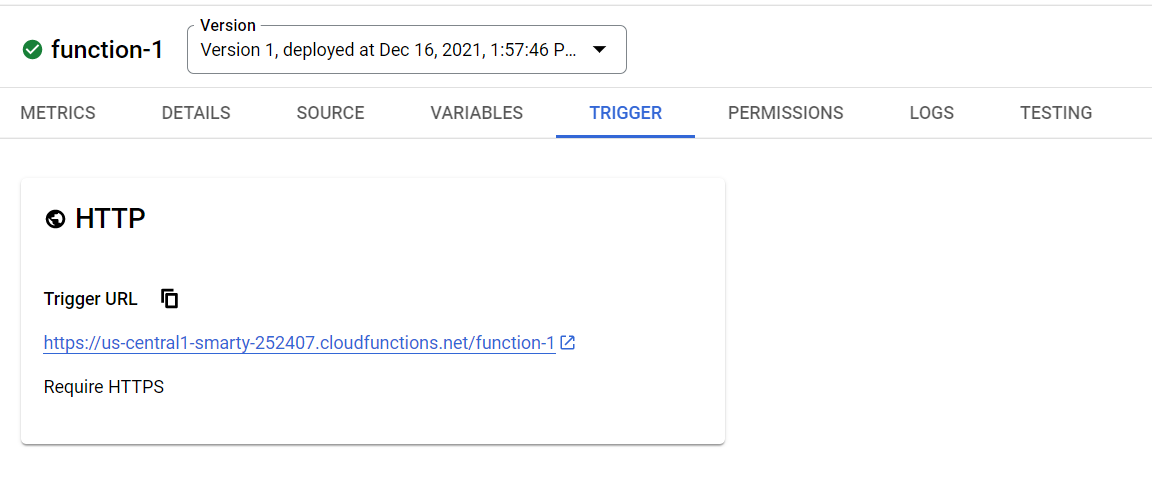
The trigger link is what you would need to test on Postman or when you want to execute this function on your application via an HTTP request. The trigger can be found when you click on the “TRIGGER” tab menu on the top. It will show you the link like so:
That all!
I hope this gives you an insight into how exactly Google Cloud Function is set up and how to make it work. If this was helpful, like our Facebook group and share your thoughts there as well. Have a great one!
Recent Comments
Categories
- Angular
- AWS
- Backend Development
- Big Data
- Cloud
- Database
- Deployment
- DevOps
- Docker
- Frontend Development
- GitHub
- Google Cloud Platform
- Installations
- Java
- JavaScript
- Linux
- MySQL
- Networking
- NodeJS
- Operating System
- Python
- Python Flask
- Report
- Security
- Server
- SpringBoot
- Subdomain
- TypeScript
- Uncategorized
- VSCode
- Webhosting
- WordPress
Search
Recent Post
Understanding Mutex, Semaphores, and the Producer-Consumer Problem
- 13 October, 2024
- 10 min read
Process scheduling algorithm – FIFO SJF RR
- 14 September, 2024
- 8 min read
How to Implement Multithreading in C Language
- 8 September, 2024
- 9 min read

