In this article, we are going to see how to connect HBase With Python. I have already created an article, where I’m explaining how HBase is deployed using Docker Container. In this article, we are going to see how to interact HBase with Python. This would be done using a 3rd party library called HappyBase. Later we will also see some python HappyBase examples. So, let’s get started.
Prerequisites
- Docker should be installed. (How to install Docker)
- The running operating system should be a Linux environment. (See how)
Table of Content
- What is HBase Database?
- Run HBase on Docker
- Link Container IP Address to Your Local Host
- Connect HBase Through Python HappyBase Library
- FAQ
What is HBase Database?
HBase is a non-relational database management system built on top of Apache Hadoop. It is fault-tolerant. It provides real-time data access from and to HDFS. HBase also performs compressions of data. It can hold billions of records of data and provides low latency in fetching records from those big data.
STEP 1: Run HBase on Docker
If you are not aware, I have already covered this point in much detail in this article. Still, I will briefly show you how to run the HBase service using Dockers. Execute the following command:
docker run --name=hbase-docker -h hbase-docker -d -v //data://data dajobe/hbase
And that’s it. This will download HBase Docker image and run HBase service in its container.
STEP 2: Link Container IP Address to Your Local Host
Previously we executed a command that had downloaded HBase Docker image and ran its services. But that’s the thing. The service is only running in the Docker HBase container and not the host machine. To do that, we need to add the HBase container hostname and IP address to our host machines /etc/hosts file.
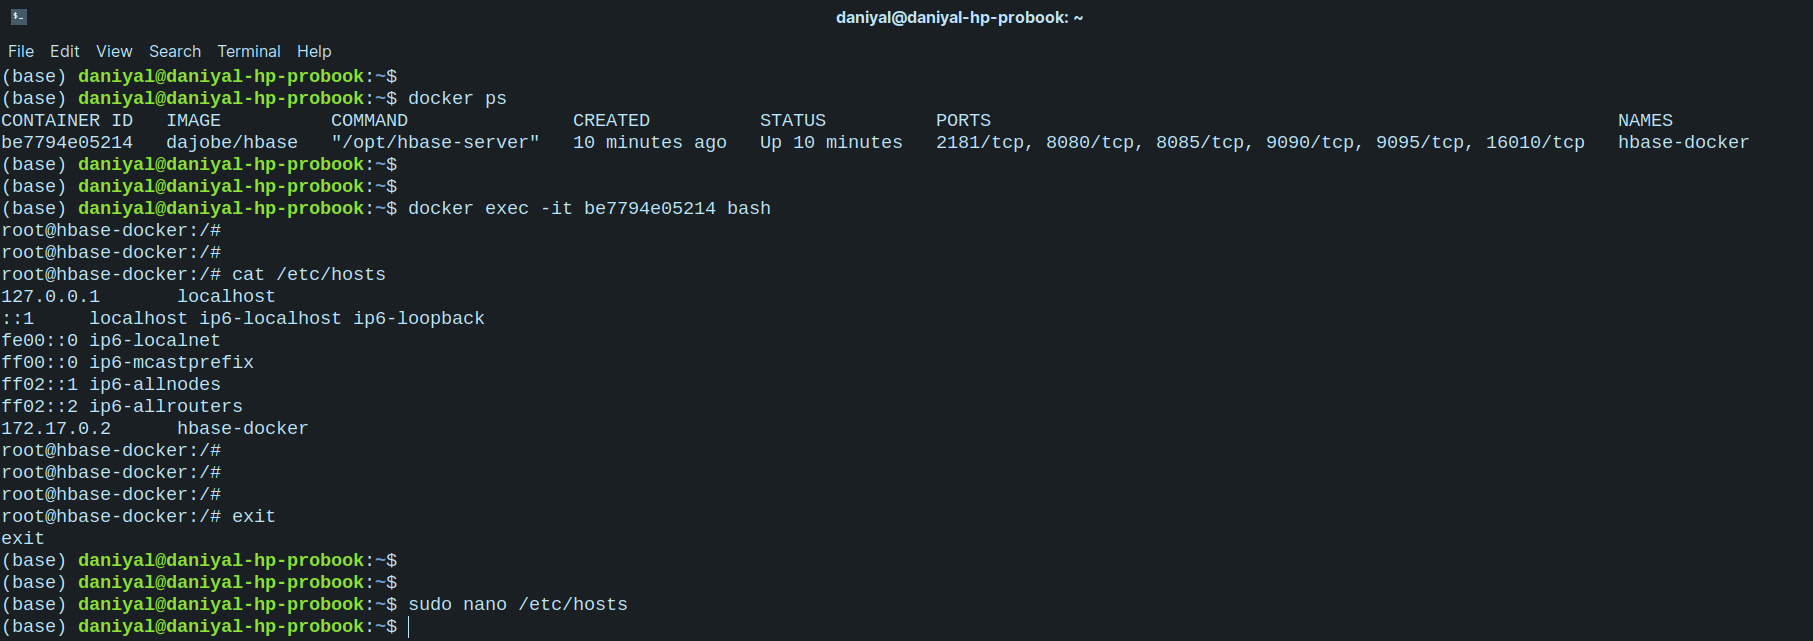
You need to bash into HBase Docker container. I have shown you how to do that here. Once you are inside the container, execute this command:
cat /etc/hosts
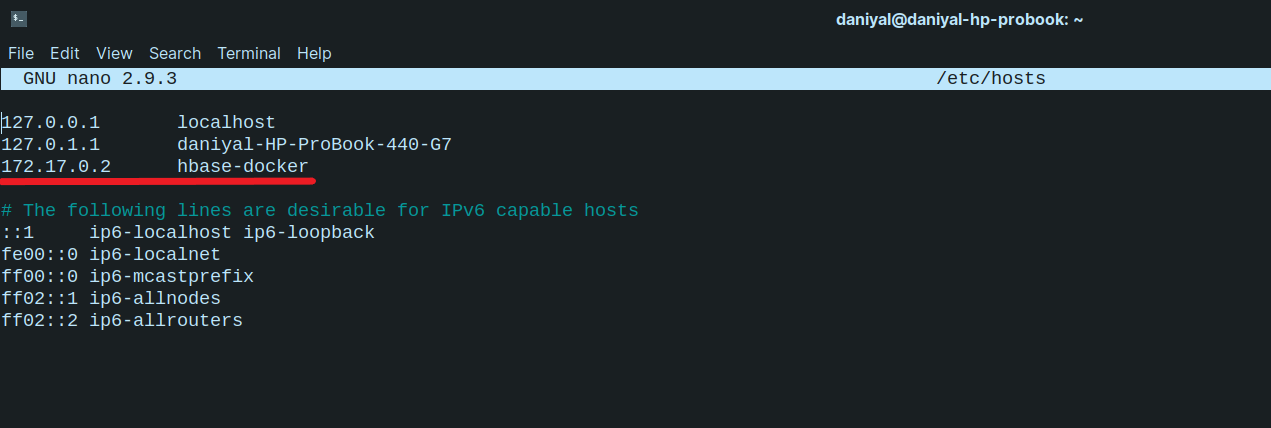
Copy the line where it shows the IP address and the hostname. Open up a new terminal in your host machine or exit the previous one. Now you will open up the same file of your host machine in a text editor, so you can paste what you had copied before:
nano /etc/hosts
P.S. if you don’t have nano installed, then simply install it. (Command for Ubuntu-based distro: ‘apt install nano -y’)
Now, at the bottom of this file, paste the hostname and IP address of the container that you copied earlier. Refer to the image shown below:
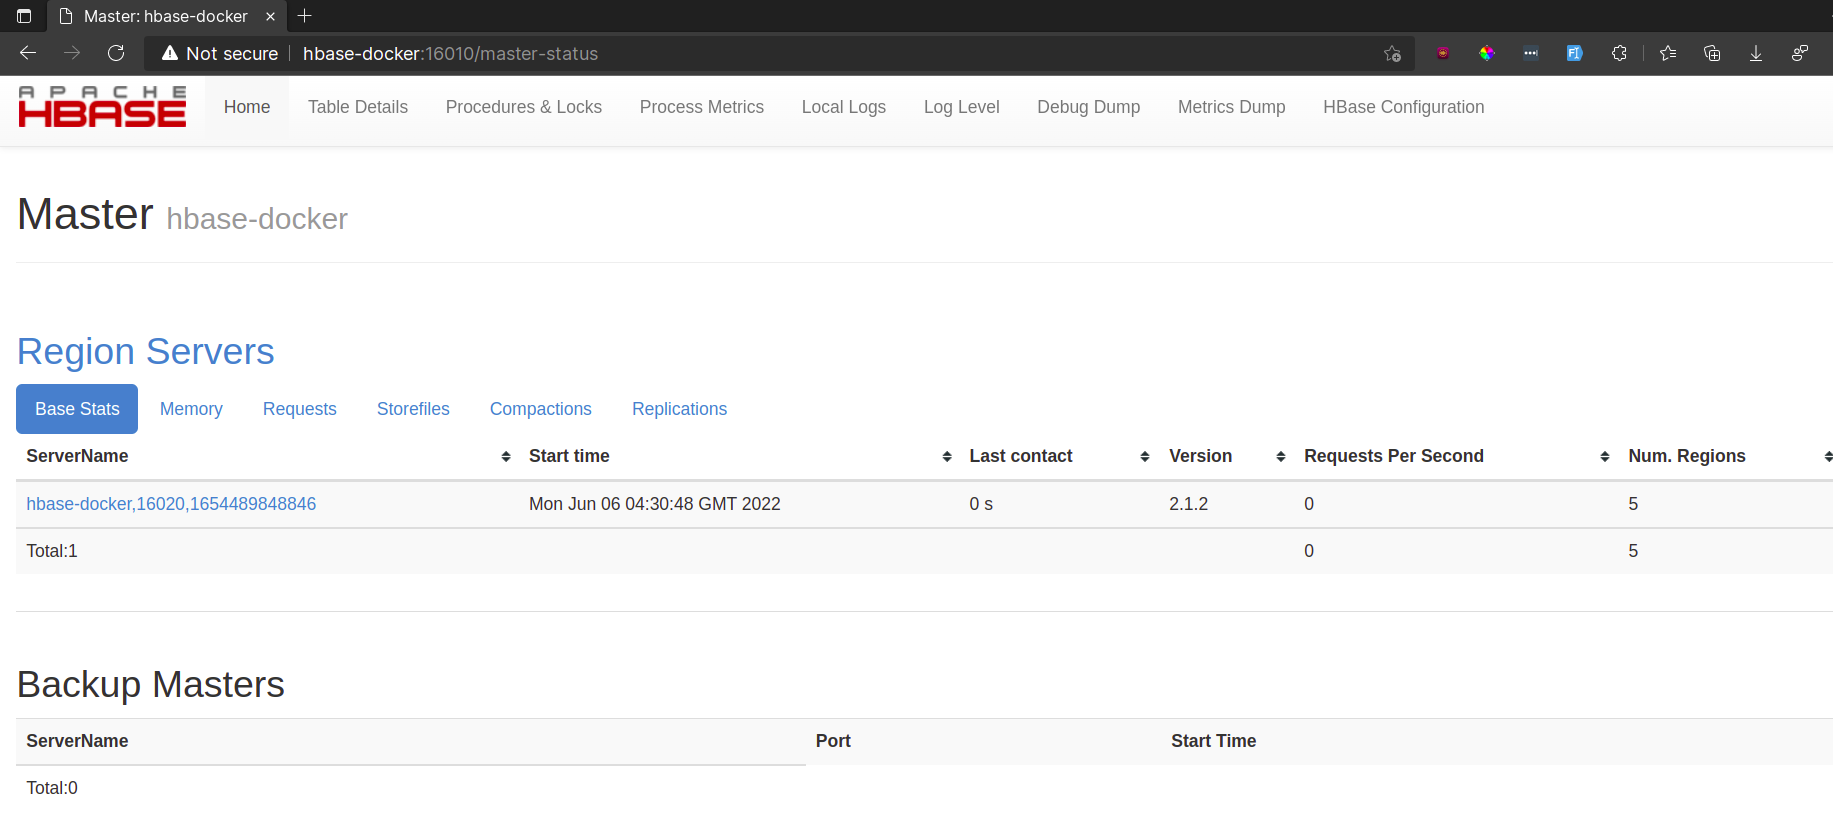
Now you can access the Docker HBase service on your localhost machine. To verify, open a browser and go to this URL: http://hbase-docker:16010
STEP 3: Connect HBase Through Python HappyBase Library
Earlier we started the HBase service using Docker and then linked the container hostname and IP address to our local machine. Now, we can finally see how to connect HBase with python. Later we may even check out some HBase examples as well using a 3rd party library known as HappyBase Python.
First thing first, let’s create a file name “hbase_api.py” and open it in a text editor. I prefer Visual Studio Code. Next, copy and paste the following code into it.
					import happybase

connection = happybase.Connection('hbase-docker', port=9090, autoconnect=True)

# FETCHING LIST OF ALL TABLES IN DB
def fetch_table():
    return connection.tables()
This is it. What we have done here is, that we’ve basically used the HappyBase Python library so that we can connect HBase with Python and communicate with it. Hence, Python HappyBase Connection is done by importing the library first and then using its connection method to mention the port to which the HBase service is available.
Note: happybase connection is done NOT with the HBase server, rather than the Thrift Server. And hence whichever port the Thrift Server is running on, we will mention that in the happybase connection method.
The function “fetch_table()” is used to fetch all the tables created in the HBase database. To learn more about python happybase example or hbase examples then checkout this article.
FAQ
As mentioned here:
“HBase provides a dual approach to data access. While it’s row key based table scans provide consistent and real-time reads/writes, it also leverages Hadoop MapReduce for batch jobs. This makes it great for both real-time querying and batch analytics. Hbase also automatically manages sharding and failover support.”
Yes. HBase is an open-source NoSQL database that follows a columnar format for storing large data.
- Hadoop is a collection of software tools, whereas HBase is a NoSQL database working on top of Hadoop.
- Data is stored in broken down into chunks before storing using Hadoop. But HBase stores them in key-value pairs for faster query processing.
- HDFS is accessed and managed through MapReduce functions. HBase can be handled using shell commands and REST API methods as well.
Docker is used for running isolated applications or services in a compact container, with a very minimalistic list of dependencies, to be deployed on a server machine.
As mentioned in their official documentation:
“Docker uses a client-server architecture. The Docker client talks to the Docker daemon, which does the heavy lifting of building, running, and distributing your Docker containers. The Docker client and daemon can run on the same system, or you can connect a Docker client to a remote Docker daemon. The Docker client and daemon communicate using a REST API, over UNIX sockets or a network interface. Another Docker client is Docker Compose, which lets you work with applications consisting of a set of containers.”
Mirantis, a cloud computing company acquired Docker in 2019.
And that’s a wrap!
I hope this tutorial helped you learn about what is HBase and how to connect HBase with Python. Feel free to leave a review in the comment section below.
Have a great one!
Recent Comments
Categories
- Angular
- AWS
- Backend Development
- Big Data
- Cloud
- Database
- Deployment
- DevOps
- Docker
- Frontend Development
- GitHub
- Google Cloud Platform
- Installations
- Java
- JavaScript
- Linux
- MySQL
- Networking
- NodeJS
- Python
- Python Flask
- Report
- Security
- Server
- SpringBoot
- Subdomain
- TypeScript
- Uncategorized
- VSCode
- Webhosting
- WordPress
Search
Recent Post
Understanding Linux Scheduling Algorithm: A Comprehensive Guide
- 13 June, 2023
- 3 min read
How to add routing in Angular
- 9 May, 2023
- 4 min read
What is Data at Rest in Cloud
- 13 March, 2023
- 2 min read


