In this article, I will show you step by step how to install WordPress on a Subdomain in your Webhosting server. As you probably already know, WordPress is a very popular Content Management System (CMS) in the market. With more than 30% of websites made on this platform. And today we will be going through all the configurations in setting it up on a subdomain from scratch. we will be covering the following steps:
Prerequisites!
- Must have a Webhosting server
- Subdomain should already be created (Check out on how to create one)
Table of Content
- Uploading WordPress files onto the Subdomain
- Extracting WordPress files in Subdomain’s root directory
- Creating a database for our website
- Configuring WordPress on your Subdomain
STEP 1: Uploading WordPress Files onto the Subdomain
Firstly, we need to download WordPress files from its official page here.
After downloading it, we need to upload this file to the root directory of the subdomain. For that, you need to open up your cPanel and then open File Manager and locate your subdomain’s root directory.
NOTE: If you’re having trouble so far, I suggest you have a look here. I’ve already explained much of the steps in detail here.
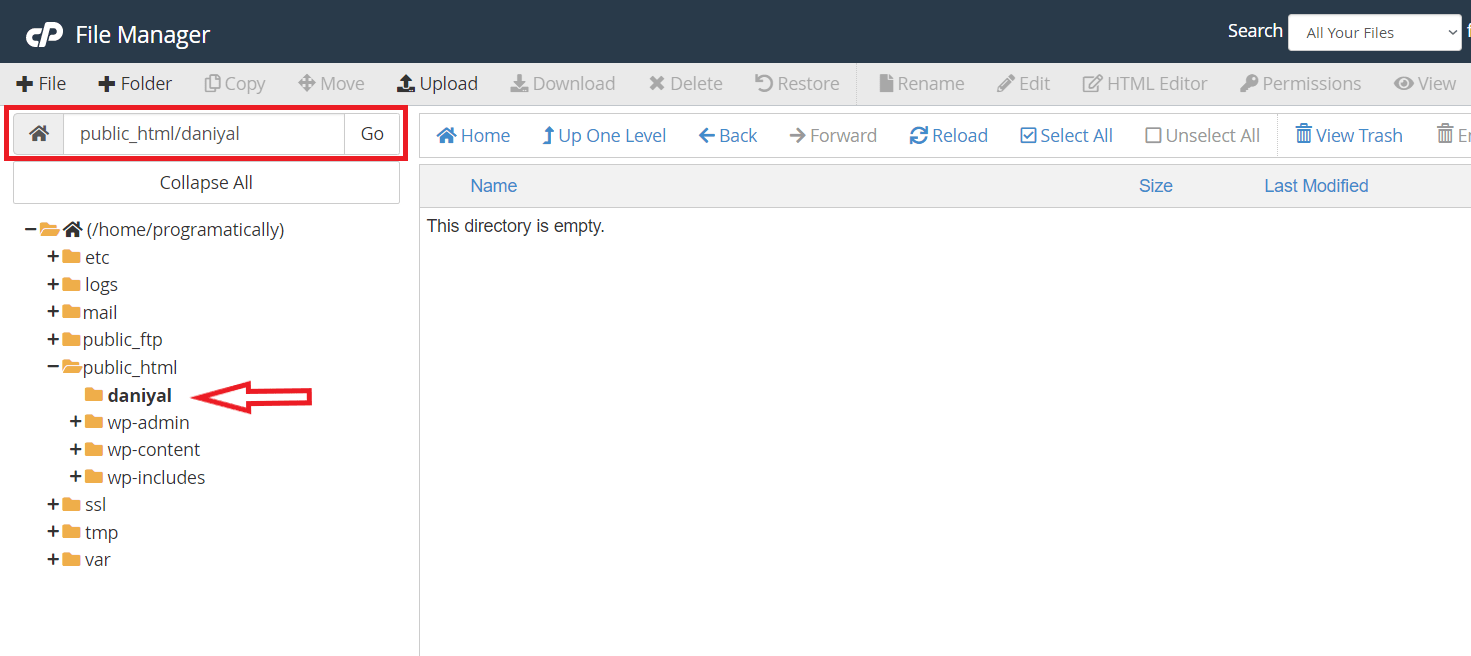
Moving on, I’ve made a subdomain with my name “daniyal.programatically.com”. The below pictures show the root directory of my Subdomain. It’s where we will keep the WordPress file we just downloaded.
Therefore, click on the ‘upload’ button at the top bar. Browse the WordPress file you just downloaded so that it can be uploaded to this webserver. Once it’s uploaded, you can now extract it here; which leads to our next step.
STEP 2: Extracting WP Files in Subdomain Root Directory
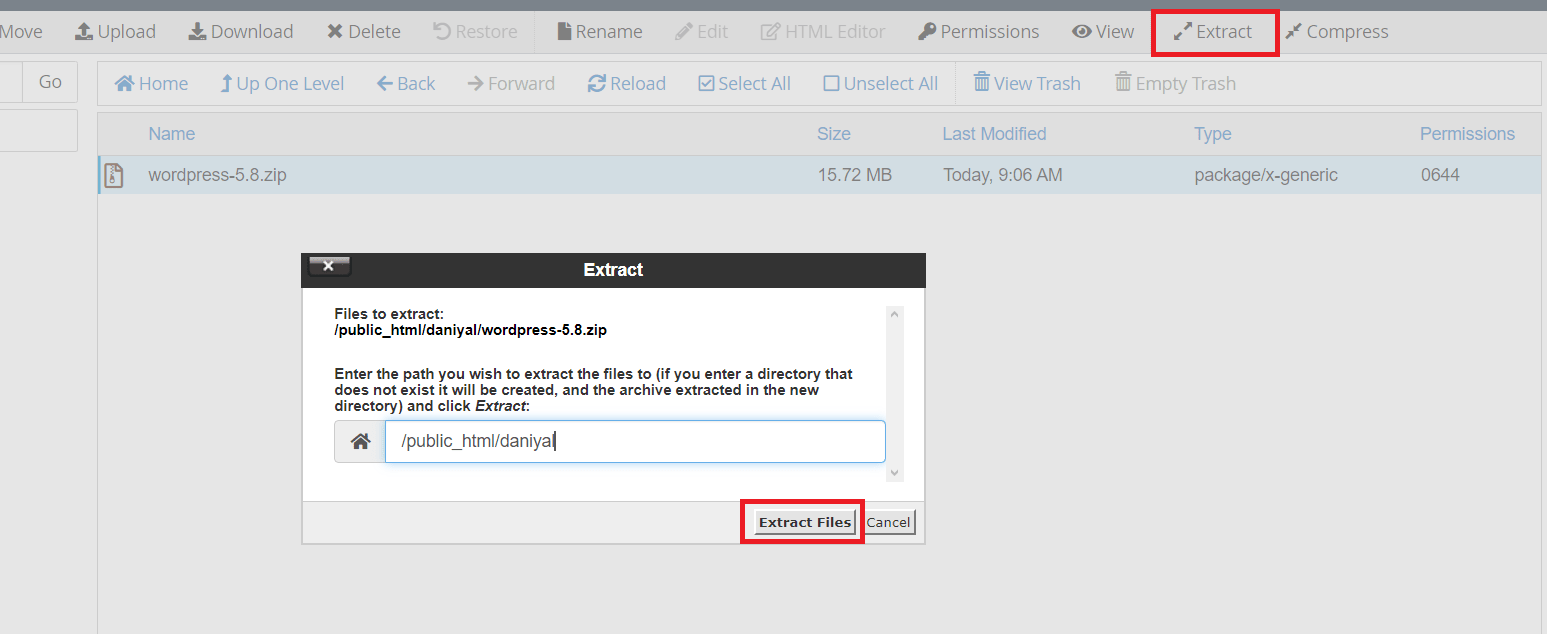
To extract the uploaded zip file, single click on the file. This will highlight some of the buttons at the top bar, including the ‘Extract’ option. Click on that and just press the ‘Extract Files’ button. This will extract the zip file in the current folder, which we want. Take reference from the image below:
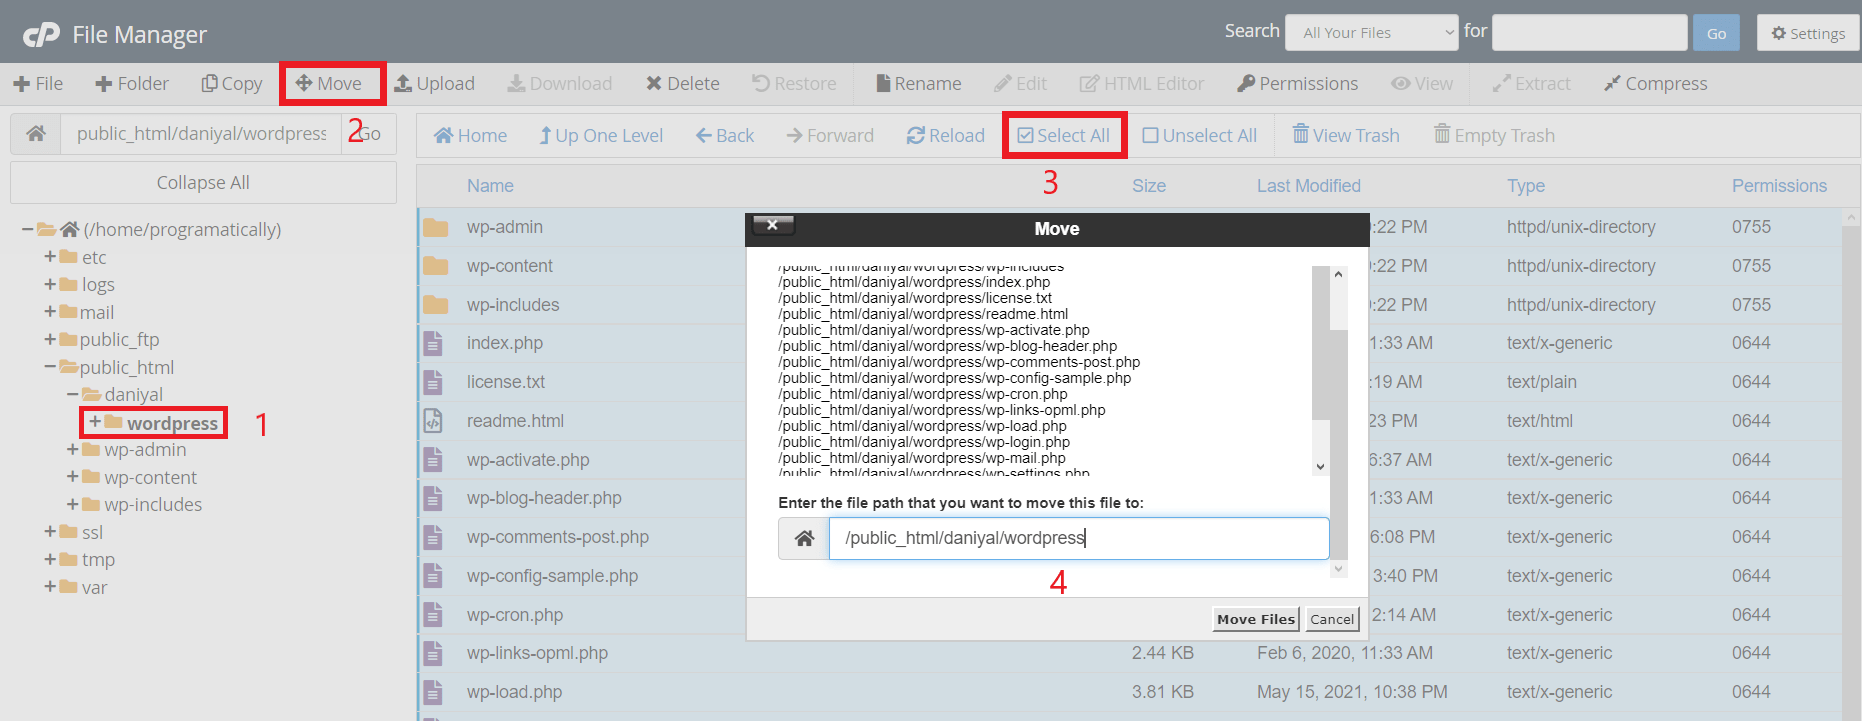
This will extract a folder named ‘wordpress’ containing all the files. However, we now need to move all the files inside that ‘wordpress’ folder into the current directory (outside the ‘wordpress’ folder). Therefore, go inside the folder and select all the files in there. Then select the ‘Move’ from the top bar as shown in the image below:
In the popup window you will have to add the destination path for the files to move at. By default, the current directory path would be written. Just remove the last word ‘wordpress’. This will make the correct path to be ‘public_html/daniyal’. Then click ‘Move Files’.
This will empty the current folder and move all the files to the previous folder.
STEP 3: Creating Database & Assigning Privileges
Moving on, you now need to create a MySQL database, which we will link to our website. So, go to your cPanel and open up MySQL Database like so:
Now create a new database by giving it a name and then click on ‘Create Database’ as shown in the image below:
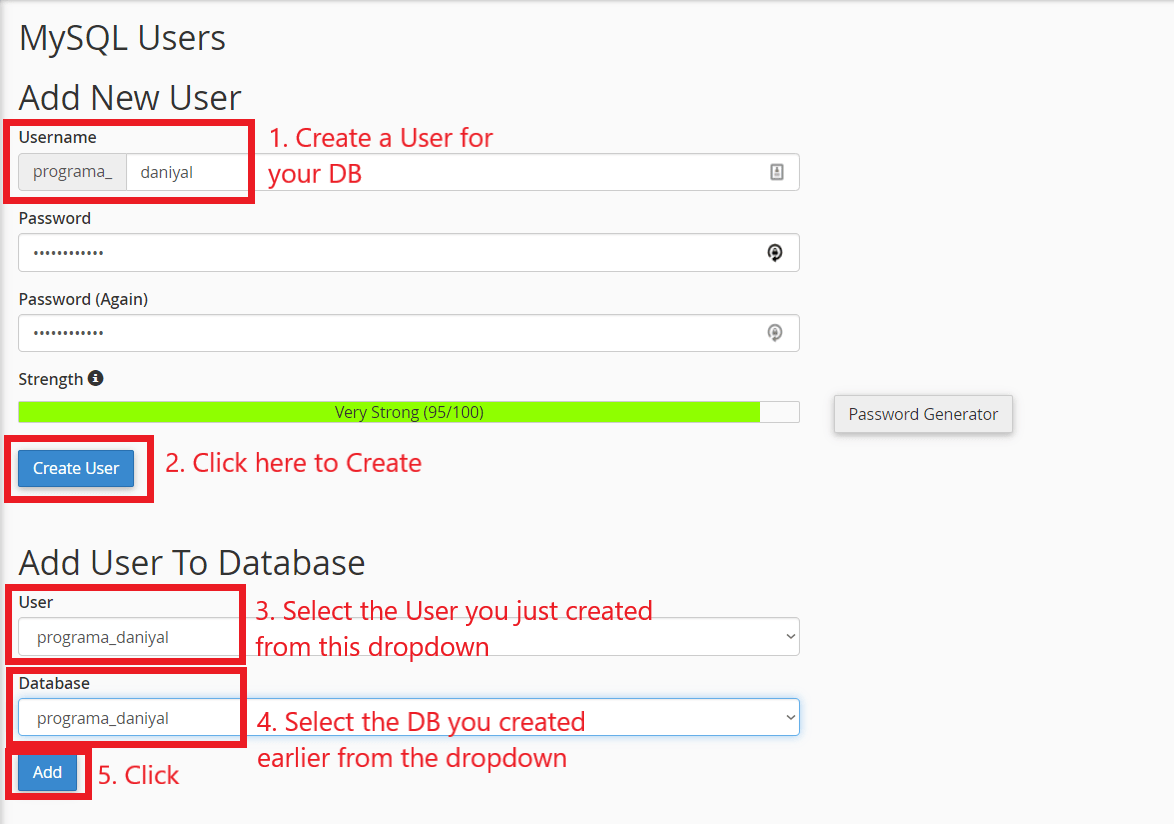
After creating the database, now you would have to create a user and give it privileges. Then assign that user to the database you created. Just Scroll down at the bottom of the same page and then follow the steps shown in the image below:
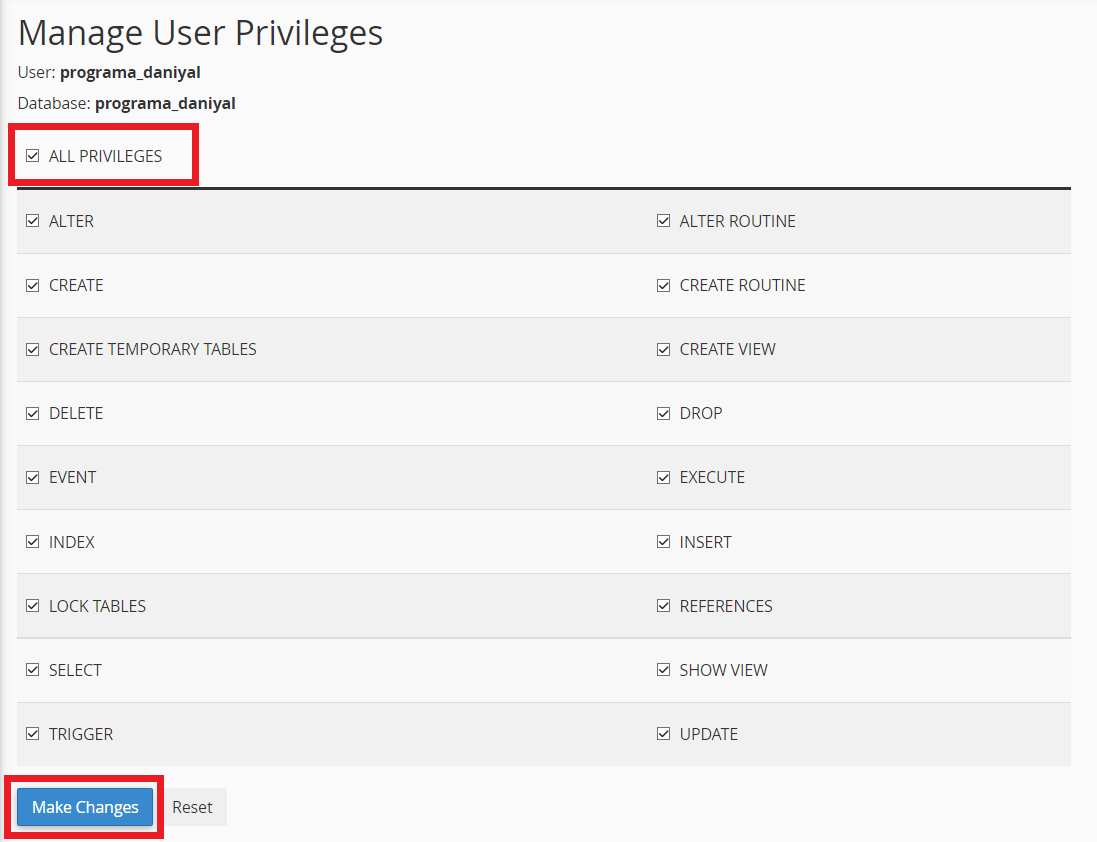
Firstly, you have to add a username and give it a strong password, and then hit the ‘Create User’ button. After the user has been created, you need to assign that user to the database which you created earlier. So, in step 3 and 4, you need to select both the user and the database you just created and then click the ‘Add’ button. This will take you to another page where you will assign the user its privileges as shown in the image below. Just assign all rights and hit ‘Make Changes’.
STEP 4: Configuring WordPress on Our Website
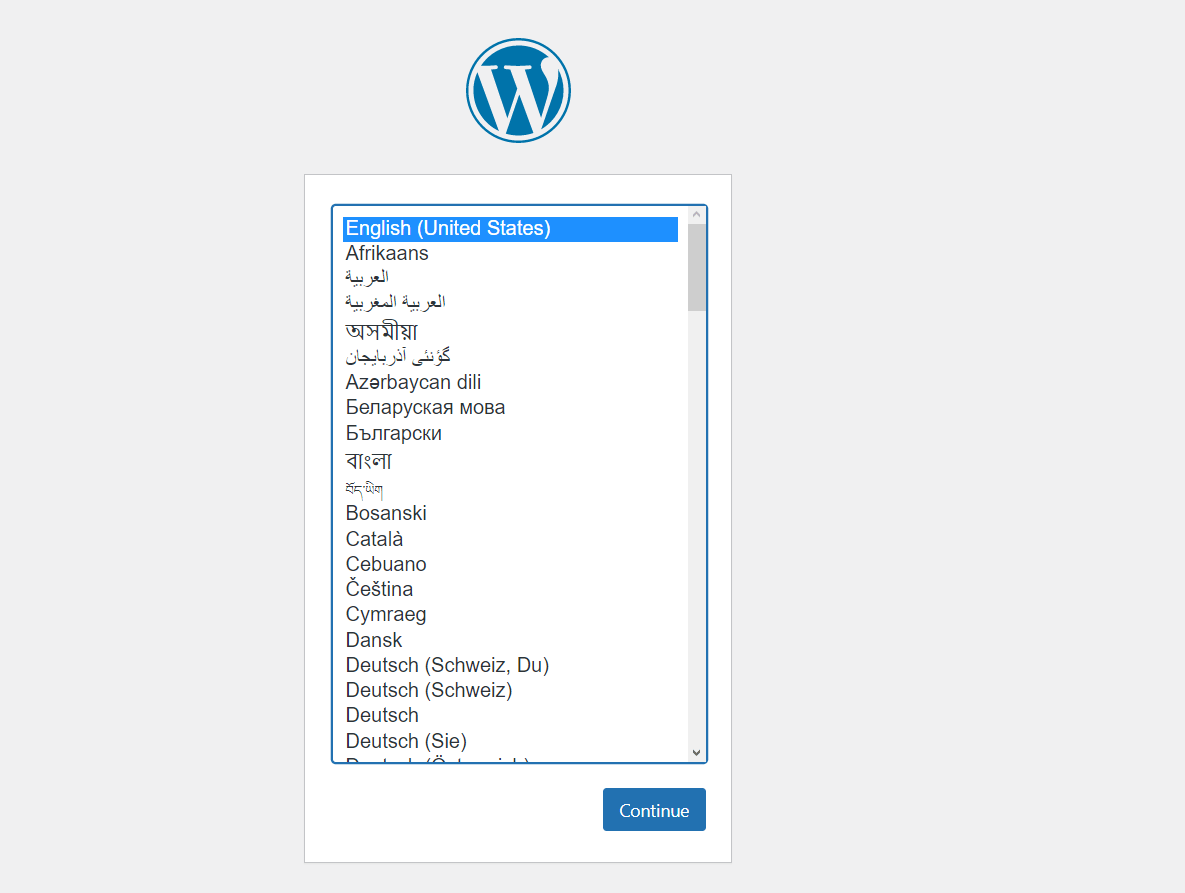
To begin with, simply search this URL ‘https://programatically.com’ in the browser, and let’s start setting up our WordPress site. It will show you the setup config page of WordPress like so:
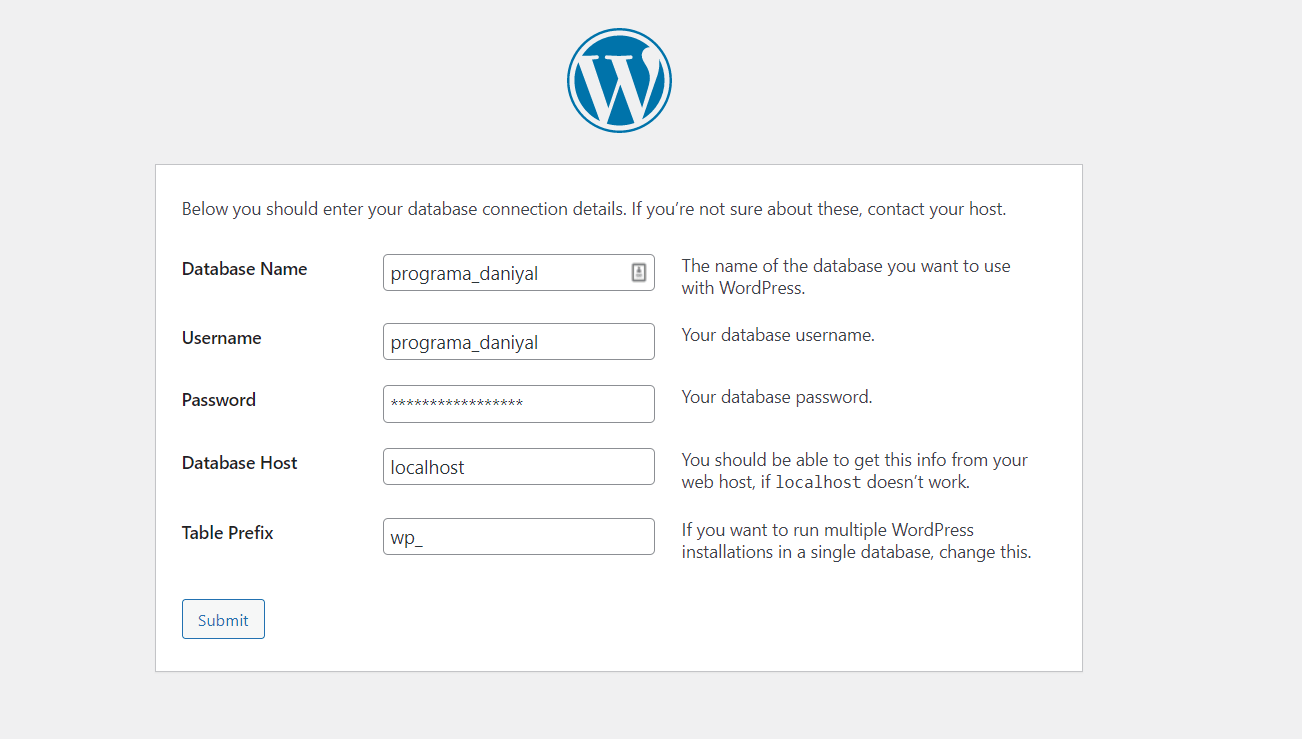
If you can see the page then that means so far, you’ve been going correctly. Please select the language that you prefer and click ‘Continue’. After that you’ll be prompted another page, just click on the button at the bottom that says, ‘let’s go’. Then you’ll be shown a page where you will be asked to connect your database to the website. Just fill in the details that we used while creating our database earlier. Take reference from the image below.
Just leave Database Host and Table Prefix with the default value that it already has. After that click on submit button. If you inserted the DB credentials correctly, it’ll take you to another page where you’ll be asked to ‘Run the installation. Just click on that button it prompts up.
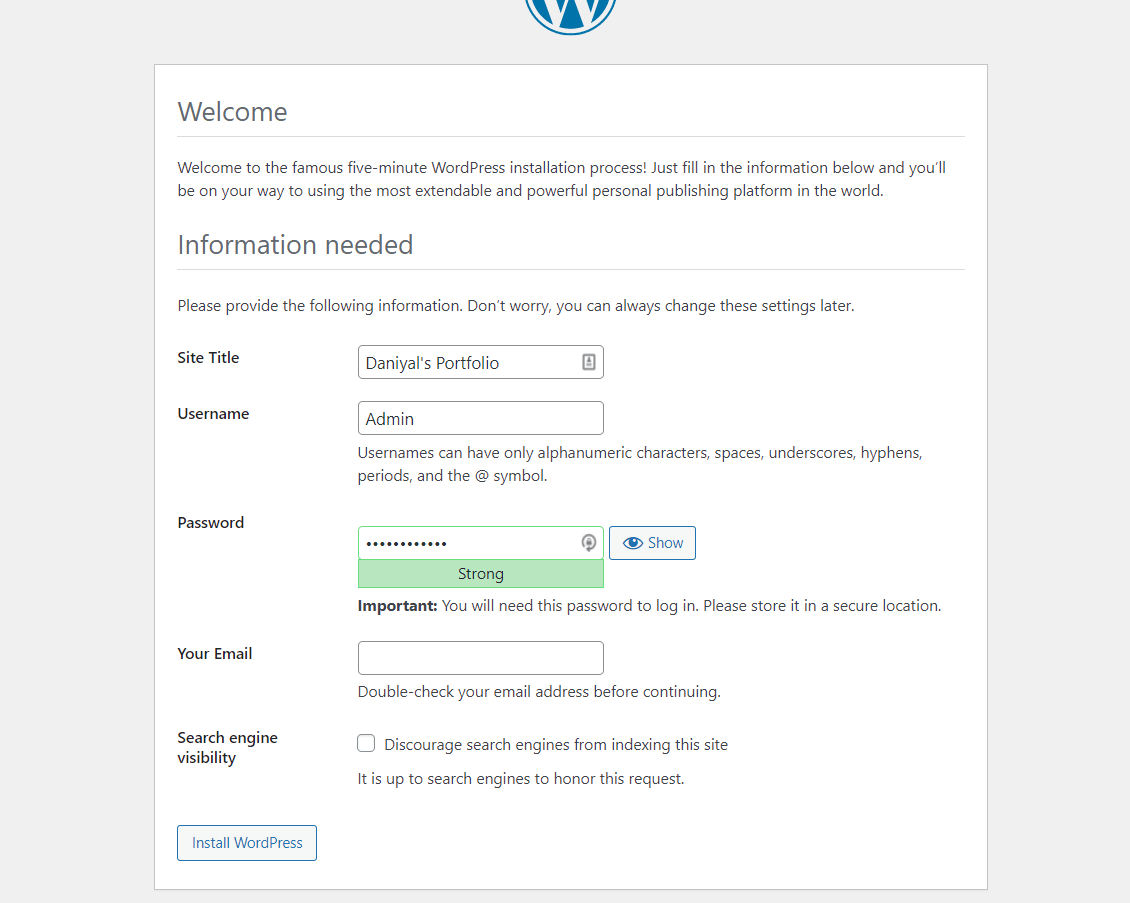
The Site Title can be anything you want it to be. The Username and Password are different from the previous one you entered. That was your DB username, whereas this is the username and password for accessing your WordPress website backend. So, enter your credentials carefully and obviously keep them safe. You can add your Email so that WordPress would notify you of all details happening on your site. You can change this later if you want. After that, click on ‘Install WordPress’.
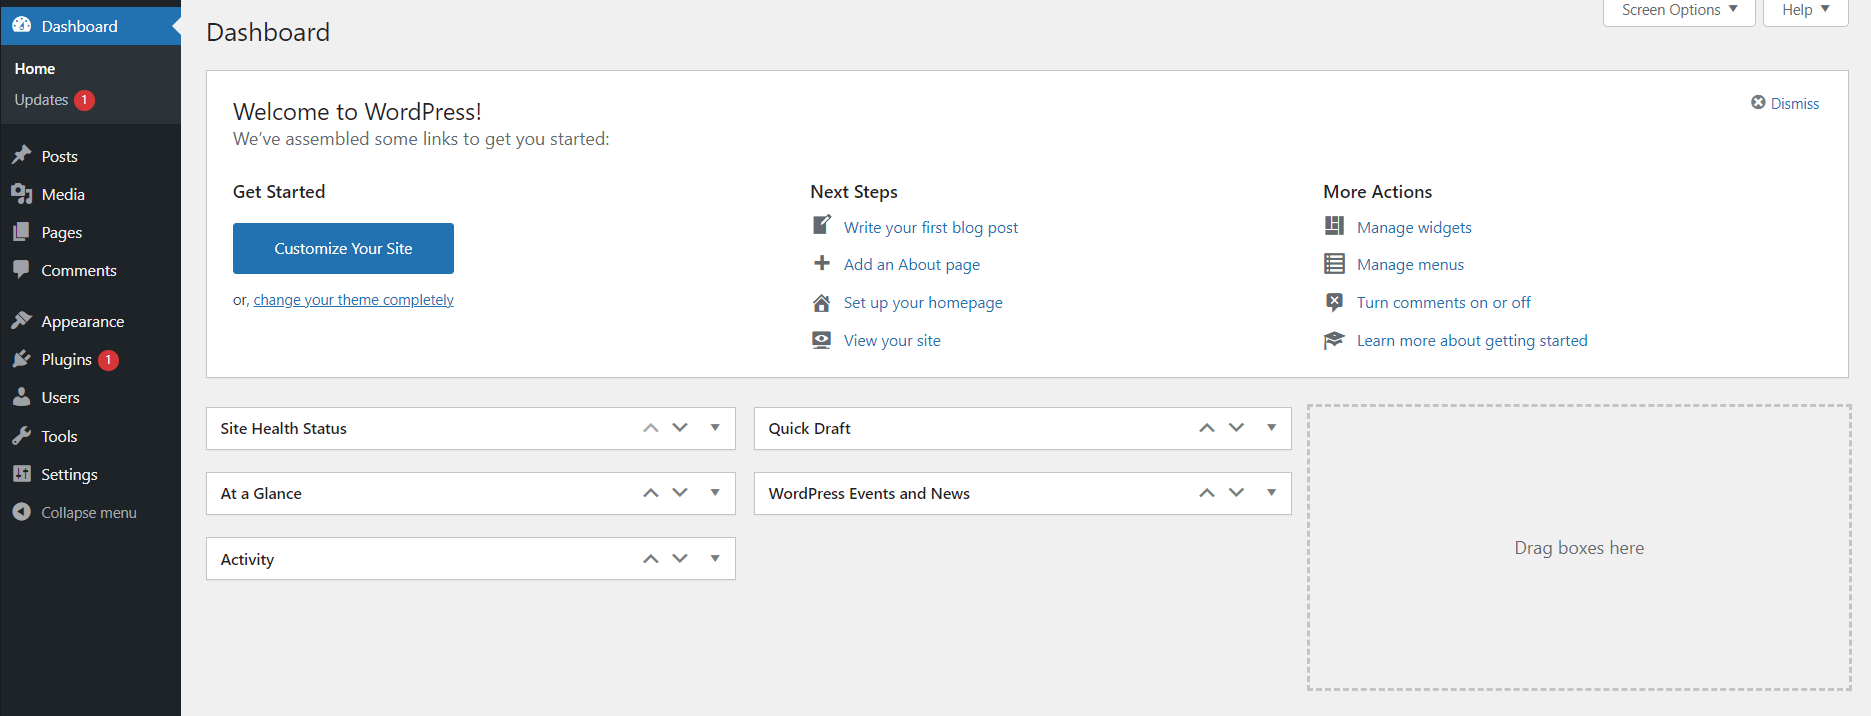
And that’s all! You’re done with all the configurations. Afterward, you’ll be taken to your WordPress dashboard like so:
Hence, if you enter your URL in the browser again, “https://programatically.com”, you’ll be taken to your running website.
Now it’s your turn to set up your website to make it look and present the way you want it. Install Themes and Plugins and go wild in development phase!
And that’s a wrap!
I hope you found this article helpful. Now you would know how to install WordPress on a subdomain. If so, then please leave your reviews in the comments below. Take care and have a great one!
Recent Comments
Categories
- Angular
- AWS
- Backend Development
- Big Data
- Cloud
- Database
- Deployment
- DevOps
- Docker
- Frontend Development
- GitHub
- Google Cloud Platform
- Installations
- Java
- JavaScript
- Linux
- MySQL
- Networking
- NodeJS
- Operating System
- Python
- Python Flask
- Report
- Security
- Server
- SpringBoot
- Subdomain
- TypeScript
- Uncategorized
- VSCode
- Webhosting
- WordPress
Search
Recent Post
Understanding Mutex, Semaphores, and the Producer-Consumer Problem
- 13 October, 2024
- 10 min read
Process scheduling algorithm – FIFO SJF RR
- 14 September, 2024
- 8 min read
How to Implement Multithreading in C Language
- 8 September, 2024
- 9 min read
