Hey developers! In this article, we will see how to set up autocomplete in Angular HTML form for chrome. We are going to run an Angular Project with a general HTML form containing a few typical fields. Then we will see how to enable and disable autocomplete for those fields. We will also check out the specific autocomplete values that you would expect. So, without any further delay, let’s get into it.
Prerequisites
- Should have Angular project running (Learn How)
Table of Content
- Adding Autofill content in Chrome
- Running an Angular Project with HTML Form
- Enable and Disable Autocomplete in HTML Form
STEP 1: Adding Autofill Content in Chrome
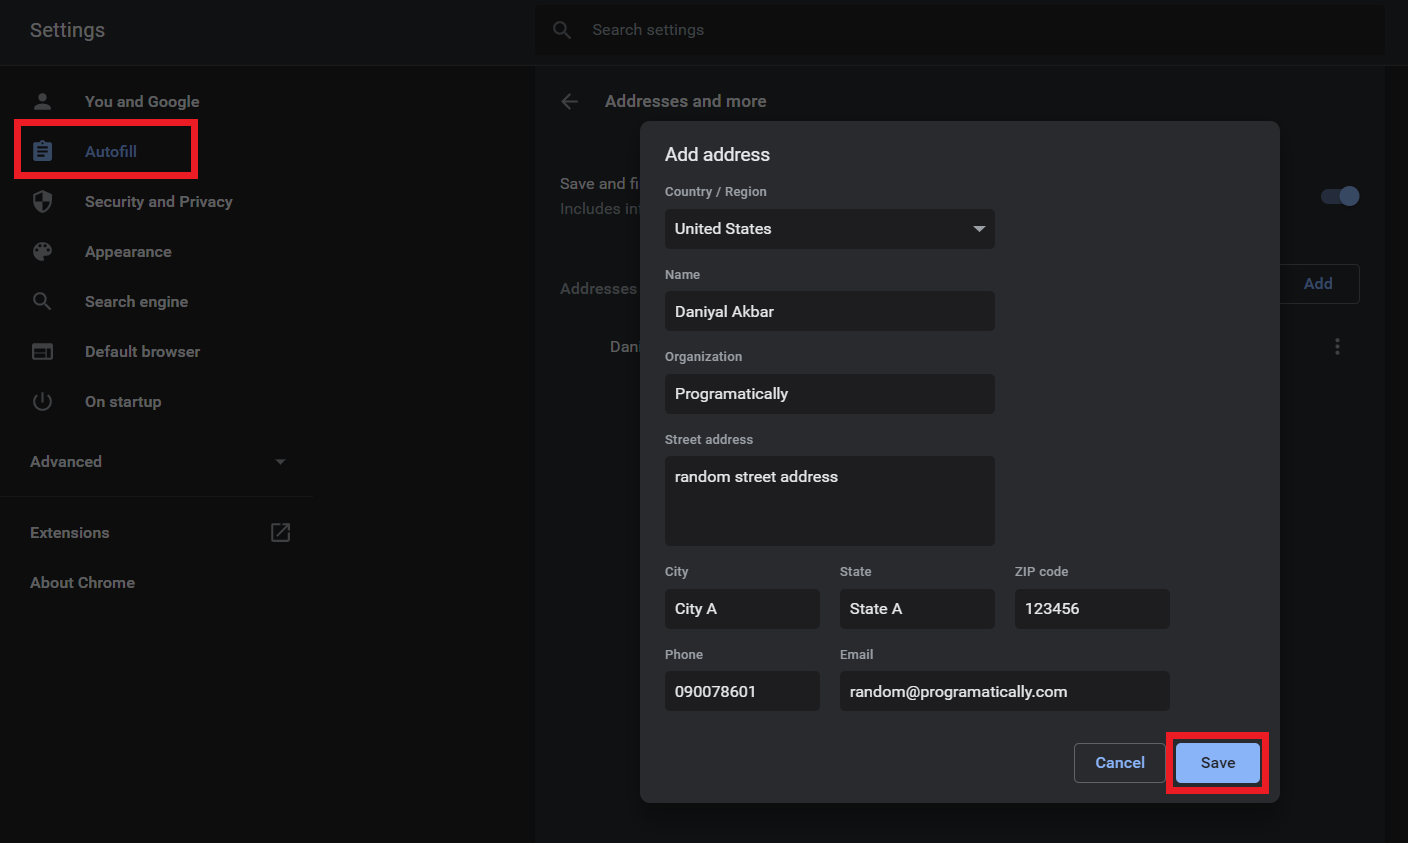
Firstly, we will add a few autofill contents in the chrome browser so that chrome has something to suggest for the autofill. For this, go to Settings > Autofill > Addresses and more.
Here you click on Add button and start filling random values in the fields that it shows. Take reference from the image below. Once done, click on save. Now we move to our next step.
STEP 2: Angular Project with HTML Form
As mentioned earlier in the prerequisite, you should have a basic Angular project up and running. If you’re having problems with that, check out this article to create Angular project from scratch. Next, you need to create a basic HTML form with a few fields. So, simply copy the following HTML form in “app.component.html” file in Angular.
					<form action="/action_page.php" method="get">
  <label for="fname">First name:</label>
  <input type="text" id="fname" name="name"><br><br>
  <label for="email">Email:</label>
  <input type="text" id="email" name="email"><br><br>
  <label for="adress">Address:</label>
  <input type="text" id="address" name="address"><br><br>
  <input type="submit">
</form>
Then simply start your Angular Project with this command:
ng serve
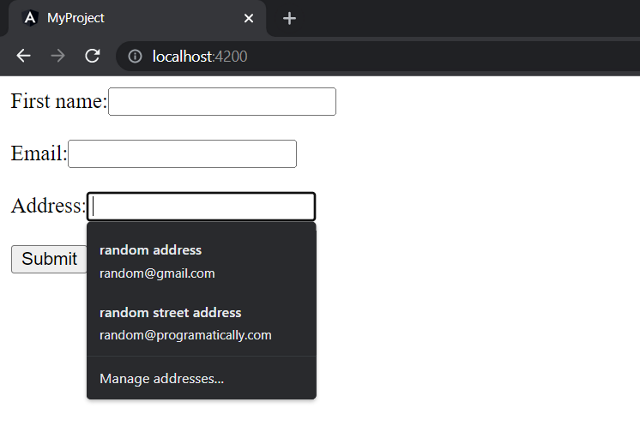
This should be the output on your browser as shown in the image below. In the image, the autofill is also shown.
STEP 3: Enable/Disable Autocomplete in Chrome
1) Enable Autocomplete in HTML Form
As shown earlier, we only had to add the autofill content in Chrome for it to show us autofill suggestions. By default, autocomplete feature is enabled in every HTML form.
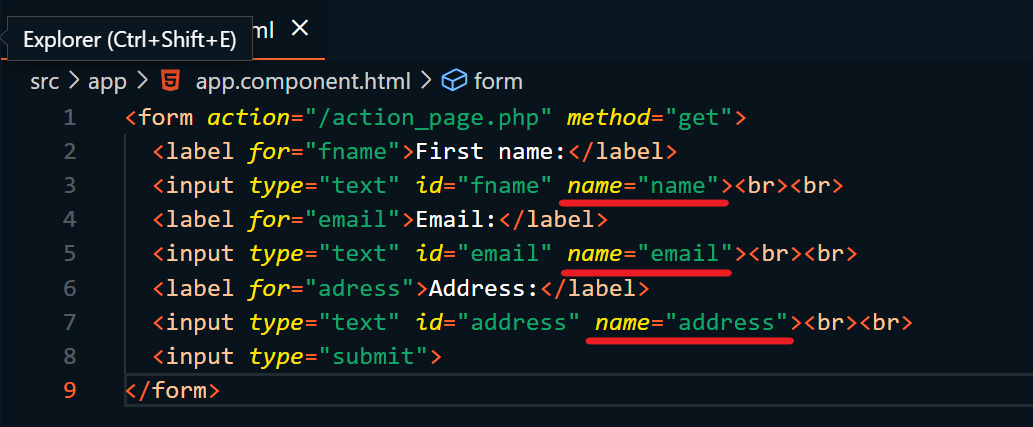
However, there is one thing you need to make sure of. You need to add the ‘name’ attribute for each of the input fields in HTML form. With the name attribute, the browser identifies the type of suggestions to give for that field. And it would only give suggestions according to the Autofill Content that we’ve added in Step 1. Take reference from the image below:
2) Disable Autocomplete in HTML Form
There are 2 ways to disable autocomplete in HTML form. First is the proper way but sometimes, it might now work for some frameworks. So, let’s check them out.
A) Method #1:
autocomplete='off'
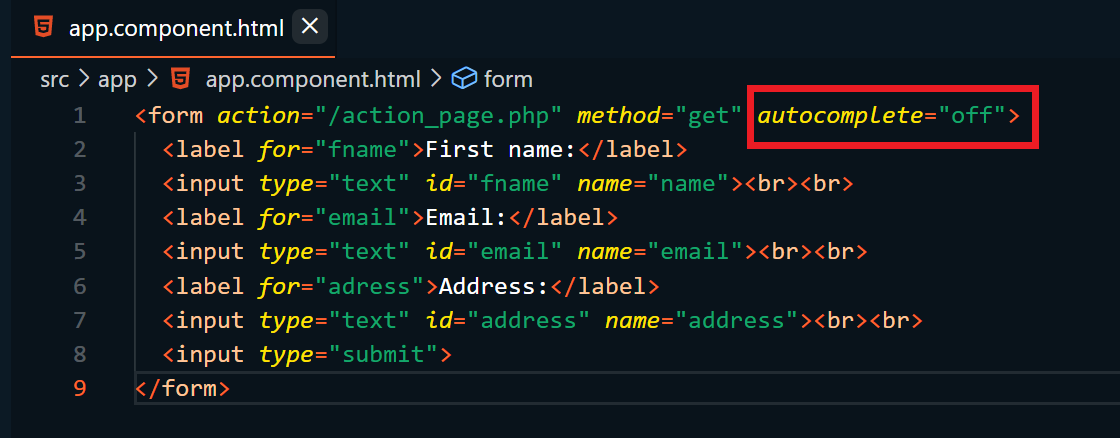
Simply add autocomplete=’off’ in the form tag in your HTML. See the image below.
The above method will disable autocomplete for ALL the input fields in the form. But if you want to disable autocomplete for a specific input field only, then add the autocomplete=”off” code for specific fields as shown below.
B) Method #2:
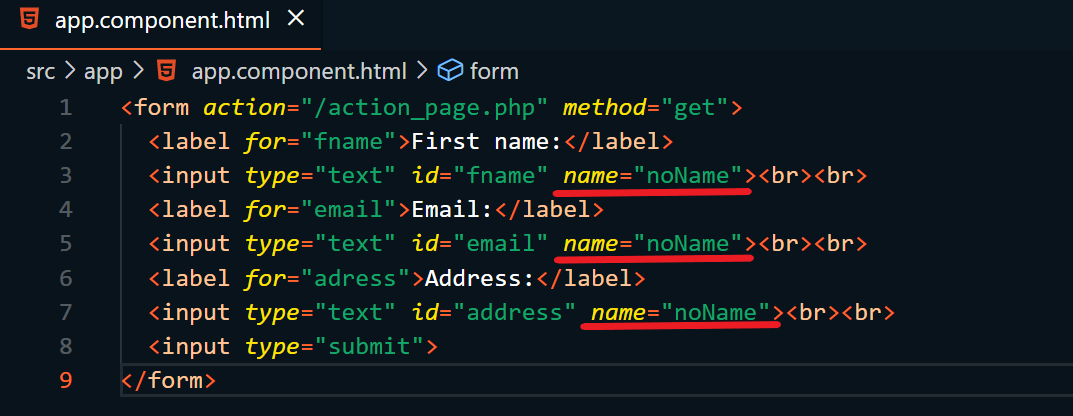
This is kind of a hack for disabling the autocomplete feature in chrome. You can do this by simply giving a random value to the ‘name’ attribute of your input fields. As mentioned in the 1st method when we were enabling autocomplete. The autocomplete is triggered when it identifies the type of input filed. And it does that with the ‘name’ attribute.
So, logically speaking, if we give an input field a faulty name, then the chrome autocomplete would not trigger. So basically, this hack is not disabling the autocomplete feature. It’s simply making the browser ignore the suggestion for the input field. As it would not understand that type of suggestions to give. And it can only suggest according to the Autofill content that we added in Chrome in step 1. Check the image for reference.
That’s a wrap!
I hope this article helped you figure out exactly how to enable or disable autocomplete in HTML form. I hope it made you confident enough to start using this in your next project. Please leave your reviews in the comment section below.
Have a great one!
Recent Comments
Categories
- Angular
- AWS
- Backend Development
- Big Data
- Cloud
- Database
- Deployment
- DevOps
- Docker
- Frontend Development
- GitHub
- Google Cloud Platform
- Installations
- Java
- JavaScript
- Linux
- MySQL
- Networking
- NodeJS
- Operating System
- Python
- Python Flask
- Report
- Security
- Server
- SpringBoot
- Subdomain
- TypeScript
- Uncategorized
- VSCode
- Webhosting
- WordPress
Search
Recent Post
Understanding Mutex, Semaphores, and the Producer-Consumer Problem
- 13 October, 2024
- 10 min read
Process scheduling algorithm – FIFO SJF RR
- 14 September, 2024
- 8 min read
How to Implement Multithreading in C Language
- 8 September, 2024
- 9 min read
