Hey developers! In this article, we are going to see how to create header and footer in WordPress using Elementor plugin. We will not be using anything paid. Everything will be freely available on WordPress. We will design a custom header and footer using a free plugin for Elementor and replace it with the default one. So, let’s begin.
Prerequisite
- Should be familiar with WordPress architecture
Table of Content
- What is Elementor?
- Installing Elementor plugin in WordPress
- Creating WordPress Template using Elementor
- Custom design header and footer using Elementor
- Conclusion
- FAQ
What is Elementor?
Elementor is a free page builder plug-in on WordPress, that is used for designing your website frontend pages. It has a wide range of widgets and services. It provides the convenient feature of a drag-and-drop option for various functionality and widgets on your web pages. Making it very efficient and blazing fast to design your pages. And of course, it also supports responsiveness for Mobile, Tablet, and Desktop mode. It also has a paid version, which provides a plethora of more features. But for this article, we won’t be needing it.
Step 1: Installing Elementor plugins in WordPress
First thing first, we need to install Elementor Free version plugin, along with that, for the header and footer, we would need another Elementor plugin. Let’s see how to do that.
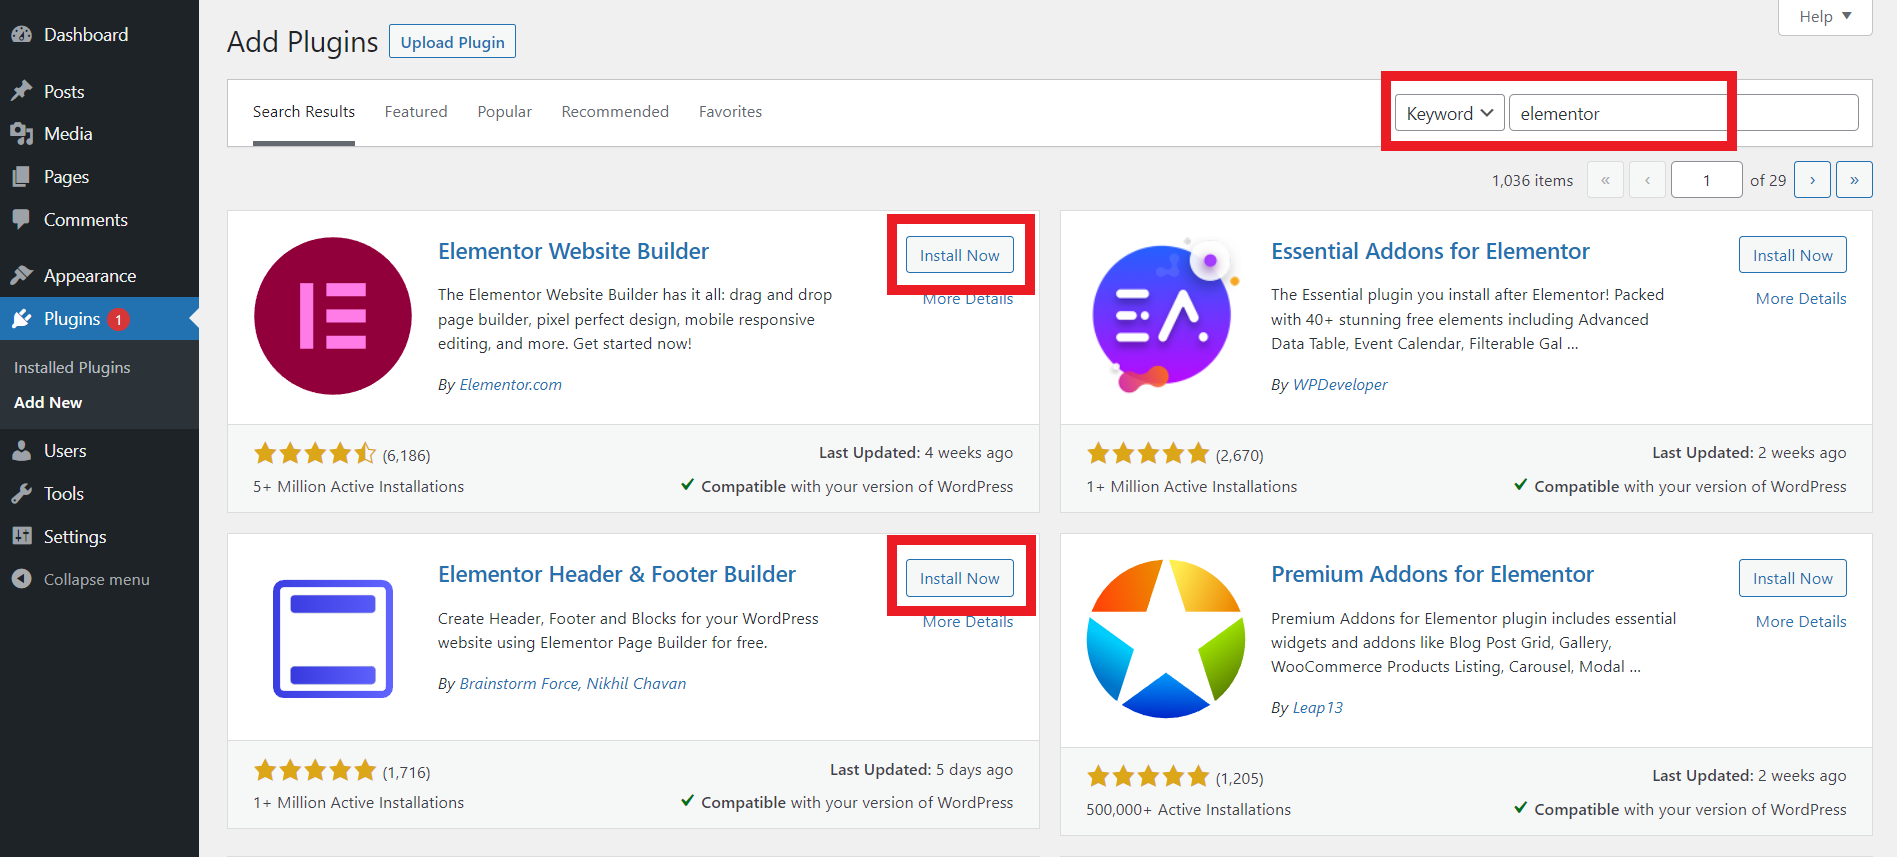
Simply go to Plugins > Add New > Search plugins
Search for Elementor. This will show a few relevant plugins, install and activate 2 of these.
- Elementor Website Builder
- Elementor Header & Footer Builder
Take reference from the image below:
Step 2: Creating WordPress Template using Elementor
Afterward, we will create an Elementor template on WordPress where we would be designing our Header and Footer. Later, which will be used as the official templates for header and footer on the website.
To create a template, go to Appearance > Elementor Header & Footer Builder > Add new.
Next, we will be configuring our template before we start designing. Make sure that the following settings are enabled and set.
- Add a title to the template at the top
- Set “Type of Template” > “Header”
- Set “Display On” > “Entire Website”
- Set “User Roles” > “All”
Then finally click on Edit with Elementor button to start with designing. Take reference from the image below:
*Note: You would repeat exactly the same steps for Footer Template, only change “Type of Template” > “Footer”.
Step 3: Custom Designing Header and Footer Using Elementor
Finally, we are on the good stuff. The actual designing part of the Header and Footer. Note that, I will just be showing you my version of the header and footer designs. Which is just for learning purposes. You can change the layout and features as per your liking of course. So, let’s get to it!
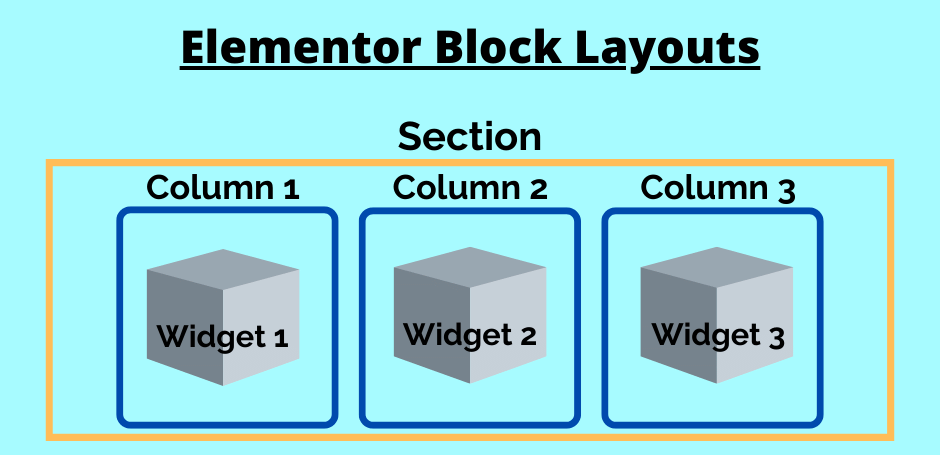
But first, you need to know about the structure and layout of how Elementor works.
So, as you can see from above, we will have 1 section and 3 columns inside of it. Since we have to add 3 different widgets, we have 3 columns to put them inside of. The 3 widgets would be the logo, the nav menu, and the search bar.
Designing Header
We are going to add 3 simple components to our Header.
- Website Logo
- Navbar Menu
- Search Tab
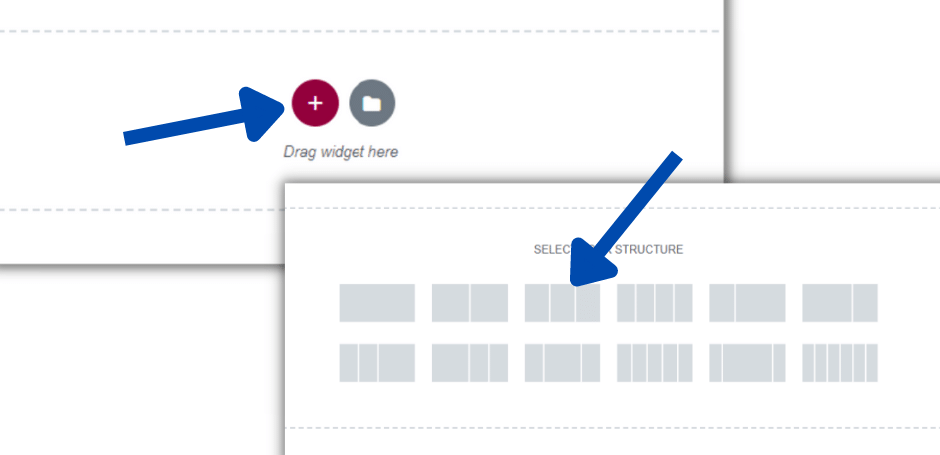
So first off, we need to add a section with 3 columns, according to the structure diagram shown above. See the image for reference:
Now to add the widgets. For the logo widget, search for Image in the Elementor sidebar as shown in the image below. After finding it, just drag and drop it in the 1st column area.
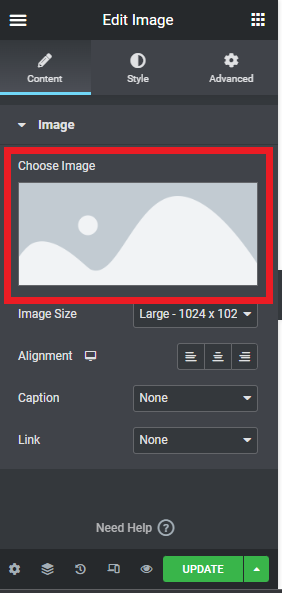
After dropping it, you need to configure it a little. Firstly, choose an image for the logo as shown below. After clicking it, you would even have the option to upload an image right on the spot.
Afterward, go to the Style tab at the top. Then resize the image width, accordingly, using the slider option. Also at the bottom, set the border-radius to 15 for rounded edges.
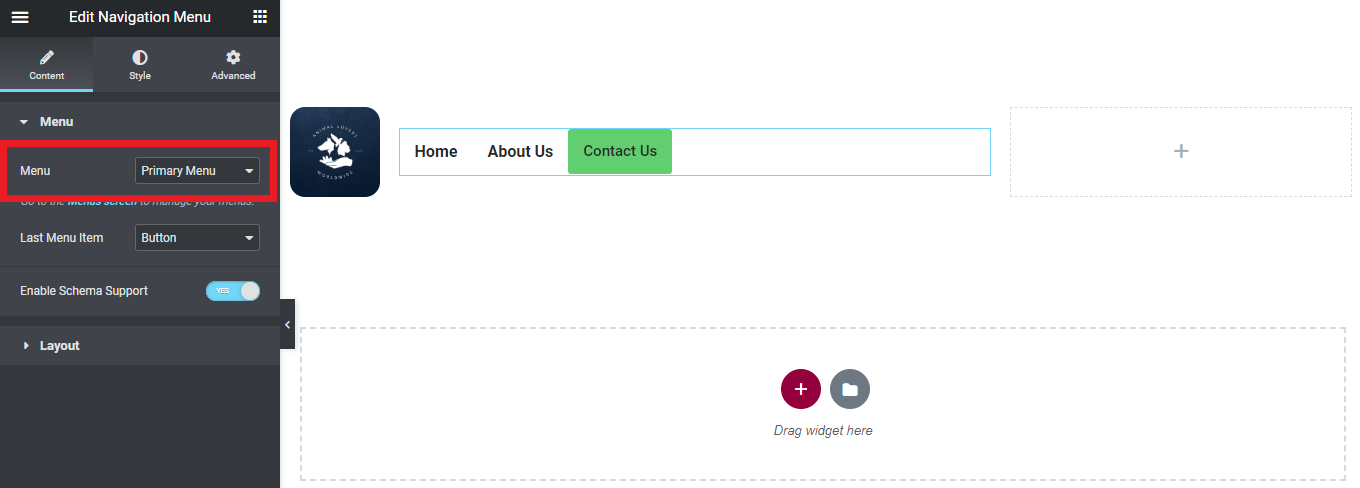
Now for the Navbar Menu. Seach for Nav and drag and drop it to the second column. Then simply select the Menu you want to display through this widget.
Note: Nav widget here will only display the Menu that you would have already created in the Appearance > Menu page on WordPress.
To set the vertical alignment for any widget, right-click and edit the Column for that widget. Then find the drop-down for the Vertical Align and select Middle.
Lastly, in the Elementor sidebar type in Search and drag and drop that widget in the last Column. You can also go to the Styles tab and change the color scheme of your choice. Below is the final version of the Header Navbar in Elementor.
Designing Footer
For the footer, I’ll be moving a bit fast since you are now familiar with the structure of Elementor. So, for the footer, we will be showing 2 widgets.
- Copyright disclaimer
- Social links
For the header, we had chosen 3 columns, so this time, choose the layout with 2 columns since we have only 2 widgets.
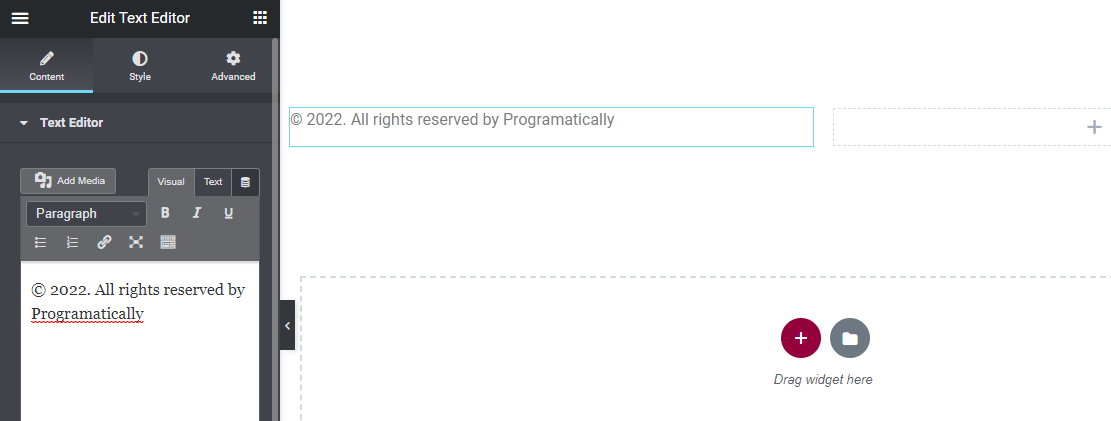
For the copyright disclaimer, we will be using a basic Text Widget. Hence, search for Text and drag it to the 1st Column area.
Afterward, type in the disclaimer for your Copyrights. For instance, “© 2022. All rights reserved by Programatically”. Check the image for reference.
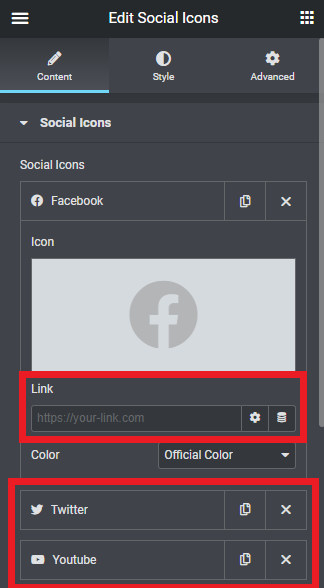
Lastly, for the next widget, search for Social and drag the widget to the 2nd Column. Now, in this widget, there will be options to add any social media platform. And each would allow you to add your profile link for that social media platform. Let’s see how to do that.
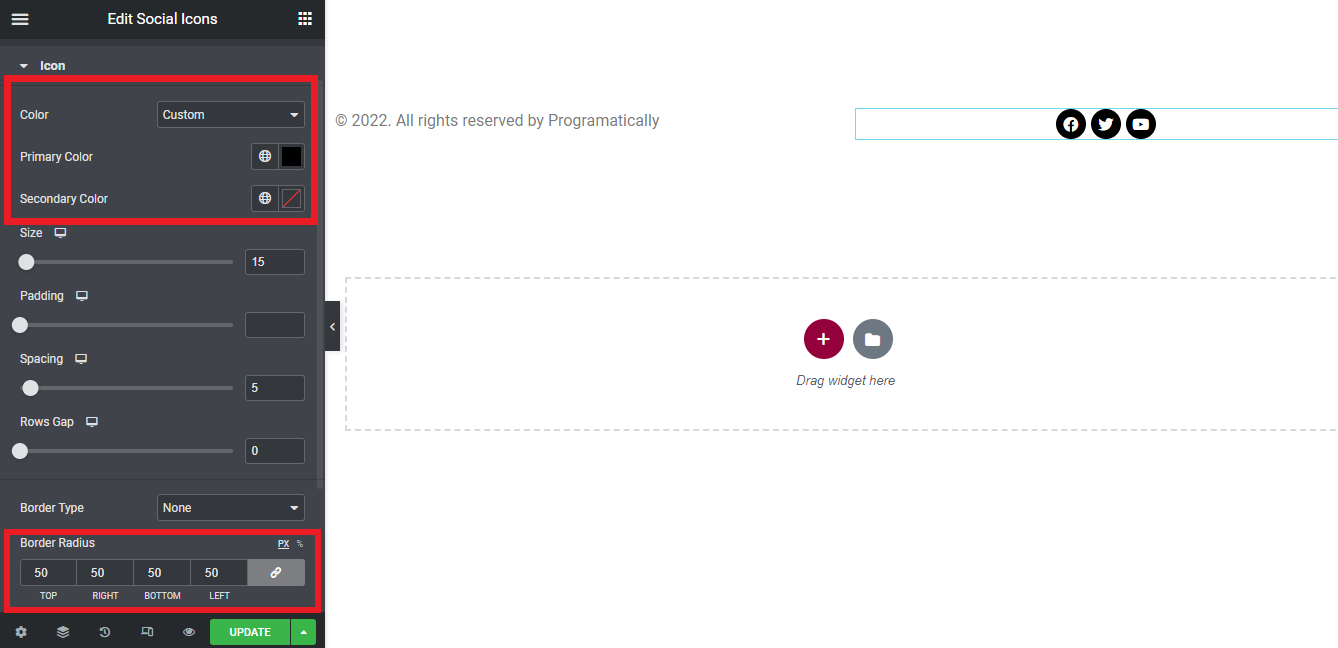
And you can also change the styling for the social links as shown in the below image. Just click on the Style tab at the top and there you will find a bunch of options. You can resize the social icons. You can change the Color field to be custom and color the icons as you would like. You could change the Border Radius to give it some roundness at the edges. Other than that, just play around as much as you like.
Hit the update button and you are all done!
Conclusion
In this article, on how to create header and footer in WordPress using Elementor, we went through the following stages:
- The first step was to install the relevant plugins. The Elementor plugin and the Elementor Header and Footer plugin.
- Next, we created Header and Footer templates in Elementor. Which would replace the theme’s default Header and Footer on the website.
- Then we set the configurations to override our custom Header and Footer template with the theme’s default one.
- Lastly, we saw how the Elementor drag and drop widgets are used for designing both Header and Footer.
FAQ
Yes, Elementor is free, but it has a paid version as well. Although the free version has a lot of features on its own. The paid version of Elementor, has a lot of advanced, up to date features that you see in modern websites. Eg: Dark Mode
Elementor widgets are basically features or functionalities that we can implement in our website by simply dragging and dropping the widget on to our page. The paid version provides a lot more of advance widgets.
Recent Comments
Categories
- Angular
- AWS
- Backend Development
- Big Data
- Cloud
- Database
- Deployment
- DevOps
- Docker
- Frontend Development
- GitHub
- Google Cloud Platform
- Installations
- Java
- JavaScript
- Linux
- MySQL
- Networking
- NodeJS
- Operating System
- Python
- Python Flask
- Report
- Security
- Server
- SpringBoot
- Subdomain
- TypeScript
- Uncategorized
- VSCode
- Webhosting
- WordPress
Search
Recent Post
Understanding Mutex, Semaphores, and the Producer-Consumer Problem
- 13 October, 2024
- 10 min read
Process scheduling algorithm – FIFO SJF RR
- 14 September, 2024
- 8 min read
How to Implement Multithreading in C Language
- 8 September, 2024
- 9 min read
