Hey developers! Today we are going to look at how to create Elementor sticky Header effect on WordPress. I have already made an article on how to add header in WordPress elementor. So be sure to check that out first. In this article, we will only be working with the WordPress plugin. We will add header sticky effect using only Elementor plugins and no code. Let’s begin.
Prerequisite
- WordPress Header Should be Created (How to add header using Elementor)
Table of Content
- Install Sticky Header Elementor Plugin
- Add Elementor Sticky Header Effect
STEP 1: Install Sticky Header Elementor Plugin
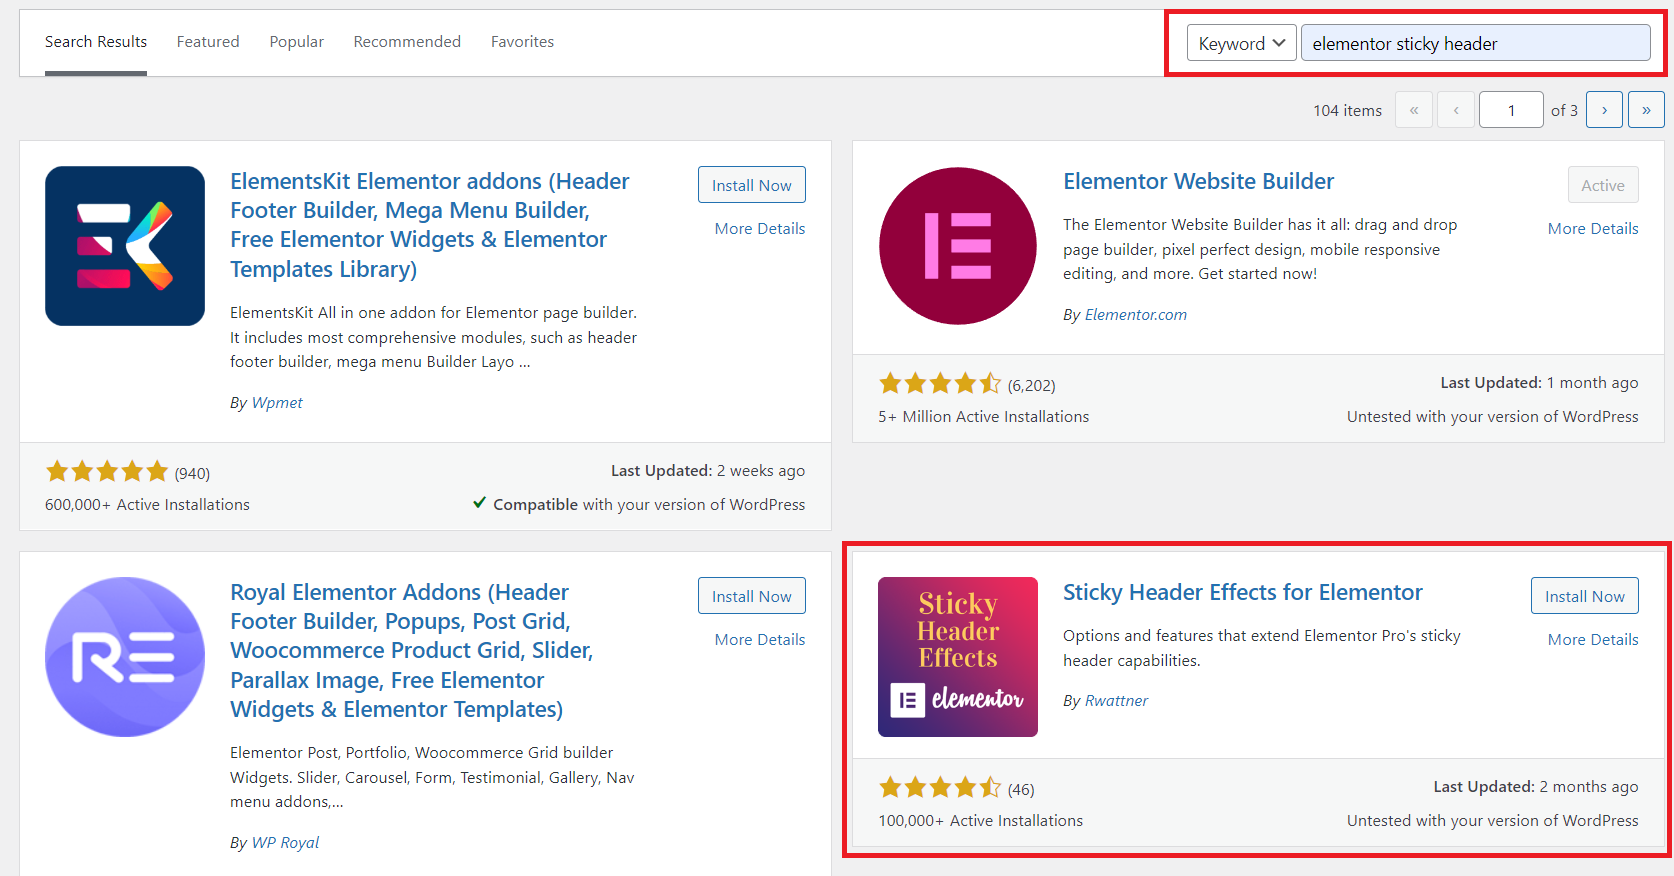
Firstly, you need to login to your WordPress backend panel and from the dashboard go to Plugins > Add New. As shown in the image below, search for “Elementor Sticky Header” click on install, and activate the highlighted plugin.
STEP 2: Add Elementor Sticky Header Effect
Earlier we saw how to install sticky elementor header plugin. Now, we will see how to add the sticky effect on to Header Navbar on WordPress using elementor plugin. No coding is required for this step.
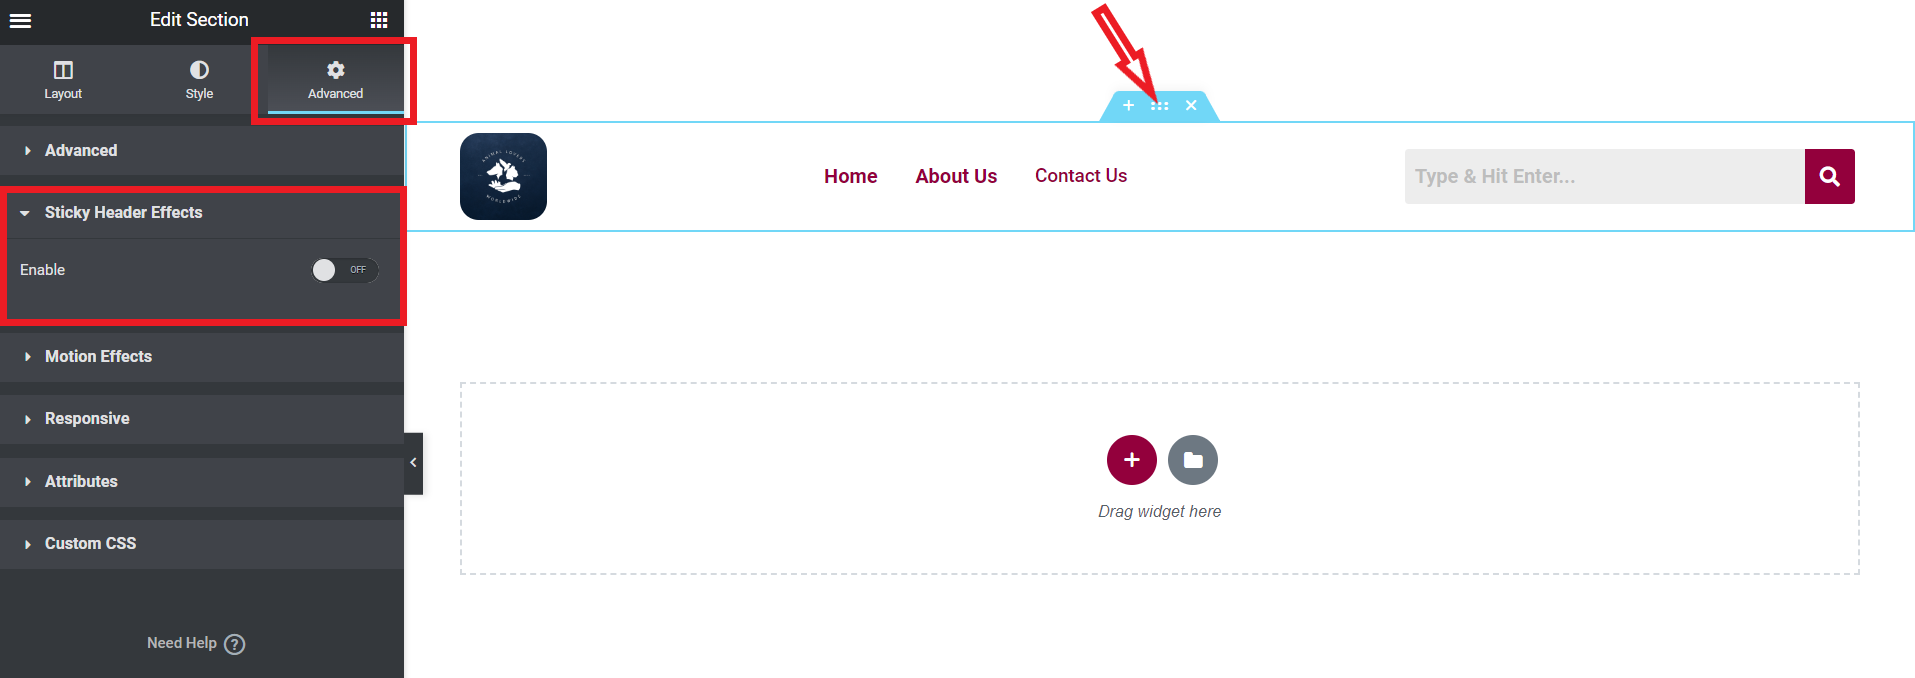
First, you need to open up the Header Navbar template in the “Edit with Elementor” mode. This was a prerequisite for this article. Afterward, select the parent section to edit and go to its advanced properties tab as shown in the image below. Then go to the “Sticky Header Effects” section and enable the feature.
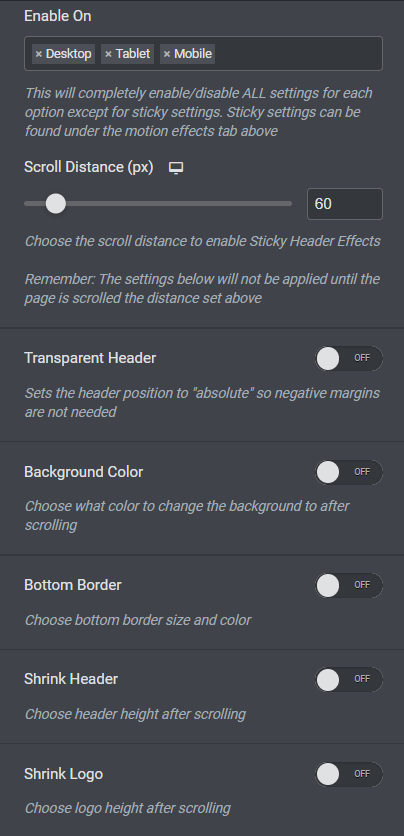
Afterward, you will be shown all the features and configuration options for applying the sticky effect. These are mostly self-explanatory so I won’t go through every single one of them, but rather the important ones.
The first option “Enable On” shows you a list of device modes in which you would want to enable this feature. For instance, if you remove ‘Mobile’, the sticky header would not be activated in mobile view mode.
The “Scroll Distance” is how much you want to Scroll down your page, after which you would want the Sticky header to become active.
“Transparent Header” makes the background color for the header section completely transparent. On the other hand, “Background Color” sets the color of the background of the header section after the sticky header has become active.
“Shrink Header” and “Shrink Logo” are two options where you want to resize the height of the sticky header after the effect has become active.
And that’s a wrap! After all the configurations are done, click the update button, and you are done.
I hope you all found this article helpful. Now you know how to create Elementor sticky header effect. For more on such content, please leave a review in the comment section below.
Have a great one!
Recent Comments
Categories
- Angular
- AWS
- Backend Development
- Big Data
- Cloud
- Database
- Deployment
- DevOps
- Docker
- Frontend Development
- GitHub
- Google Cloud Platform
- Installations
- Java
- JavaScript
- Linux
- MySQL
- Networking
- NodeJS
- Operating System
- Python
- Python Flask
- Report
- Security
- Server
- SpringBoot
- Subdomain
- TypeScript
- Uncategorized
- VSCode
- Webhosting
- WordPress
Search
Recent Post
Understanding Mutex, Semaphores, and the Producer-Consumer Problem
- 13 October, 2024
- 10 min read
Process scheduling algorithm – FIFO SJF RR
- 14 September, 2024
- 8 min read
How to Implement Multithreading in C Language
- 8 September, 2024
- 9 min read
