In this article, we will look at how to edit files inside docker container that is currently active and running. We will be looking at how to run an Nginx Docker container, which will pull from Docker Hub. Afterward, we will see how to mount a volume inside the container for us to be able to edit files inside the docker container. So, let’s begin.
Prerequisites
- Should know about Docker and Containers
- Should know about Nginx and its use (Check out here)
- Should be familiar with basic Linux commands
Table of Content
- Download and Run Nginx Docker Image
- Create a Directory for Volume Mount
- Mount Volume in Docker Container
- Edit Files Inside Docker Container
- Summary
What is Nginx?
Nginx is open source and is famously used as a Web Server and Reverse Proxy for filtering out incoming web requests, such as spam or malware. It has many more uses too, such as caching, load balancing, media streaming, and more.
STEP 1: Download and Run Nginx Docker Image
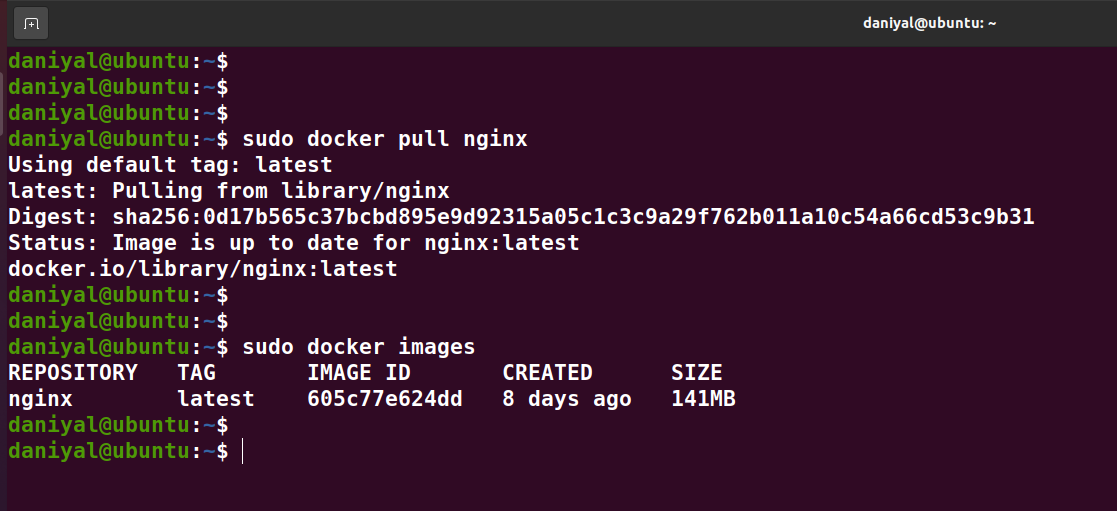
In this first step, we will simply run a command to download Nginx Docker Image. Execute the below command to download the official Nginx Docker image from Docker Hub.
sudo docker pull nginx
- “pull” command is always used when we are downloading a Docker Image from Docker Hub
- “nginx” is the name of the official nginx docker image from Docker Hub, from where it will download
It will take a few seconds to download the docker image. Afterward, you can execute the below command to see all the list of docker images on your computer and find “Nginx” in there.
sudo docker images
STEP 2: Create a Directory for Volume Mount
Next, we are going to create a directory and a file on our local machine. We will be mounting these directories inside the docker container when we will run it. Till now, we have only created the docker image, we have not started the docker container yet.
Create a directory named “html” and inside this directory, create a file named “index.html”. Here are the commands for it.
					mkdir html
touch html/index.html
STEP 3: Mount Volume in Docker Container
Earlier, we create a directory on our local machine named “html”. Now we will mount this as a volume in our docker container. For that, we need to spin up our container first. (Spin up means to run the Docker container).
But first! Let’s see how to run the Nginx container without mounting volume, just to see how it works.
Running Nginx Container Without Volume Mounting
So, to run the Nginx docker container, execute the following command in the terminal:
					sudo docker run -d -p 8002:80 --name nginx-container-not-mounted nginx
sudo docker container ps
Check the image below for reference.
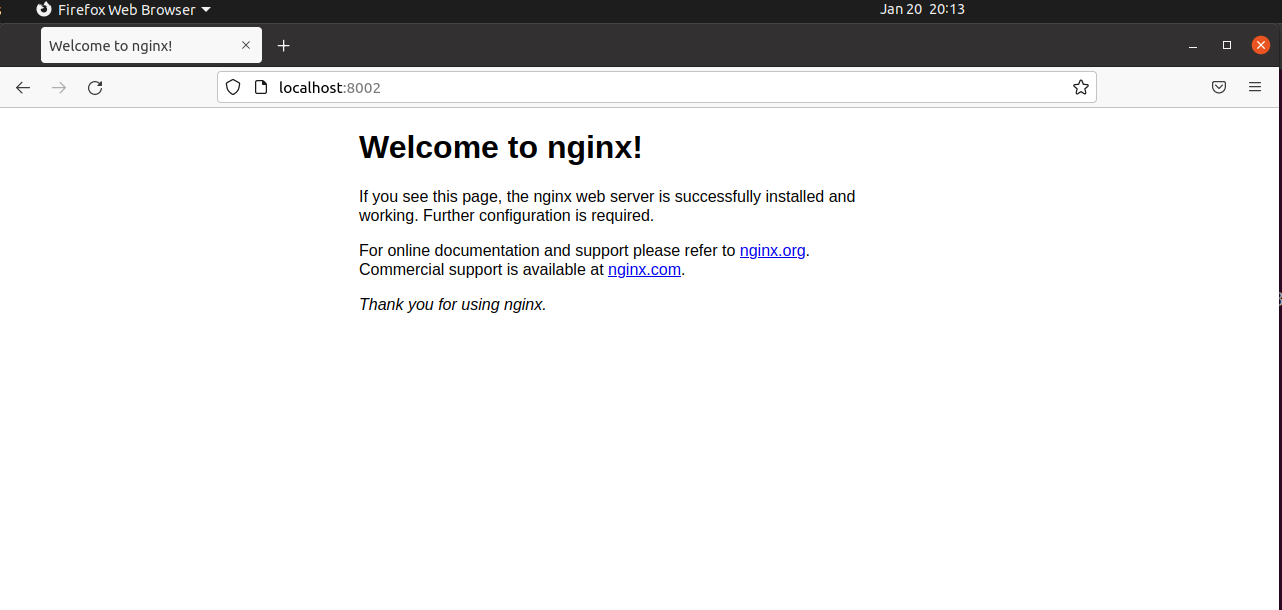
And this is what you will see when you go to this URL in your browser: http://localhost:8002/
Now, the above command may seem complex. So, let’s break it down
- “run” simply means to run the docker container using the image we have on our machine
- “-d” means to run the container in a detached mode in the background
- “-p 8002:80” by default, the Nginx server in the container would run on port 80. Since we want to access Nginx on our local machine, we mapped it to port 8002 which is available on our local machine.
- “–name nginx-container-not-mounted” this is simply giving a name to the container when it will spin up
- “nginx” this is the image we created/downloaded earlier in step 1
- “sudo docker container ps” this just lists down all the running docker containers in your machine
So, hopefully, now you must have a good idea of how things work around the Nginx Docker container. Let’s get back and see how to mount volume and how to edit files in docker container that’s active and running.
Running Nginx Container with Volume Mounting
Docker allows us to start a container and mount a volume in it all at once, using a single command. Most of it is the same as when we saw how to run the Nginx container without mounting. The only thing that’s changed here is the -v flag. Let’s see the command
					sudo docker run -d -p 8003:80 --name nginx-container-mounted -v /html/:/usr/share/nginx/html/ nginx
sudo docker container ps
Check the image below for reference.
The only thing new in the above command is -v flag. However, I’ve also used the absolute path this time as shown in the image above. For some reason, it was not letting me mount the volume without it. So just in case, use the complete location of the mounting folder from the root directory.
- “-v /html/:/usr/share/nginx/html/” the -v is for volume mounting. The left side of “:” is the directory on our local machine, and the right side is the location inside the container, where our local directory “/html” is being mounted.
Explanation:
In order to go ahead, we need to discuss what “/usr/share/nginx/html/” is and why did we mount the volume in this location.
It is the location that is created by default when we install Nginx. And inside it, we keep those files that we want to host on the Nginx Webserver. For instance, a static website. Check the Documentation Here.
Since we have mounted a local directory inside the container, whatever we keep/change in it, will reflect inside the “/usr/share/nginx/html/” location. And hence, will be exposed on the Nginx web server.
There is one thing to keep in mind. Nginx web server directly exposes only 2 files extension to the browser. Either an “index.html” or “index.php”. Therefore, we need only to have any of the aforementioned files in the mounted /html directory. That’s exactly why in step 2 earlier, we already created an “index.html” file in our local machine.
Since we have exposed the Nginx container port to our local port 8003, we can access it on our browser when with this URL: http://localhost:8003
STEP 4: Edit Files Inside Docker Container
Finally, we will now see how to edit files inside docker container while it’s active and running. Simply go to the local directory “html” and then open the “index.html” file in it. And add the following code:
<h1>Changing Content Inside a Running Docker Container! </h1>
And then change it to something else like:
<h1>Hello World! </h1>
And that’s it!
Now if you go to the URL http://localhost:8003 in your browser, you will see the index.html webpage loaded. And each time to change the local file, it will reflect on the Nginx web server that’s running inside the docker container.
Summary:
- We pulled the Nginx official docker image from Docker Hub
- We then created a directory in our local machine which we would be mounted inside the container later on
- Firstly, we started the Nginx docker container without mounting and got familiar with it
- Then we finally started another Nginx container while mounting our local directory inside the container.
- Lastly, we edited the file in our local directory which had mounted in the container. Which was then reflected on the Nginx web server running in its container.
Recent Comments
Categories
- Angular
- AWS
- Backend Development
- Big Data
- Cloud
- Database
- Deployment
- DevOps
- Docker
- Frontend Development
- GitHub
- Google Cloud Platform
- Installations
- Java
- JavaScript
- Linux
- MySQL
- Networking
- NodeJS
- Operating System
- Python
- Python Flask
- Report
- Security
- Server
- SpringBoot
- Subdomain
- TypeScript
- Uncategorized
- VSCode
- Webhosting
- WordPress
Search
Recent Post
Understanding Mutex, Semaphores, and the Producer-Consumer Problem
- 13 October, 2024
- 10 min read
Process scheduling algorithm – FIFO SJF RR
- 14 September, 2024
- 8 min read
How to Implement Multithreading in C Language
- 8 September, 2024
- 9 min read


