Hey there, in this article I’m going to show you how to create Jasper Report with a tool called JasperSoft Studio. If you’re unfamiliar with what JasperSoft is, I would recommend you read up on their documentation on their website here.
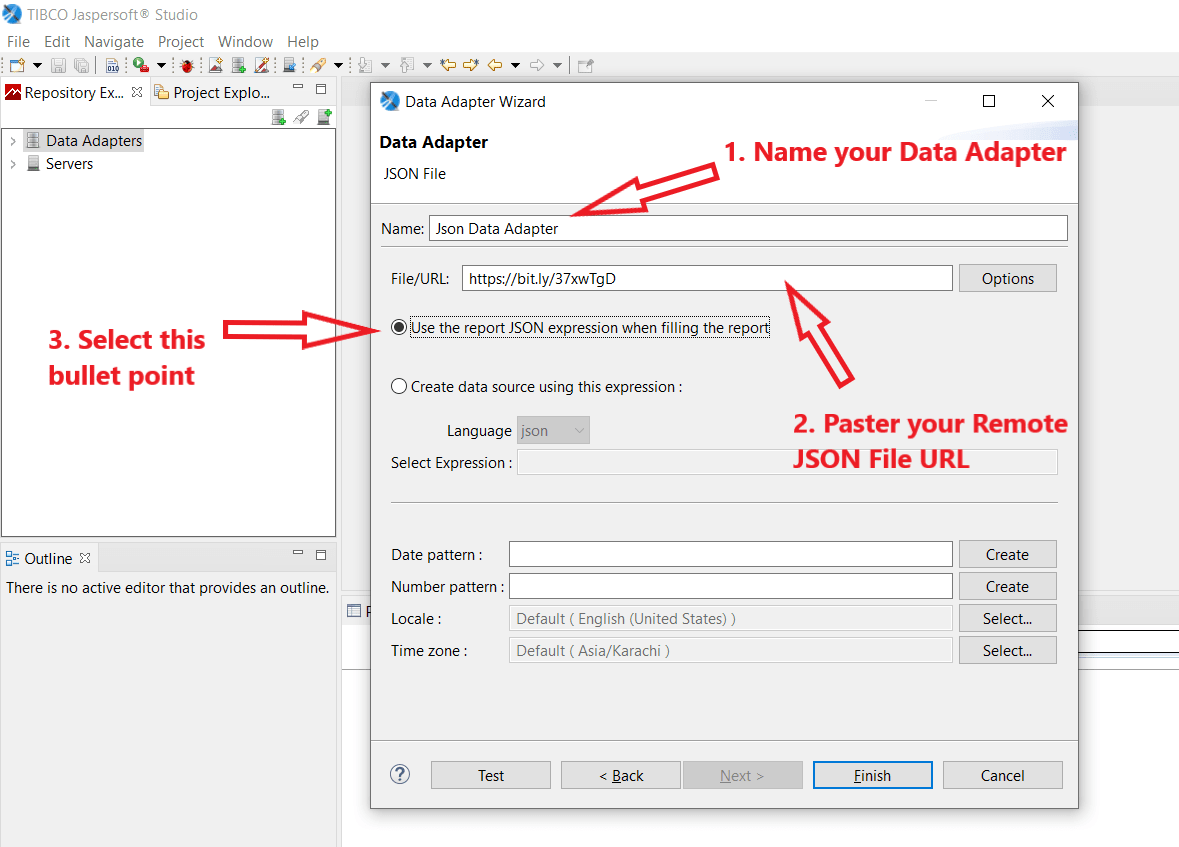
Moving on, in this article I’ll be quickly showing you how to make a Jasper Report with the data source being a Data Adapter. Which will fetch data in the form of Json object from a remote repository or server via a URL.
Prerequisites!
- should have JasperSoft studio installed (Download Link)
- Should have a remote URL which contains a Json file
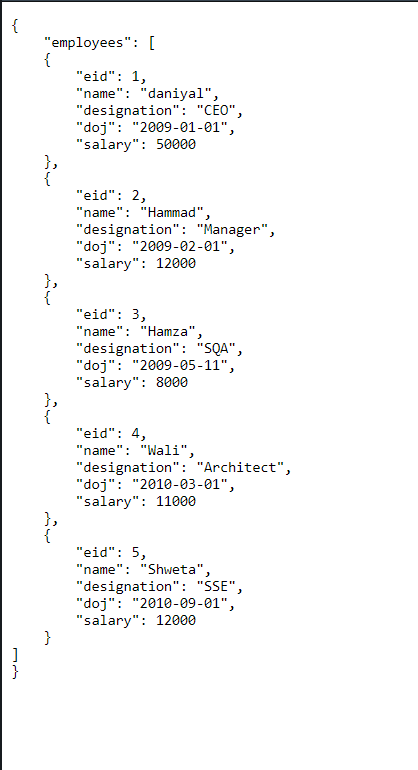
Let’s have a look at how my Json file in the remote server looks like:
STEP 1: Making JasperReport Using Data Adapter
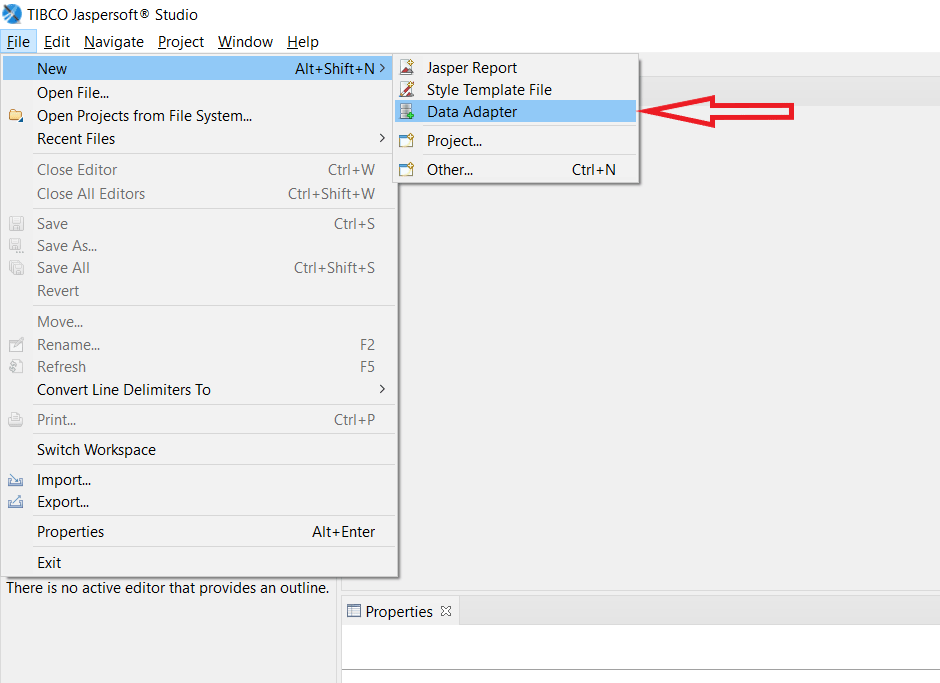
So, let’s get started and see how we can make Jasper report using a data adapter as a source. Which will fetch data as a Jason object from the remote server. First thing first, let’s open up JasperSoft studio and create a new Data Adapter. Go to File > New > Data Adapter
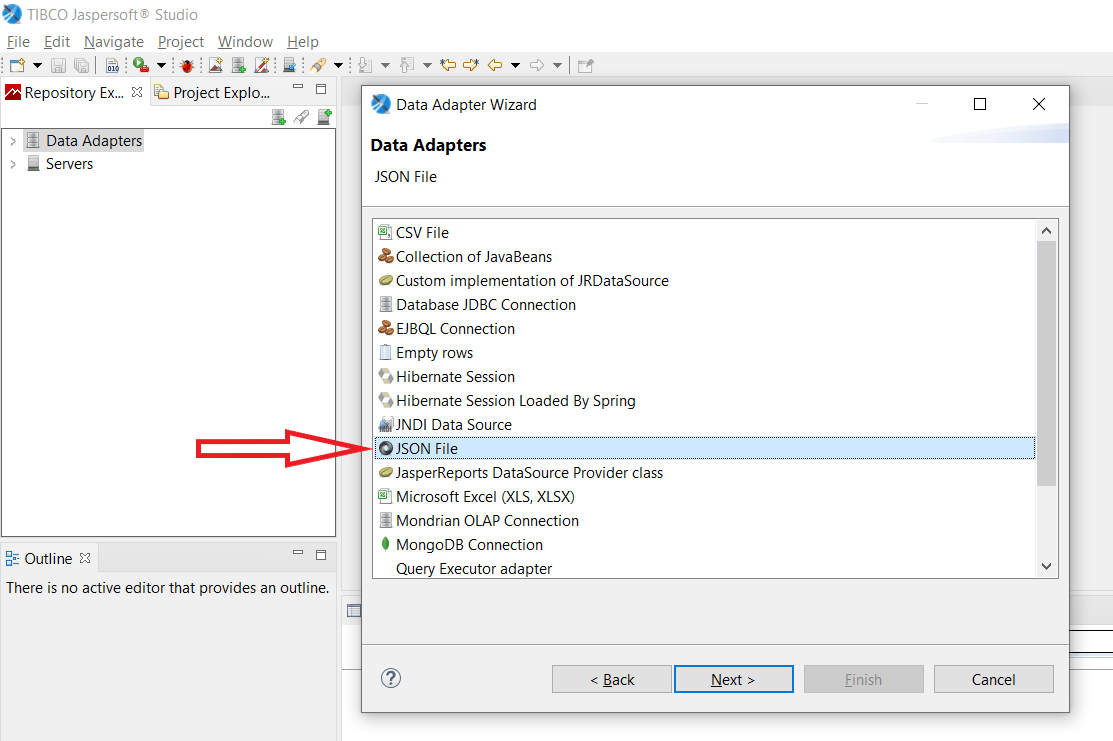
It will open up a window asking you to choose for a project to store the adapter. By default, when you install JasperSoft studio a dummy project is made with the name of “MyProject”. You’re free to choose that or if you want you can make another project and select that to store the data adapter. When you click on next it’ll show you a list of supported data sources for your data adapter. In there you should choose Jason file like shown in the picture below:
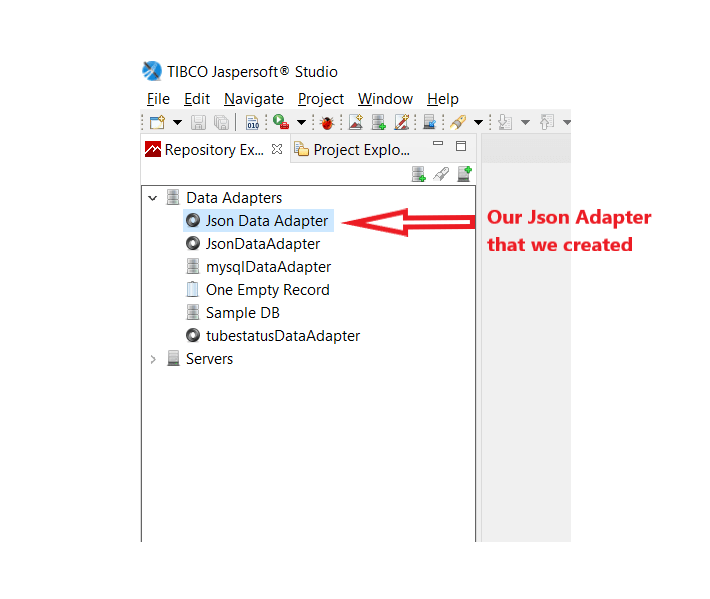
After that hit Finish button and the Adapter would get created and show up like the picture below:
STEP 2: Creating JasperReport Template
Now that our Json adapter has been made, let’s move to creating our Jasper Report. Before we start, few things to would be, the report that we are going to make is a template which is in .jrxml extension format. We connect that template here in Jasper Studio with the Json Data Adapter that we just created, and then manually set and link the fields from the json object that the adapter would fetch us and after all that, we will populate the report with the actual values from the json object that’s fetched.
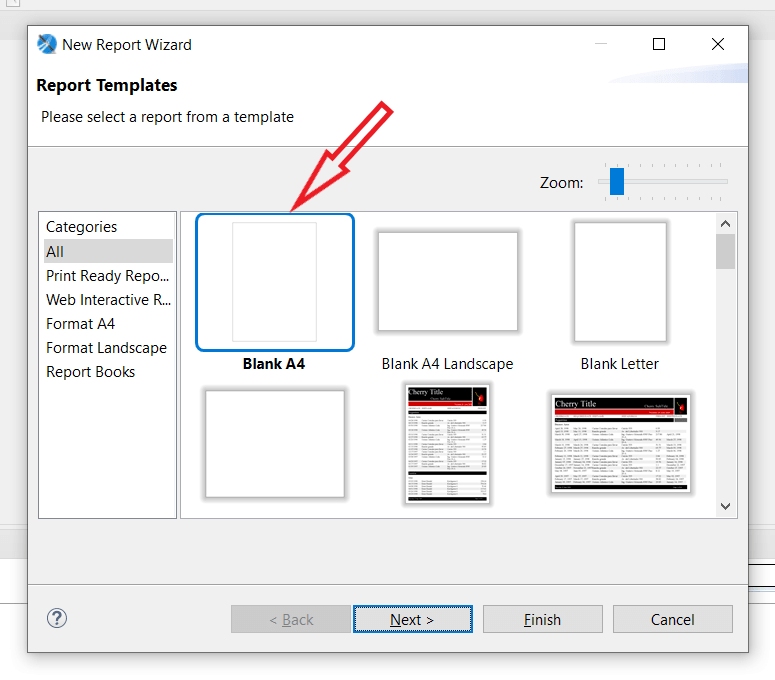
So, let’s see how to create a Jasper Report in Jasper Studio using Json Adapter with Remote URL. First, we need to go back to File > New > Jasper Report. It’s going to open a window where you will have to select a template for the report, just select a blank form and hit next like the picture show.
After hitting next, you would then be prompted to select the project that you want to save this Jasper report in. For our case just choose “MyProject” or if you’ve made another project choose that and then hit next button. After that, you would be given the option of selecting a Data Source for your report, for the time being, just leave it as it is and hit next button as shown in the picture.
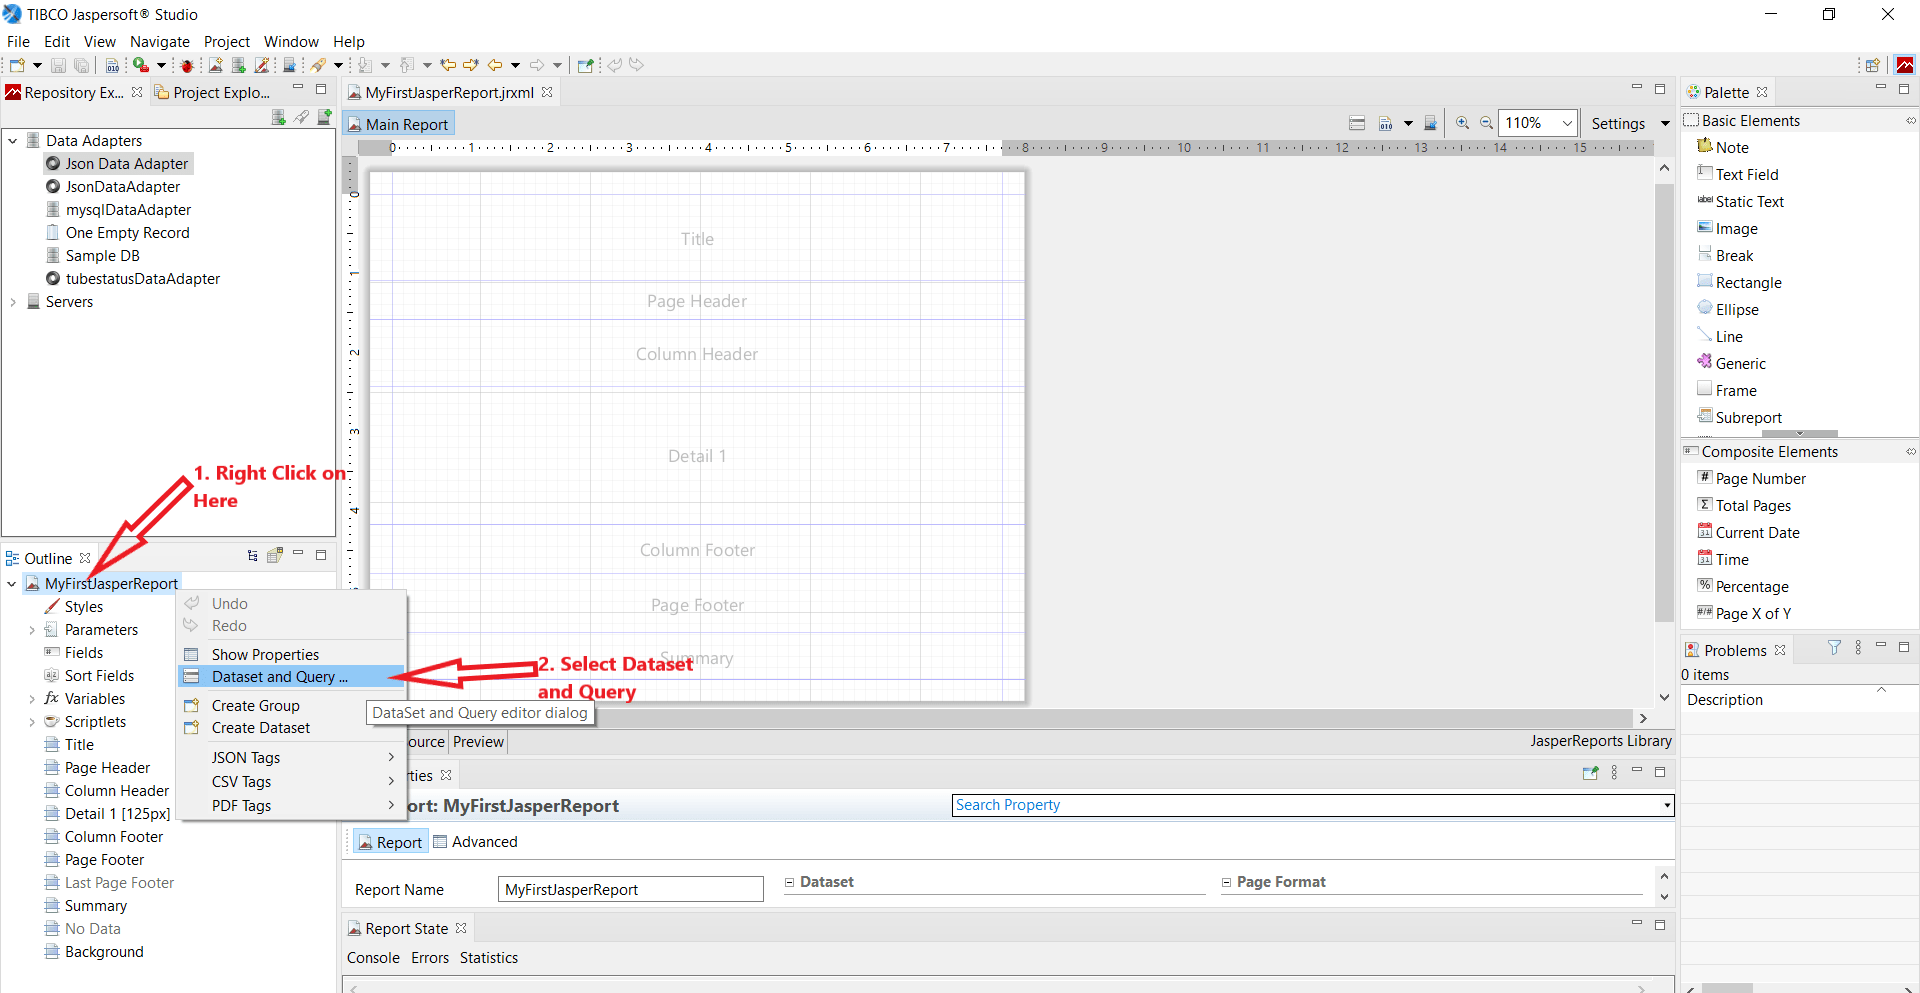
And that will be all for making a blank new report. But we still have to give it the Json Data Adapter as the Data Source so that it can fetch data on to the report template. For attaching the Data Adapter as a Data Source to the template we have to go to “Dataset and Query” option as shown below:
STEP 3: Linking Json Data Adapter to JasperReport
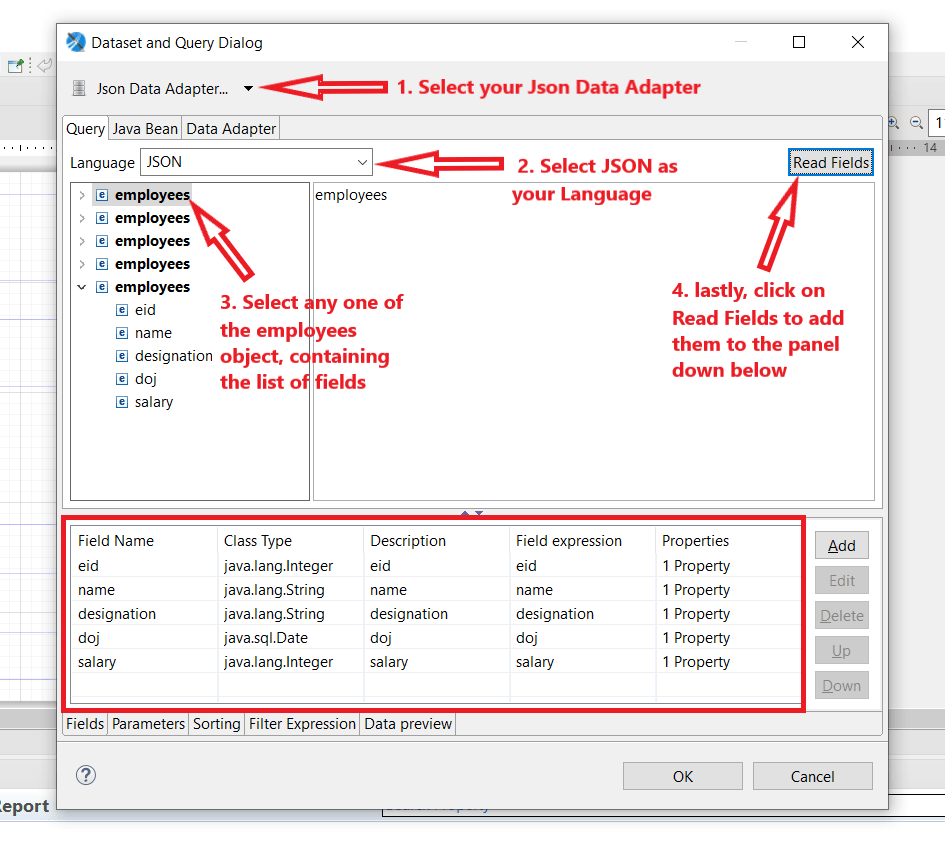
Up next, you need to perform 4 small steps as shown in the picture below. 1) you need to click on the dropdown and select your Json Data Adapter as the Data Source. 2) then you need to select the as JSON because your remote file contains JSON object. 3) you need to select list field in the left panel, where it’s showing all the fetched data from the file kept in the remote server. 4) click on the ‘Read Fields’ so that the data fields are populated in the bottom panel and then hit okay button.
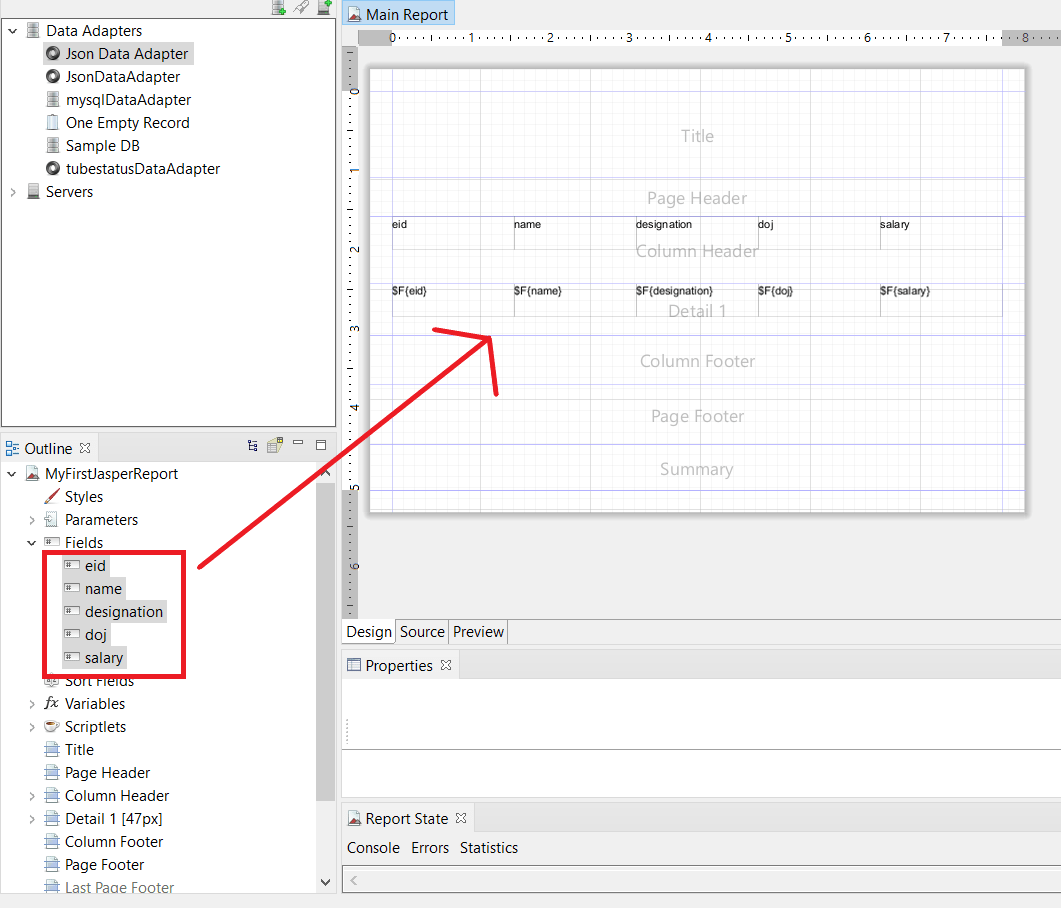
This will add all the columns that you selected before in the “Fields” dropdown shown in the left panel in the picture below. Just select all the columns that you want to add and drag and drop them in the “Detail 1” section of the report as shown in the below picture.
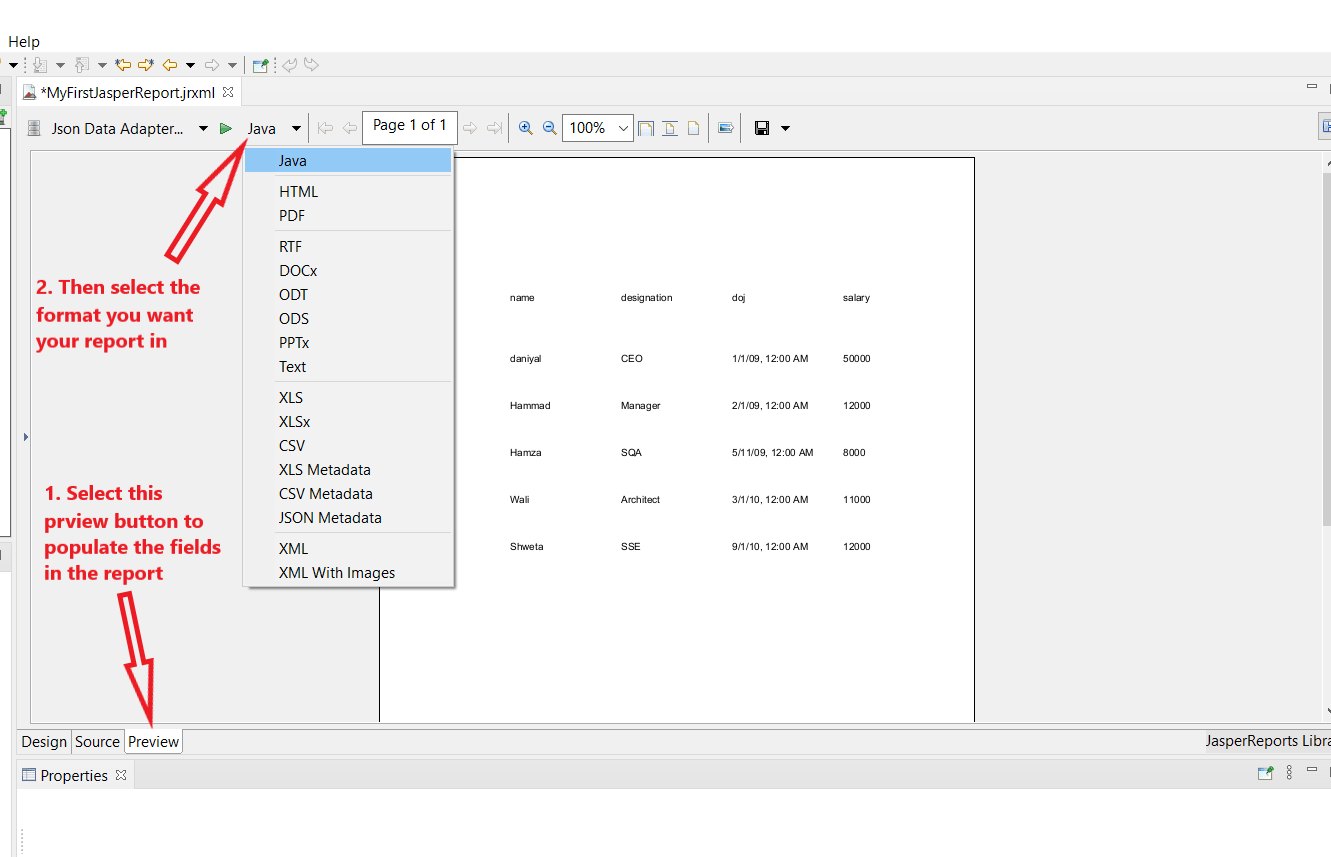
Moving on to the final step is to populate the report. For that, simply click on the “Preview” tab show at the bottom and select the type in which you want to present the report in, by default it would be Java. Refer to the picture shown below.
And we’re done!
That’s all the details and steps for how to create a Jasper Report using JSON file as the data source kept in a remote server. Hopefully, you understand exactly how to perform the task. Please leave your review in the comments. Thank you and have a great one!
Recent Comments
Categories
- Angular
- AWS
- Backend Development
- Big Data
- Cloud
- Database
- Deployment
- DevOps
- Docker
- Frontend Development
- GitHub
- Google Cloud Platform
- Installations
- Java
- JavaScript
- Linux
- MySQL
- Networking
- NodeJS
- Operating System
- Python
- Python Flask
- Report
- Security
- Server
- SpringBoot
- Subdomain
- TypeScript
- Uncategorized
- VSCode
- Webhosting
- WordPress
Search
Recent Post
Understanding Mutex, Semaphores, and the Producer-Consumer Problem
- 13 October, 2024
- 10 min read
Process scheduling algorithm – FIFO SJF RR
- 14 September, 2024
- 8 min read
How to Implement Multithreading in C Language
- 8 September, 2024
- 9 min read
