In this article, I will demonstrate how to create a custom Dockerfile with Nginx on your Linux or Windows machine. So, what is Nginx? … Nginx is open source and is famously used as a Web Server and Reverse Proxy for filtering out incoming web requests, such as spam or malware. It has many more uses too, such as caching, load balancing, media streaming, and more.
For now, I will show you how to create, build and deploy Nginx Docker container from scratch. The steps we will cover are as follows.
Prerequisites
- Docker should be installed (Docker Desktop for windows and simple Docker for Linux/macOS)
- Must have some familiarity with Linux commands
Table of Content
- Create your HTML file
- Creating a simple Dockerfile
- Build a Docker image from that Dockerfile
- Spin up the Nginx container
- Access it from our local machine
STEP 1: Create your HTML File
The first thing you should do is create a directory with the name “MyProject”. Inside this directory, you will create your HTML file named “index.html”. This will be your opening page when you access the Nginx webserver. Add some dummy HTML code in there. You can copy the following code in the index.html file.
					<!DOCTYPE html>
<html>
<body>
<h1>Welcome to Nginx Web Server</h1>
<p>This server is running through Docker container</p>
</body>
</html>
STEP 2: Creating a Nginx Dockerfile
Then create a new file called “Dockerfile” and it must not have any file extension. Create this file inside the “MyProject” folder and insert the following code in it.
					FROM nginx
COPY index.html /usr/share/nginx/html
Explanation:
So, what exactly do these 2 commands do? The first command, ‘COPY nginx’
“The FROM instruction initializes a new build stage and sets the Base Image for subsequent instructions. As such, a valid Dockerfile must start with a FROM instruction. The image can be any valid image – it is especially easy to start by pulling an image from the Public Repositories.”
As mentioned in the official Docker documentation Here.
Basically, it will pull and utilize the Nginx image that’s publicly available on DockerHub. Checkout here. It uses that public image to create a base image of your own, along with additions you add to it.
Next is the COPY command. We need the Nginx container to show our custom HTML content from the index.html file that we created before. For that, we need to add the file to a specific location of our container. So, when we access the Nginx server through our local web browser, index.html would be the first page that shows.
STEP 3: Build a Docker image from that Dockerfile
Now that we are finished creating our Dockerfile, it’s time to build the Docker Image. Run the following command in the terminal:
docker build -t IMAGE-NAME .
In this command, replace the IMAGE-NAME with any name that you want to give your image. The period at the end denotes that you opened your terminal in the same directory where the Dockerfile is. Make sure it is, otherwise, this will fail. Or just replace the period with the path of the Dockerfile in “MyProject”.
To view the image you just created, enter this command:
docker images
This will give you a list of all the images, and in it you will find your named image as well.
STEP 4: Spin up the Docker Container
Next, we are going to finally spin up the container from the custom Docker Image that we built in the last step. So then, open up your terminal and execute the following command. I am assuming that you’re standing inside the “MyProject” folder in your terminal.
docker run --name my-nginx-container -d -p 8081:80 IMAGE_NAME
Explanation:
So, what is going on with the above command? Let’s break it down.
- “docker run” will simply create and run a container from the Image name mentioned at the end of the command.
- “–name” is the name you will assign to your container. So over here, I’ve named container ‘my-nginx-container’. You can change that if you want.
- “-d” is short for detach. Which means that the container will keep on running in the background.
- “-p 8081:80” this is very important here. This right here is defining the host port and container port. In order to access the webserver on your local machine, you need to set the host port. Which is the left one in this command. The port on the right side is of your container.
You need to understand something. The Nginx service is running in your container and not your host machine (your computer). Docker creates an isolated environment, though it does share the host machine’s kernel. In order to access the service that’s inside the docker container, you define host ports. Which, in this case, is set to 8081. The other port, 80 is the container port. So when you access the Nginx service within the container, port 80 will be used.
Afterward, you can check that your container is up and running by executing the following command.
docker container ps
This will list all the running Docker containers. And is where you will find your container name ‘my-nginx-container’.
STEP 5: Access Nginx from Our Local Machine
Finally, the moment of truth. Open up your browser and enter the following URL: http://localhost:8081
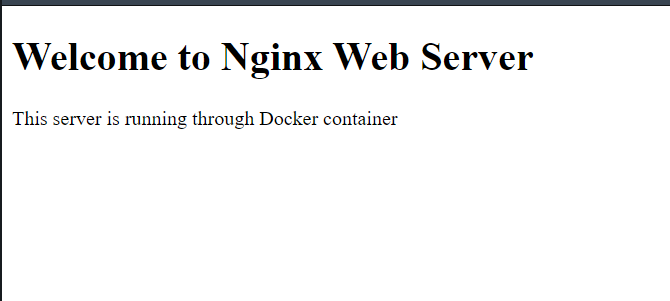
If everything went right, then this should show up on your browser.
And that’s all folks!
I hope you found this article helpful. If you need any help, please let me know in the comment section. Have a great one!
Recent Comments
Categories
- Angular
- AWS
- Backend Development
- Big Data
- Cloud
- Database
- Deployment
- DevOps
- Docker
- Frontend Development
- GitHub
- Google Cloud Platform
- Installations
- Java
- JavaScript
- Linux
- MySQL
- Networking
- NodeJS
- Operating System
- Python
- Python Flask
- Report
- Security
- Server
- SpringBoot
- Subdomain
- TypeScript
- Uncategorized
- VSCode
- Webhosting
- WordPress
Search
Recent Post
Understanding Mutex, Semaphores, and the Producer-Consumer Problem
- 13 October, 2024
- 10 min read
Process scheduling algorithm – FIFO SJF RR
- 14 September, 2024
- 8 min read
How to Implement Multithreading in C Language
- 8 September, 2024
- 9 min read


